
Publish your Android app to Google Play (step by step)
Publish and Grow · התיעוד של AppPresser
Publish your Android app to Google Play (step by step)
מאמר זה טרם תורגם, ולכן הוא מוצג באנגלית.
Your app journey: step 7 of 9, Publish to the stores. New here? Read Start here: build your app with AppPresser first.
What you'll do: Build your Android app, put it on Google Play for testers and set up automatic uploads for later versions.
Before you start
Have these ready:
- A Google Play developer account. Sign up at play.google.com/console. Google charges a one-time 25 USD registration fee, which you pay to Google. New accounts also need identity verification, which can take a few days.
- Your AppPresser app, with Android set up. On the Builds page, the Android card should be able to validate. AppPresser makes your keystore for you the first time you validate (Step 1 shows where it is).
- Your package name. In AppPresser, open Metadata and check the Bundle ID (or Android Bundle ID). The app name and package name you use in Play Console must match it exactly.
- A Google account that can use Google Cloud. Use the same Google account that owns your Play developer account, or one that's an admin on it.
- A password manager, to save the keystore credentials and the JSON key.
What this is for
This article is the "Do it yourself" path for Android. It takes your AppPresser app from a working build to an app your testers install from Google Play. Then it sets things up so every new Play Store build uploads to Google Play by itself.
It takes about 45 minutes the first time. Most of that is clicking through Google's screens.
When you're done, you'll have:
- A backup of your app's keystore (the signing file) and its credentials, saved somewhere safe.
- Your app created in Google Play Console.
- Your first build uploaded to Internal testing (a private test track for up to 100 testers).
- A Google service account with a JSON key, allowed to upload test builds for this one app.
- AppPresser set up to send each new Play Store build to Internal testing automatically.
Words you'll see
Swipe sideways to see the rest of this table.
| Word | What it means |
|---|---|
| Package name | Your app's unique ID on Google Play, in reverse-domain style, for example com.example.myapp. In AppPresser it's the Bundle ID (or Android Bundle ID) under Metadata. It can never change once your first build is uploaded. |
| .aab file | An Android App Bundle. It's the file Google Play wants for a release. AppPresser's Play Store build makes it for you. |
| Keystore | The file that signs your app. Google uses it to check that each update really comes from you. AppPresser makes one for you. |
| Version code | A number Google uses to tell builds apart. Every upload needs a higher one than the last. AppPresser handles this with the Build Number. |
| Internal testing | A private Google Play track. Only the testers you list can install it, and Google doesn't review it first. |
| Service account | A "robot" Google account that AppPresser uses to upload builds for you. It has an email address but no password. |
| JSON key | The file that lets AppPresser sign in as the service account. Treat it like a password. |
Step 1: Back up your keystore
Your keystore is what signs every version of your app. Keep a copy, because you'll need it if you ever move your app or need help from Google.
- In AppPresser, in the left menu, under Publishing, click Builds.
- Under the Android card, click Signing & keystore. You can also scroll down to Repair Utilities and click Android signing & keystore.
- Check that the Android App Signing Setup window says Keystore configured.
- Click Download Keystore and save the file.
Click Download Credentials (.txt) and save that file too. It holds the keystore's alias and passwords.
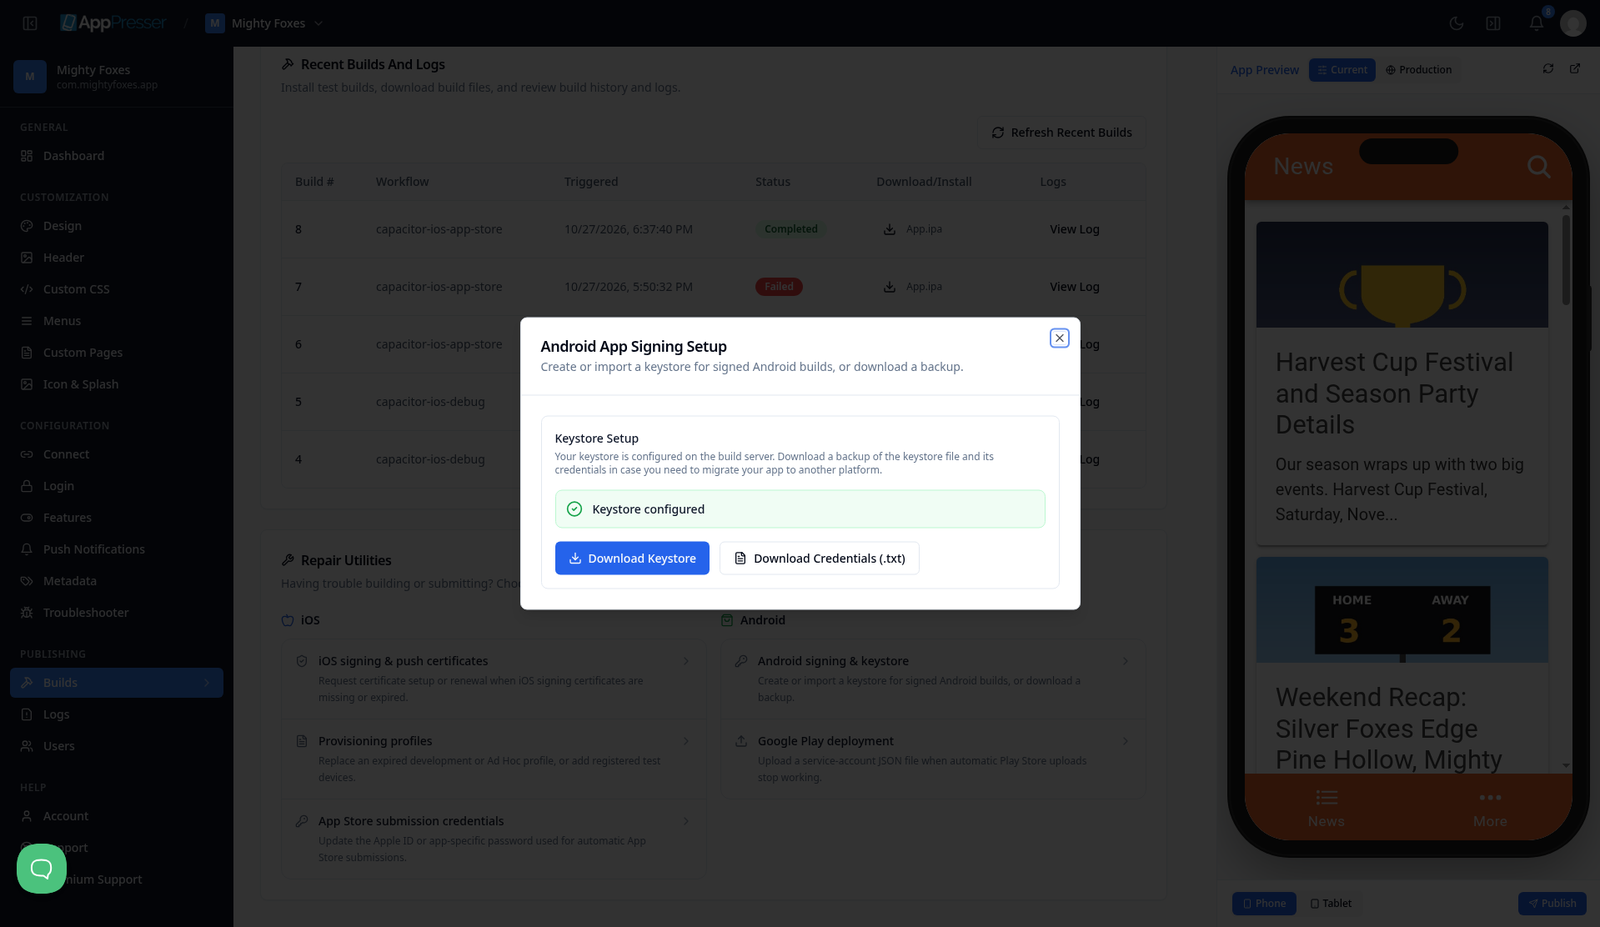
- Put both files in your password manager (or another safe, private place). Never email them or post them anywhere.
Why this matters: If you lose the keystore, you can't sign updates with it. Google Play App Signing (on by default for new apps) keeps Google's own copy of your app's signing key. This means you can ask Google support to reset your upload key, but that takes time. A saved backup avoids all of that.
Step 2: Create your app in Google Play Console
Sign in to Google Play Console (play.google.com/console) and click Create app.
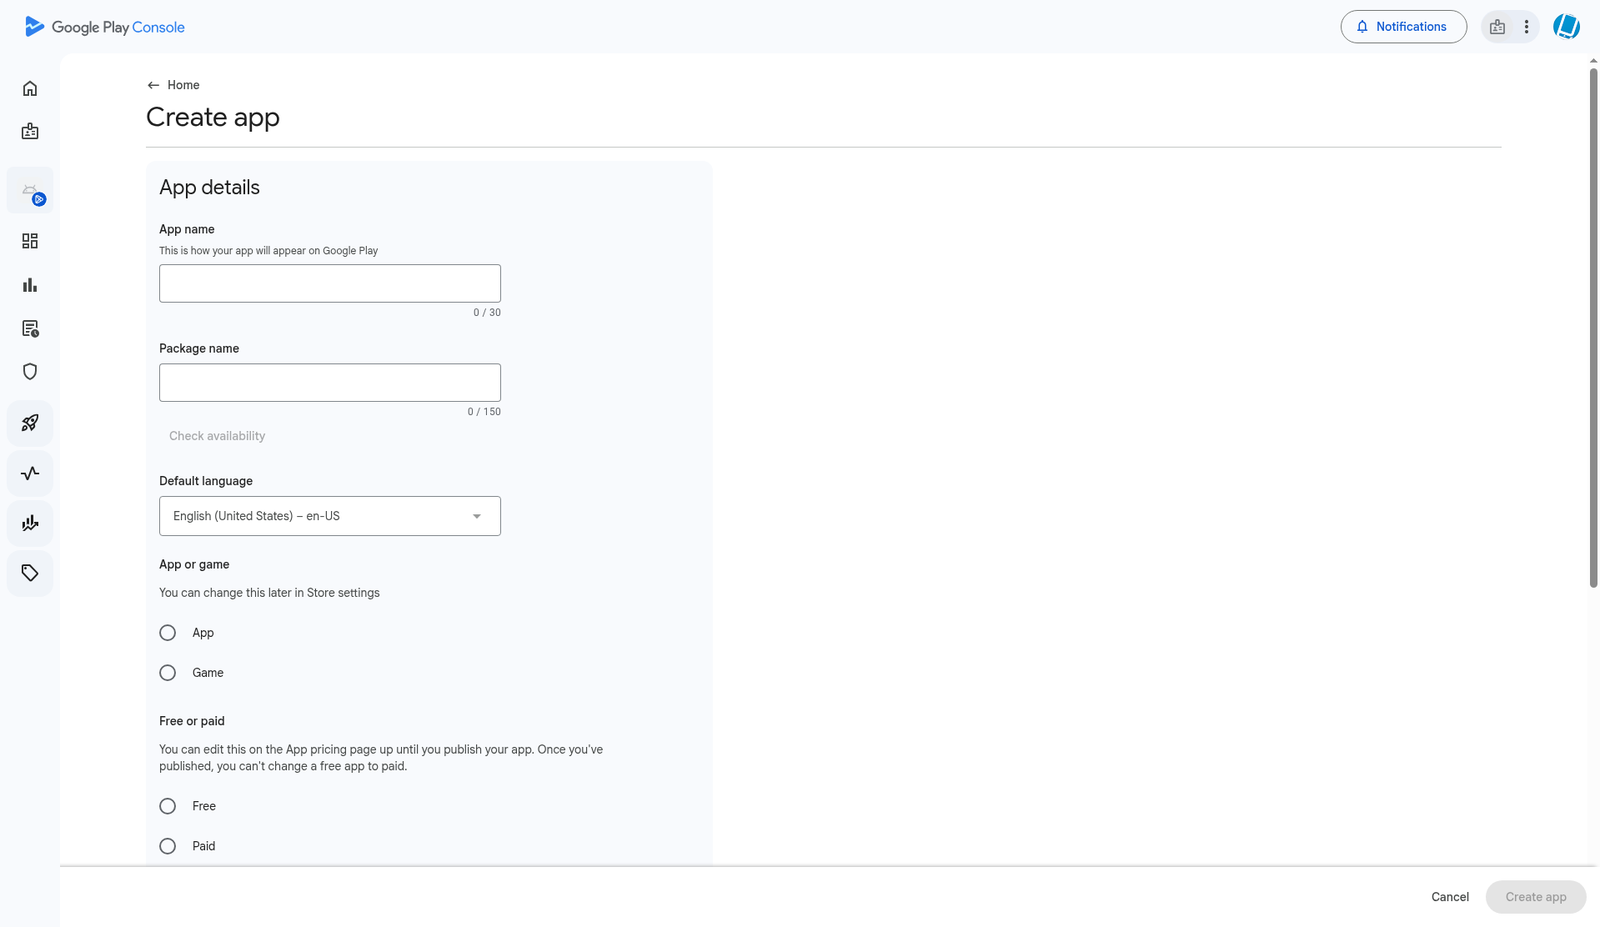
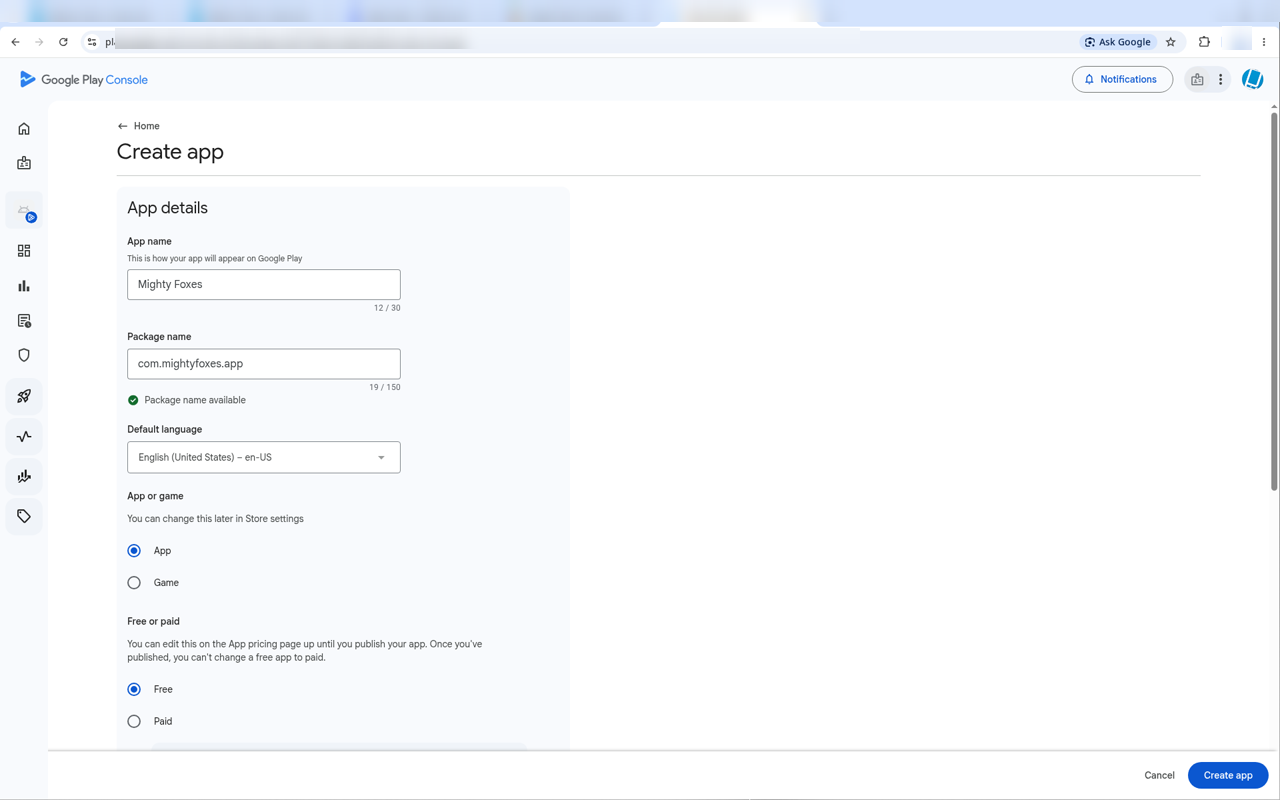
- Fill in the form:
- App name: your app's name, as it will show on Google Play (for example My Example App). You can change this later.
- Package name: your package name from AppPresser, for example com.example.myapp. Google checks it and shows Package name available.
- Default language: for example English (United States), en-US.
- App or game: App.
Free or paid: Free (or Paid, if you plan to charge). Once a free app is published, you can't change it to paid.
Scroll down to Declarations and check both boxes: Developer Program Policies and US export laws.
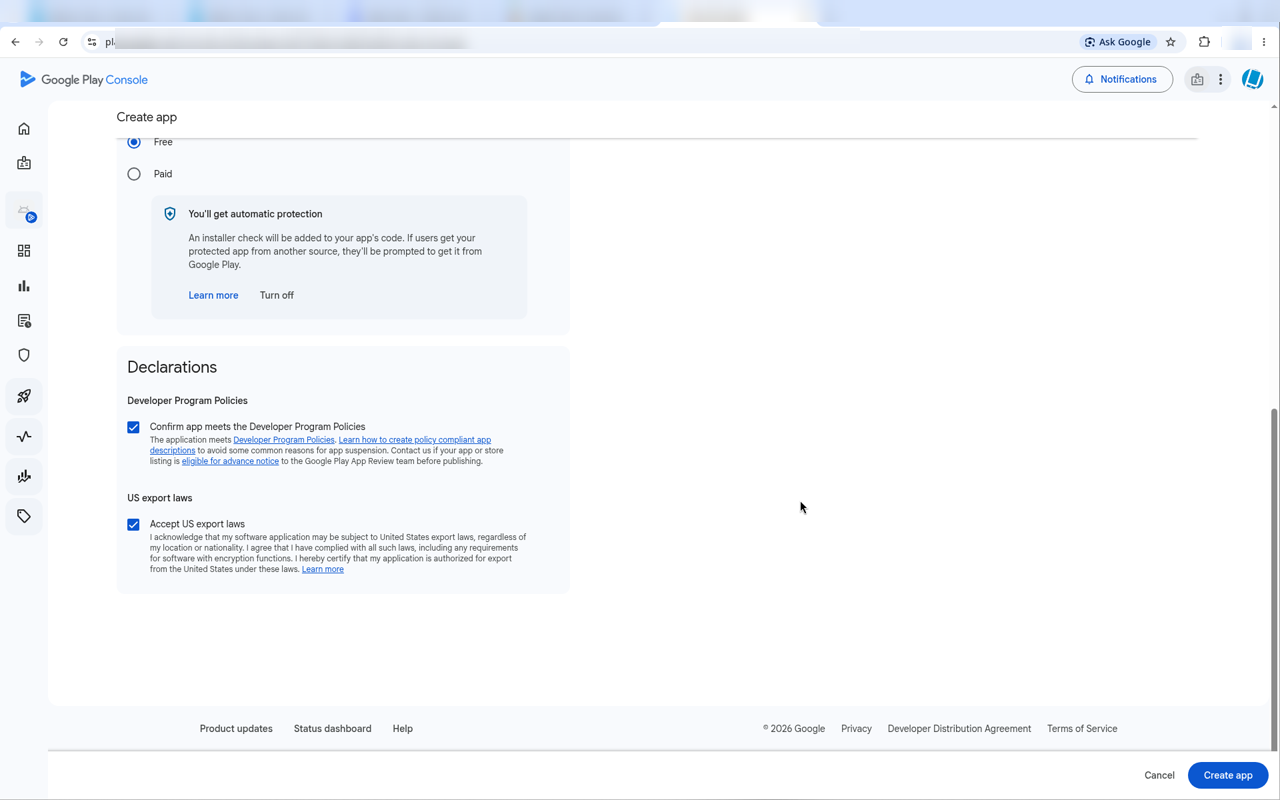
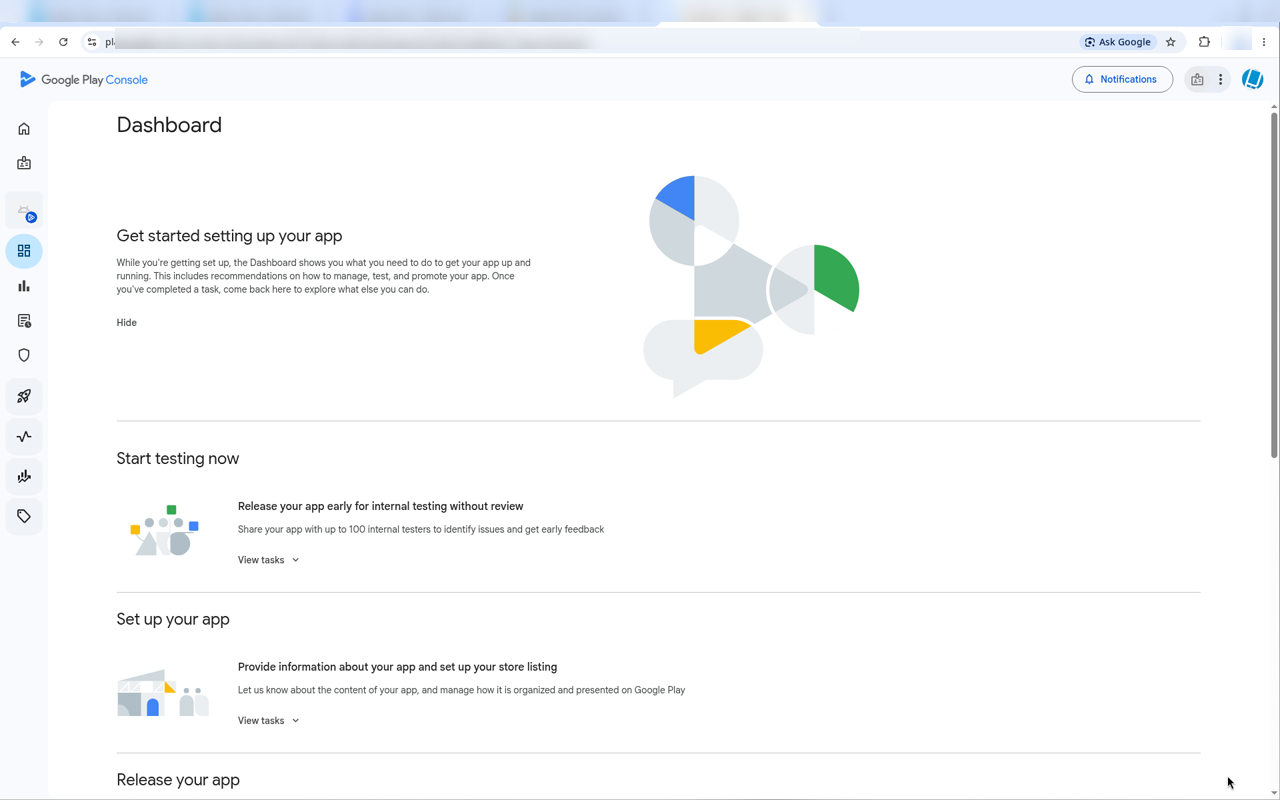
Click Create app. You land on your app's Dashboard.
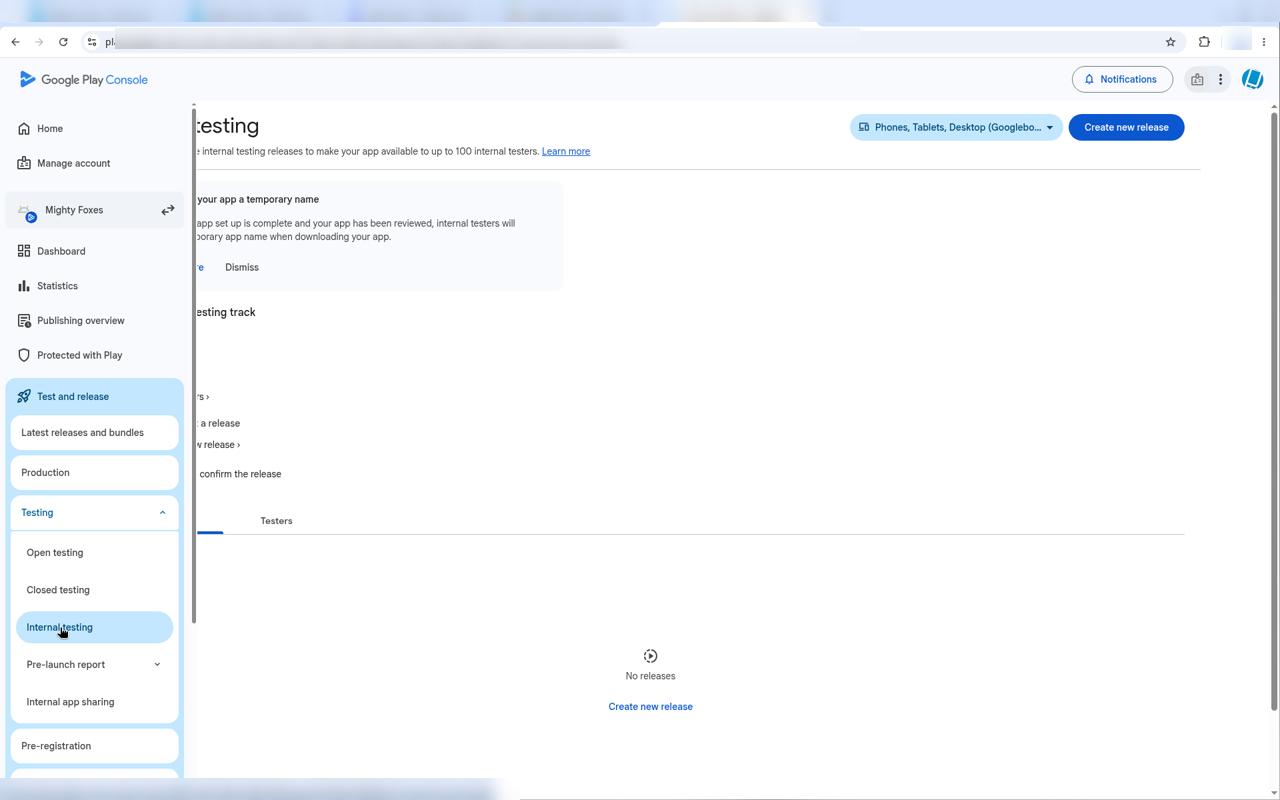
In the left menu, open Test and release > Testing > Internal testing. It says No releases. Leave this tab open. You'll come back to it in Step 5.
Step 3: Run your first Play Store build
Google needs your very first build uploaded by hand. AppPresser's Play Store build makes the file you need.
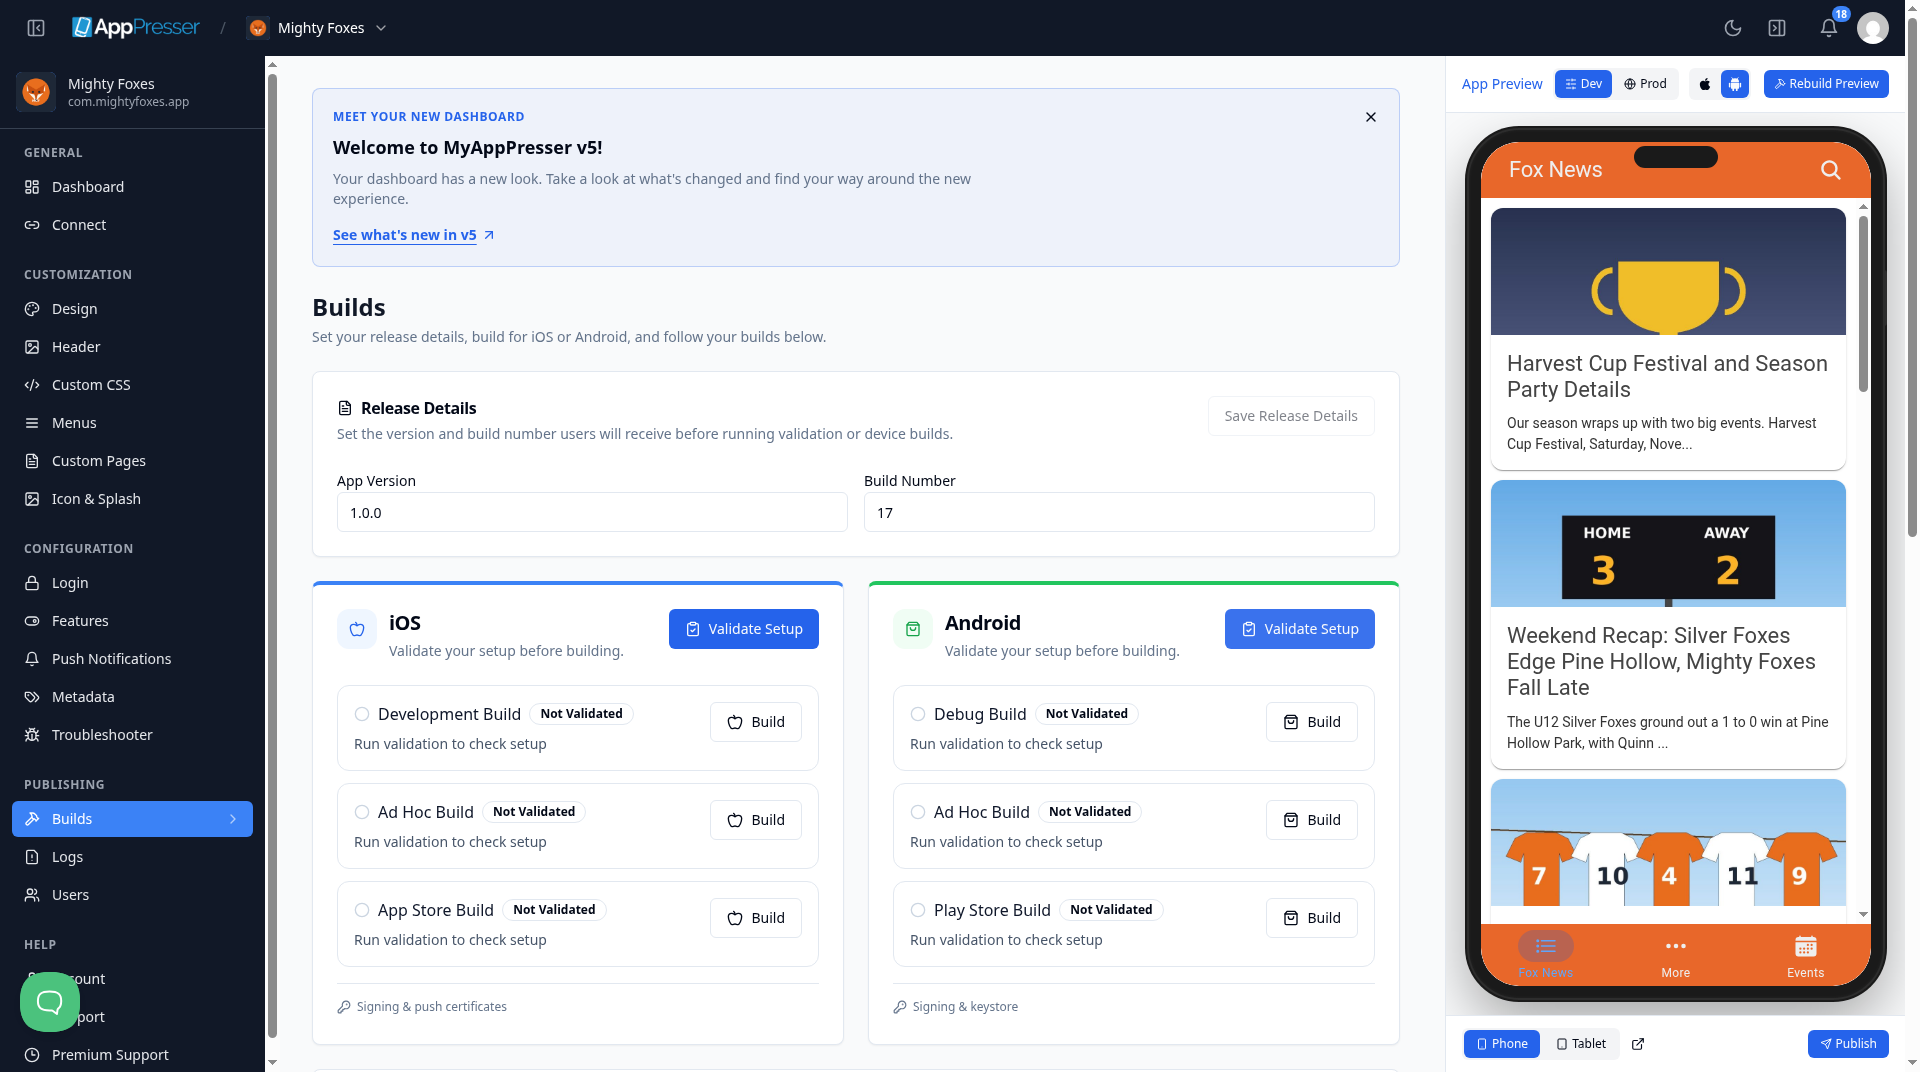
- In AppPresser, open Builds and check the App Version under Release Details, for example 1.0.0. If you change anything, click Save Release Details.
On the Android card, click Validate Setup.
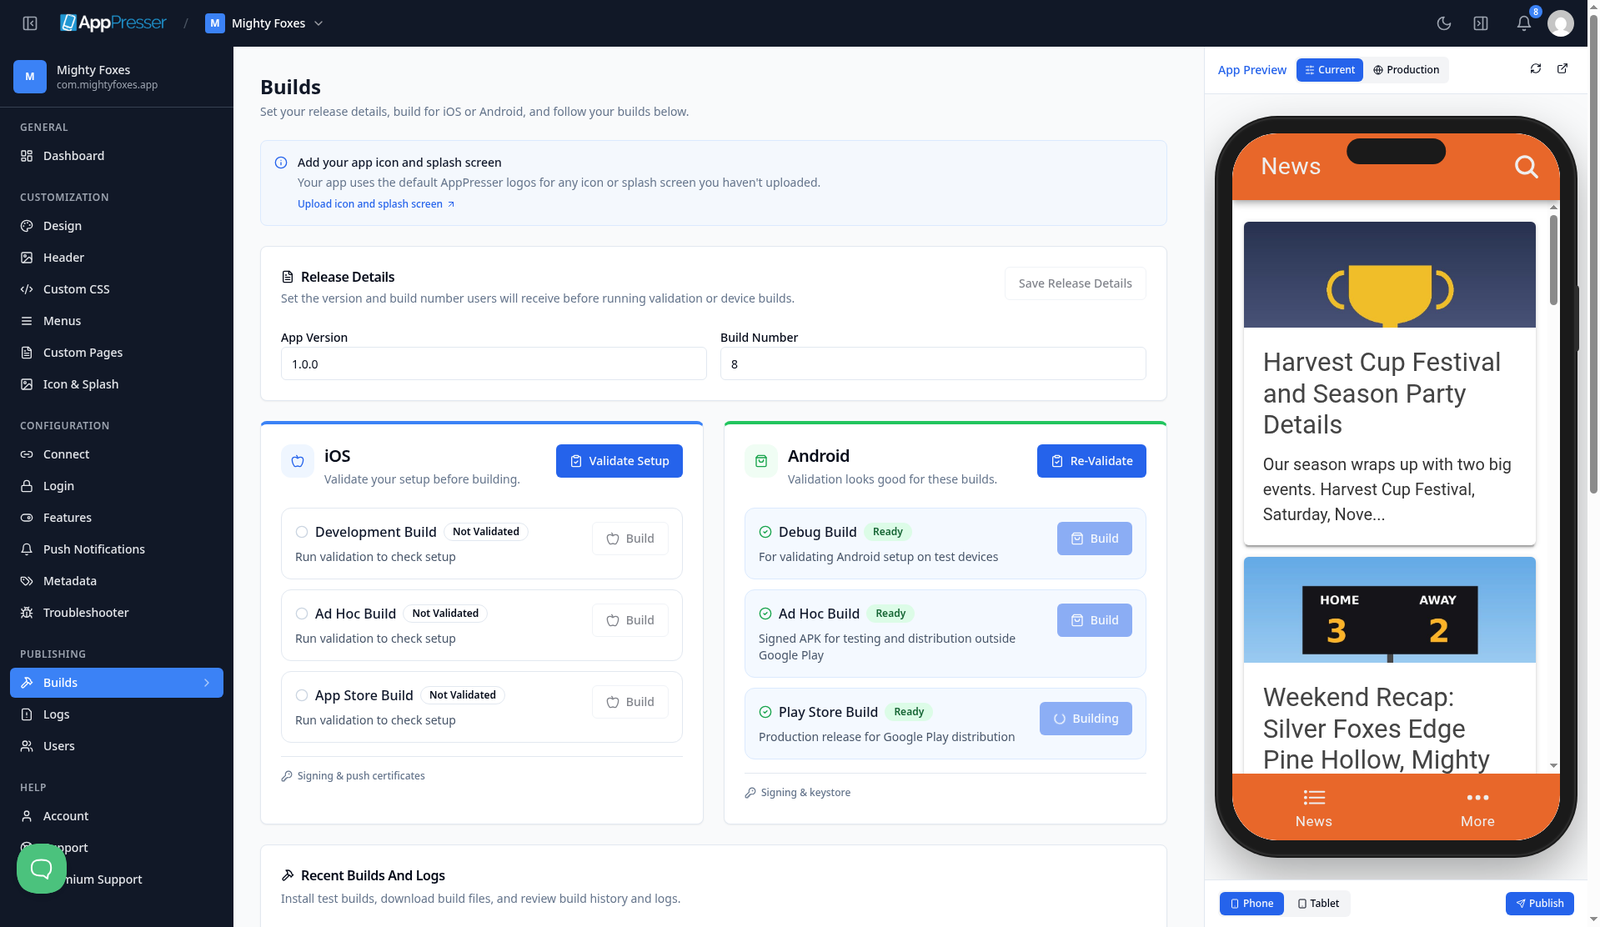
When the rows show Ready, click Build on the Play Store Build row. The button changes to Building and the page says Build started. Follow its progress below.
- Wait for the build to finish (about 3 to 5 minutes). Watch Recent Builds And Logs further down the page.
This first build is expected to show Failed. AppPresser makes and signs your .aab, then tries to send it to Google Play. That last part can't work yet, because Google only accepts automatic uploads after the first manual one, and you haven't made the Google key yet (Steps 6 to 9). Your .aab is still made.
Step 4: Download your .aab file
- In Recent Builds And Logs, find the Play Store build you just ran (workflow capacitor-android-play-store, status Failed).
In the Download/Install column, click app-release-bitrise-signed.aab and save the file. This is the signed file Google wants.
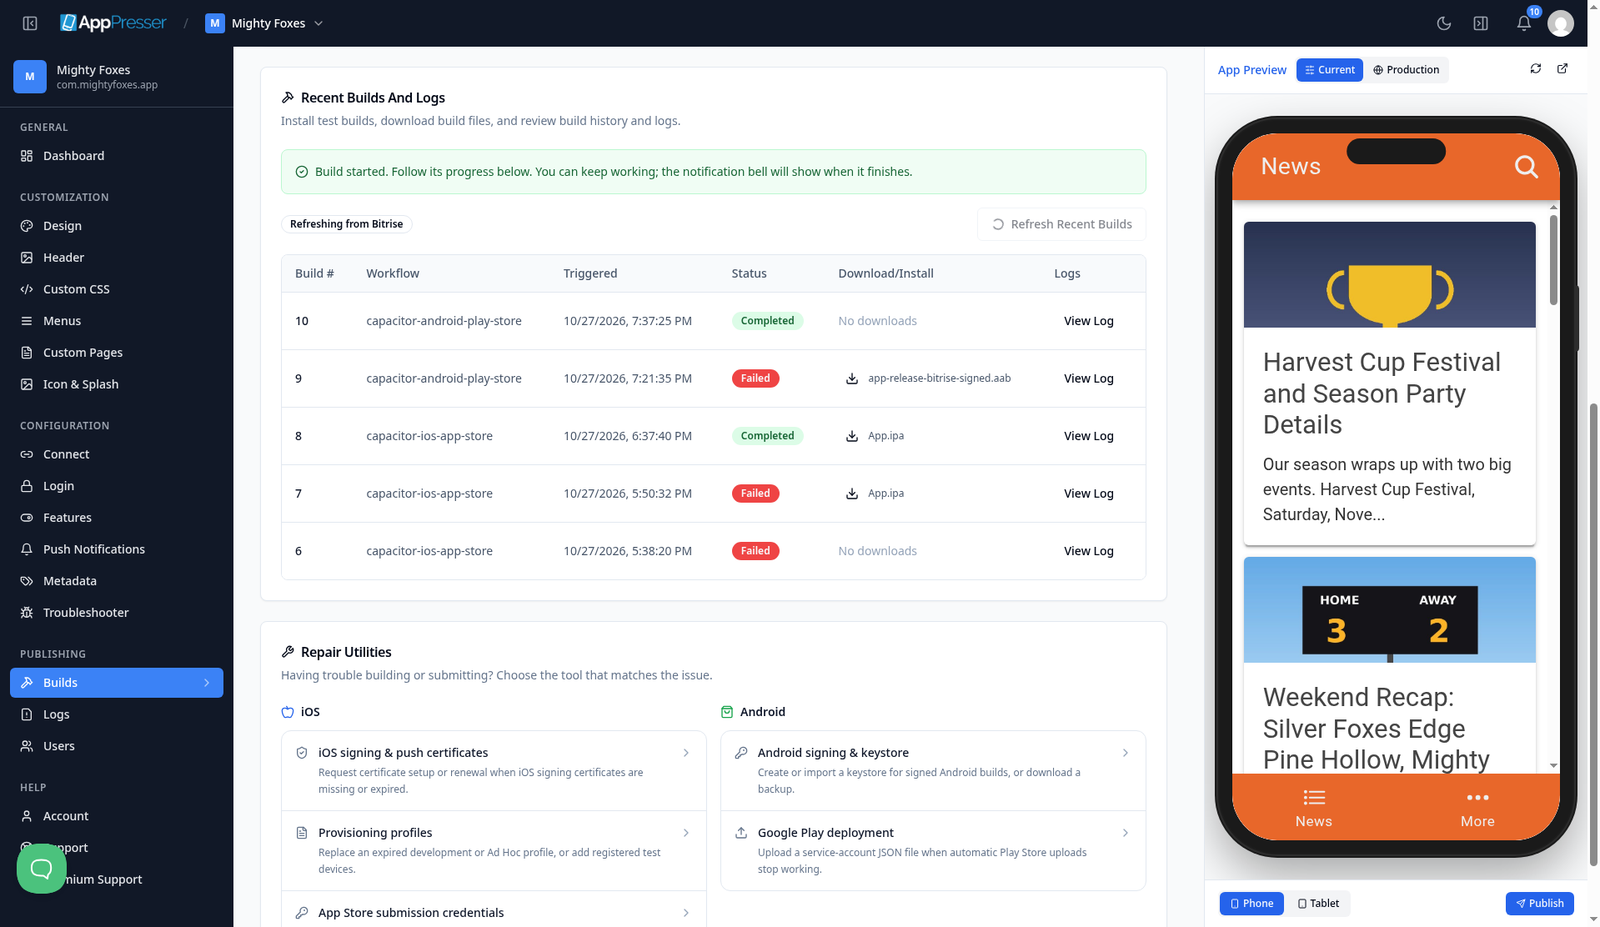
In the screenshot, build 9 is the first (failed) build with the .aab link. Build 10 is the later, successful build from Step 11.
Step 5: Upload your first build by hand to Internal testing
Back in Play Console, open Test and release > Testing > Internal testing and click Create new release.
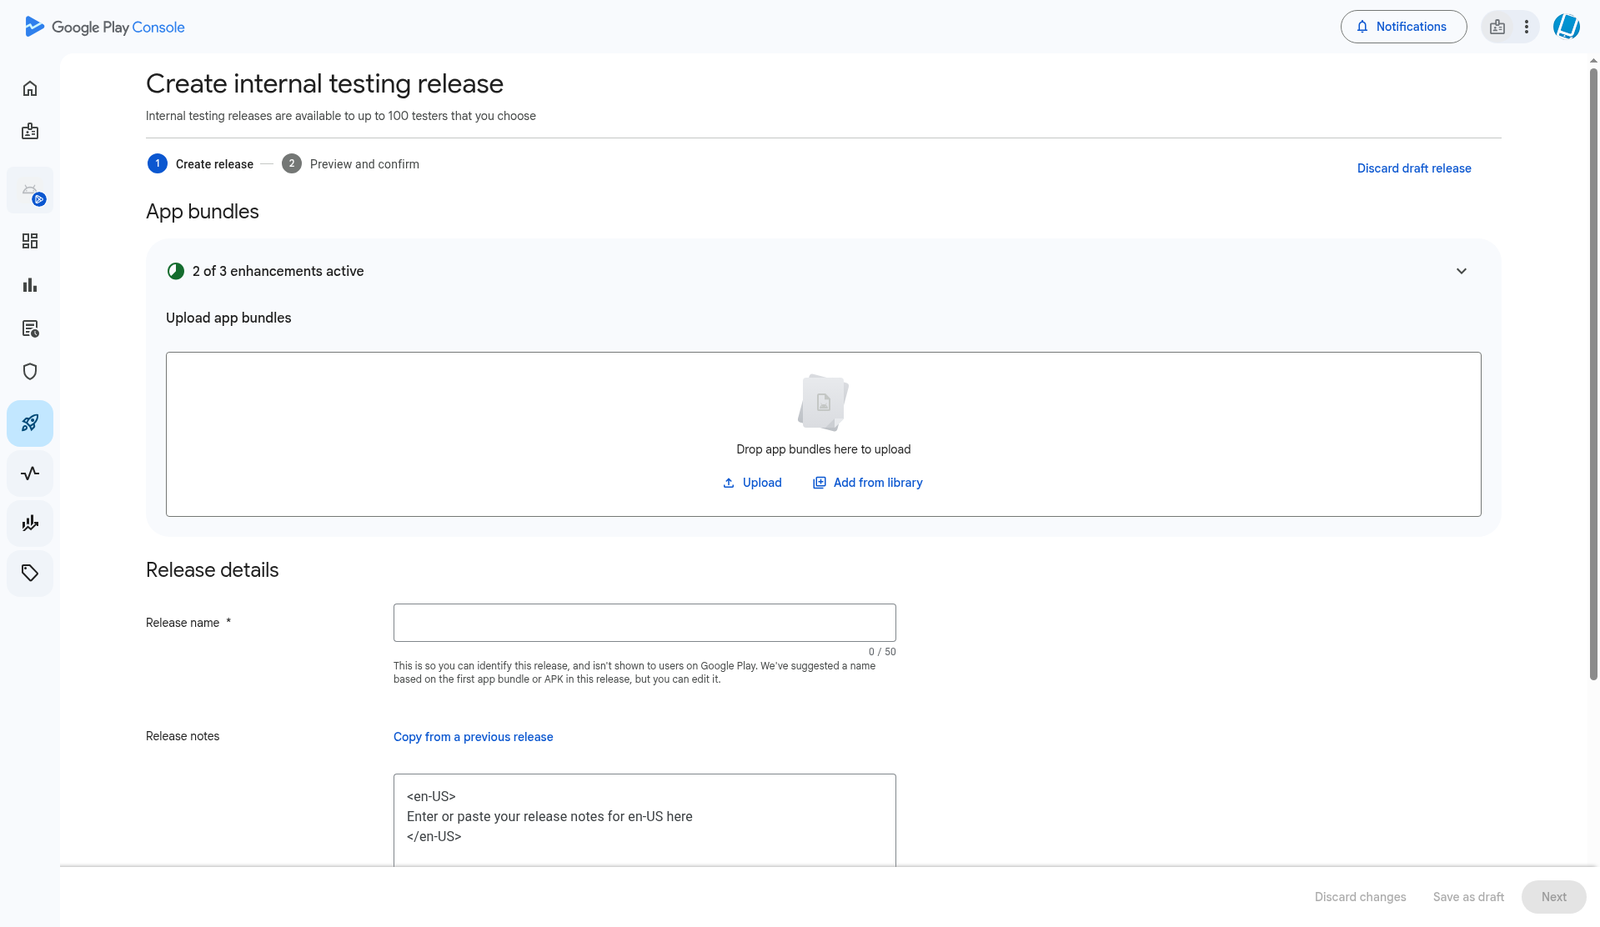
- If Google asks about Play App Signing, keep Google's recommended option (Google manages your app signing key). No question appears for new apps, because they use it by default.
- Under App bundles, click Upload and pick the app-release-bitrise-signed.aab file from Step 4. When it's done you see a row with the version (for example 9 (1.0.0)), API levels 24+ and target SDK 36.
Release name fills in by itself (for example 9 (1.0.0)). You can leave it.
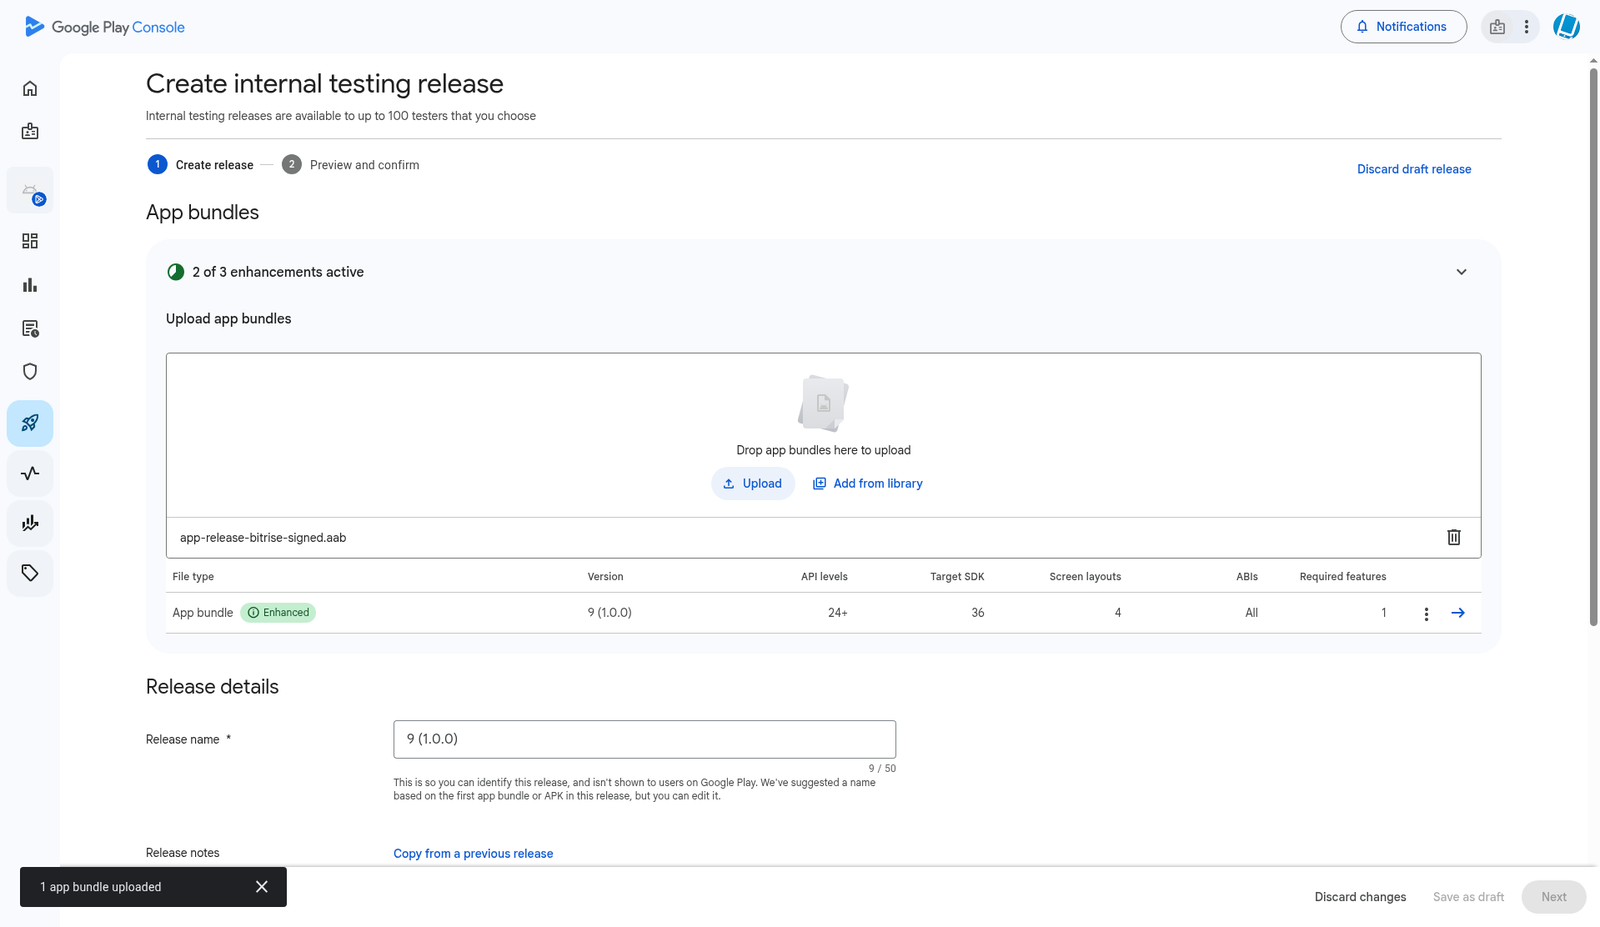
In Release notes, replace the sample text between the language tags. Keep each tag on its own line, like this:
<en-US> First internal test build. </en-US>If you put it all on one line, Google shows an error.
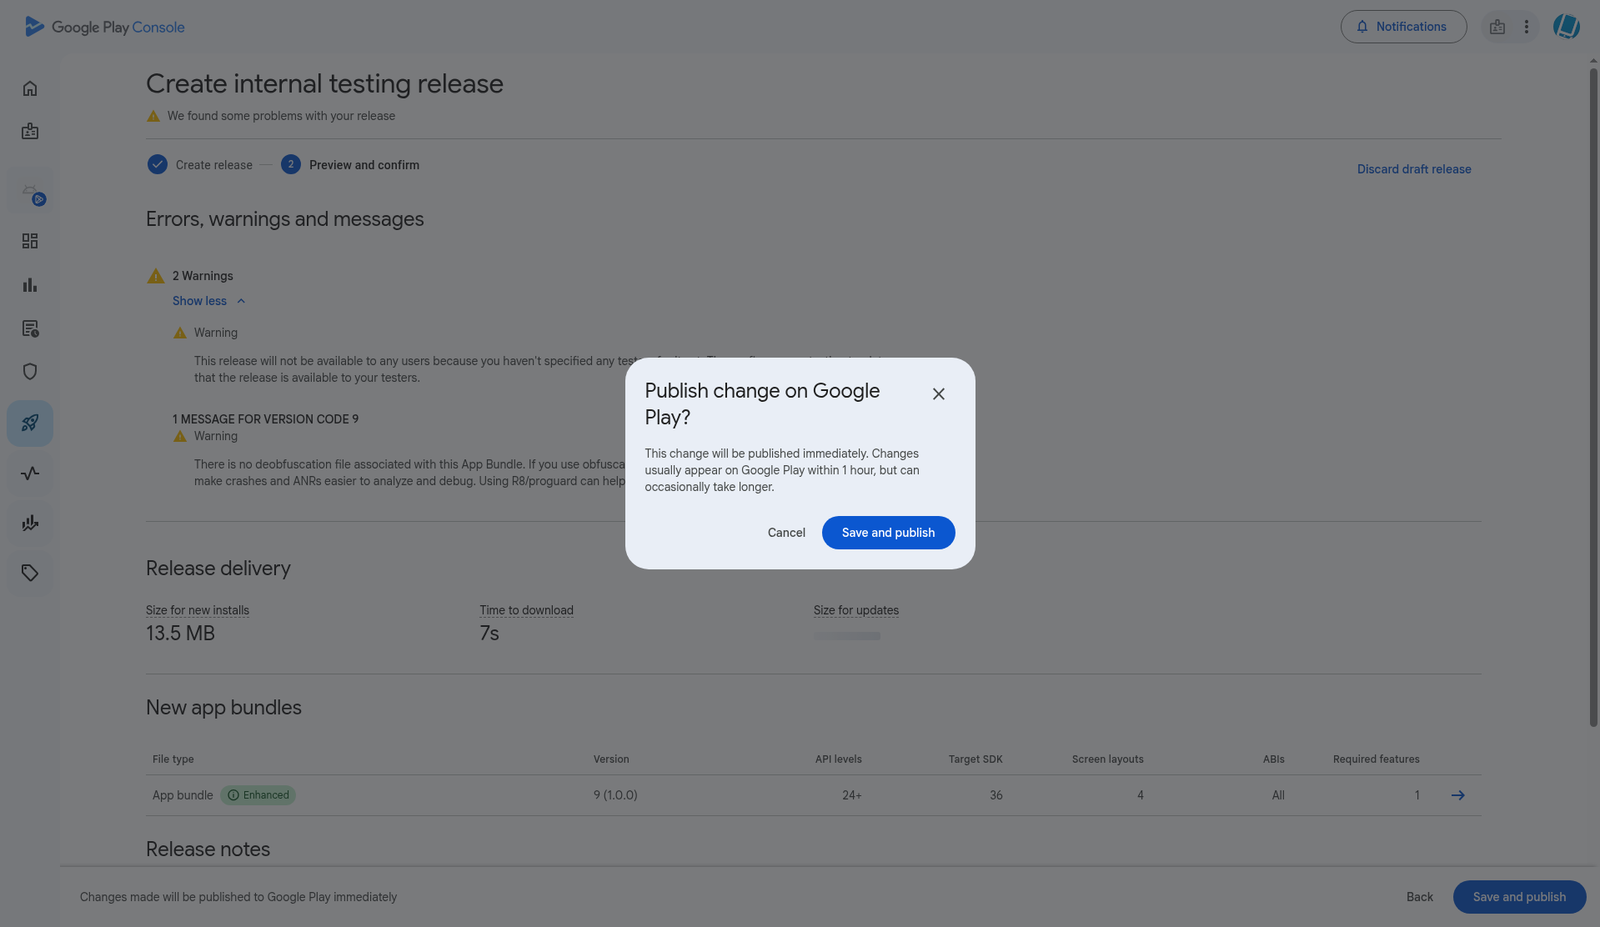
- Click Next. Google shows Errors, warnings and messages. Two warnings are normal for a first test build:
- No testers yet. You'll add them in Step 12.
No deobfuscation file. This only affects how readable crash reports are. You can ignore it.
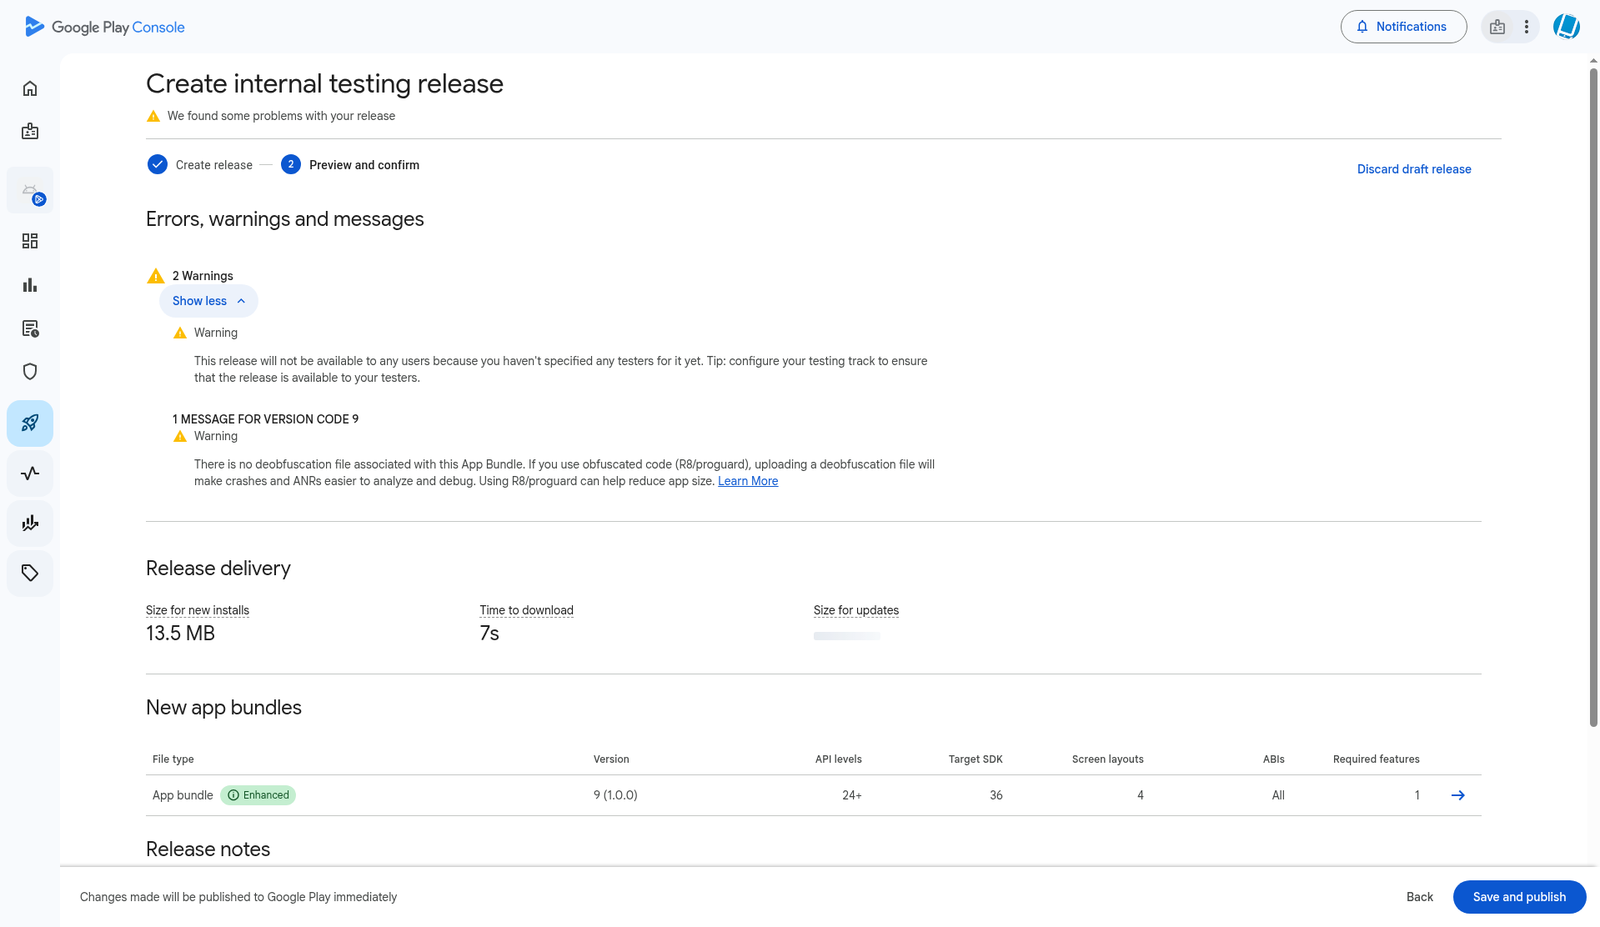
Click Save and publish, then Save and publish again in the Publish change on Google Play? window.
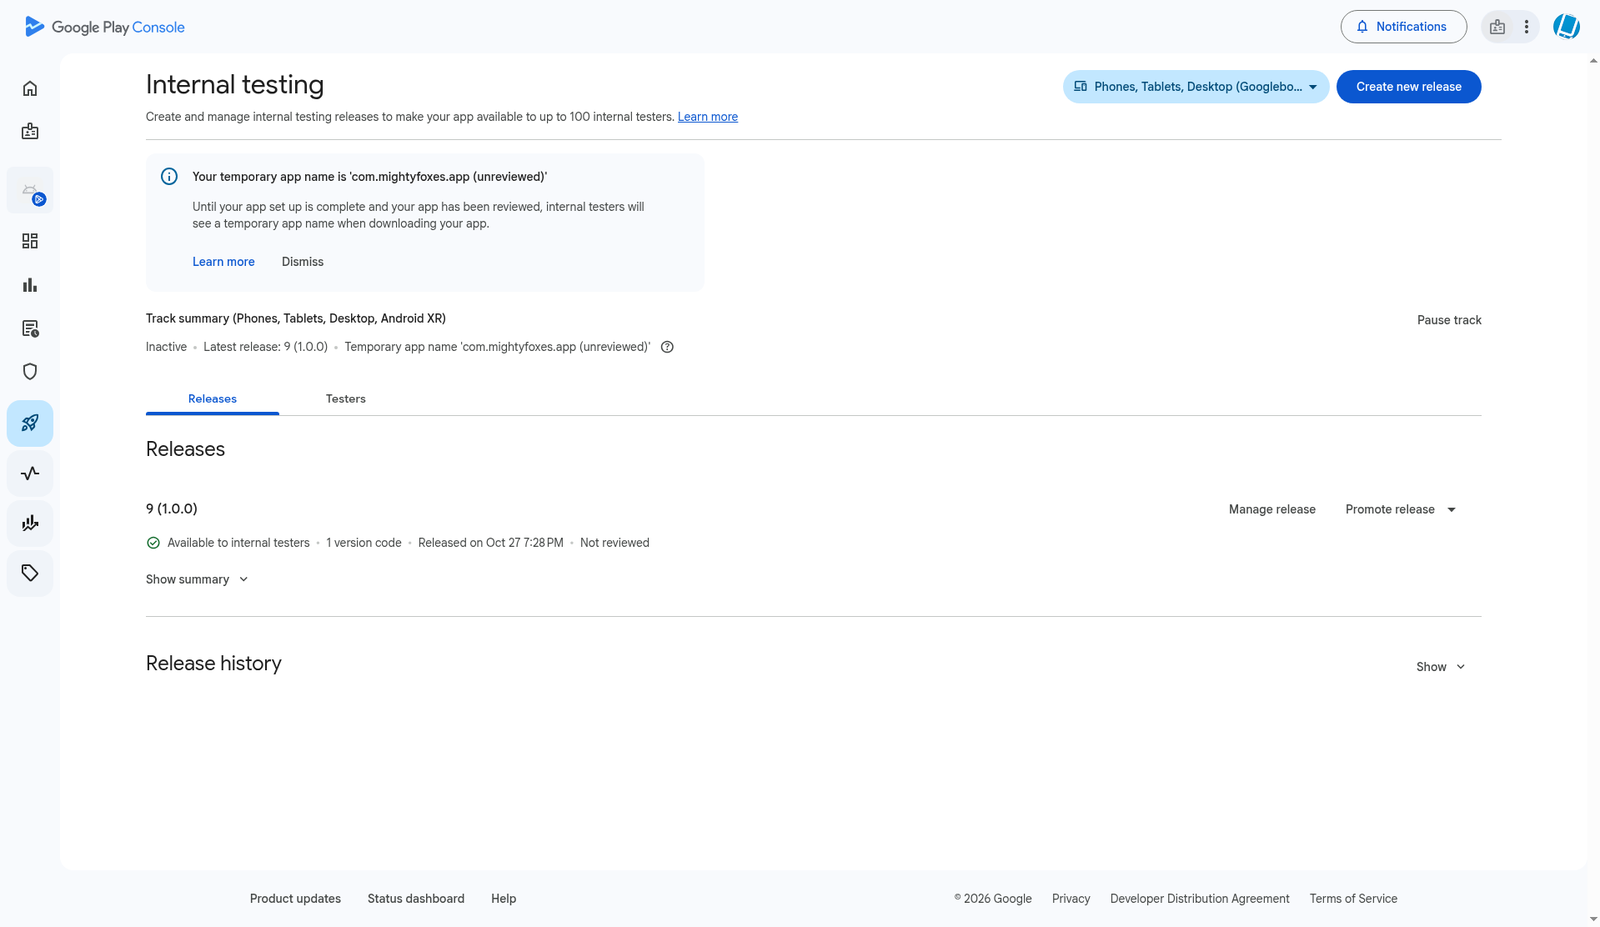
The release now shows Available to internal testers. This only goes to your internal testers, not the public.
Step 6: Make a Google Cloud project and turn on the Google Play API
The next steps create the "robot" account AppPresser uses to upload future builds. Google Cloud doesn't charge for any of this, and you don't need to add a billing account.
- Go to console.cloud.google.com and sign in with the Google account from "Before you start". Google may ask you to type your password again.
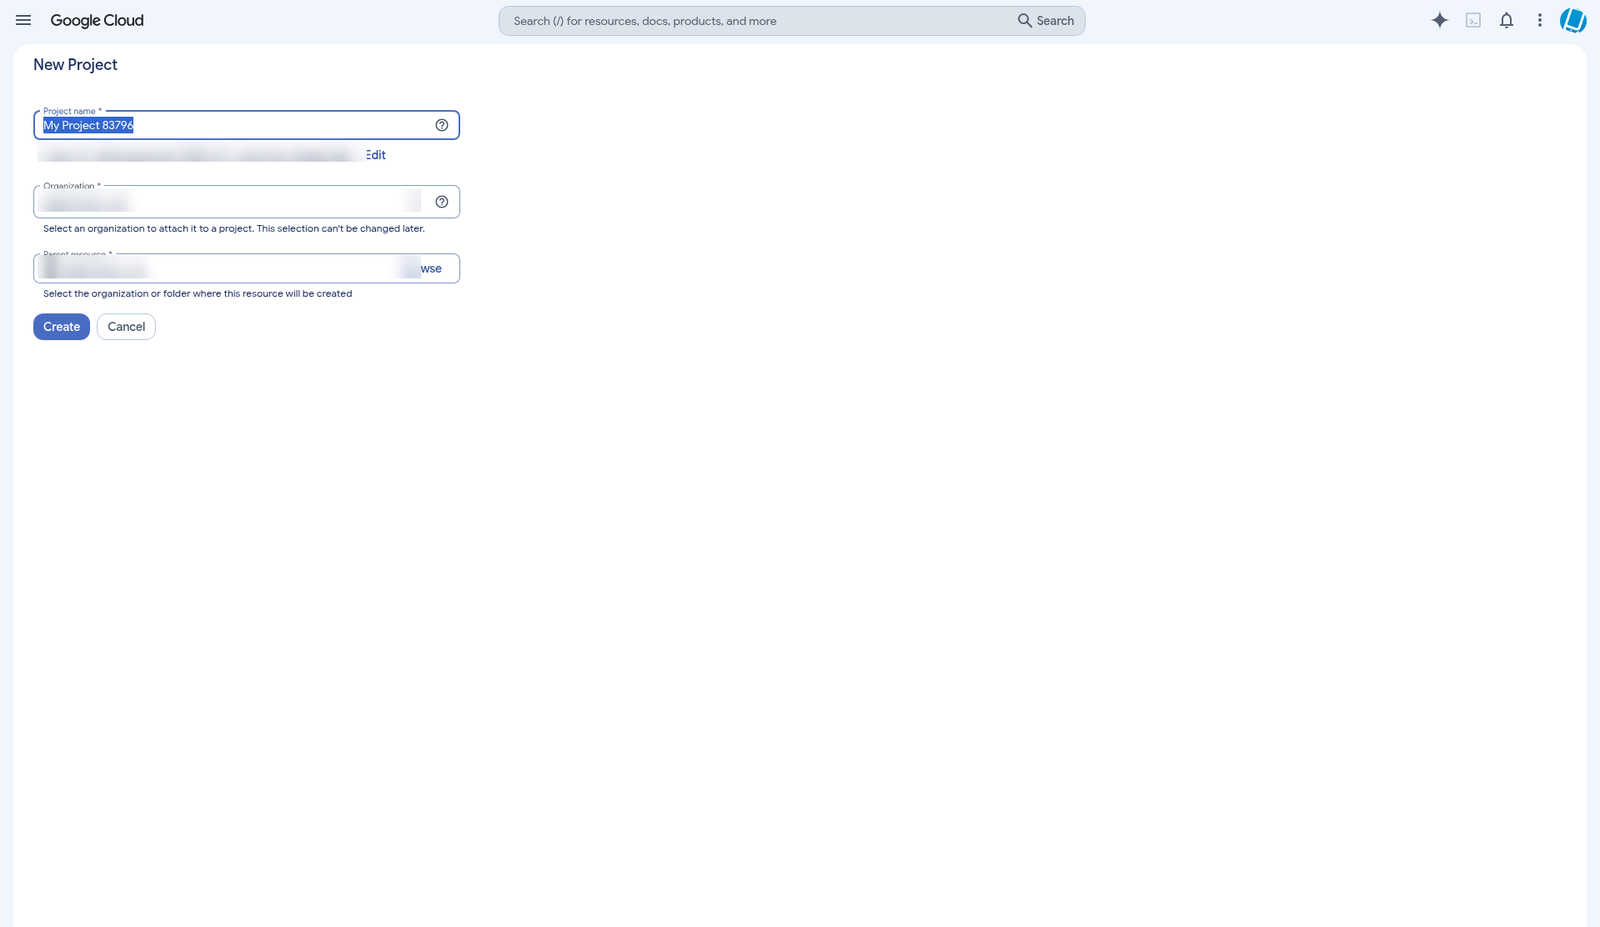
- Click the project picker at the top, then New project.
Give it a clear name, for example myapp-play-uploads. Leave the organization and location as they are, and click Create. Then make sure the new project is selected at the top of the page.
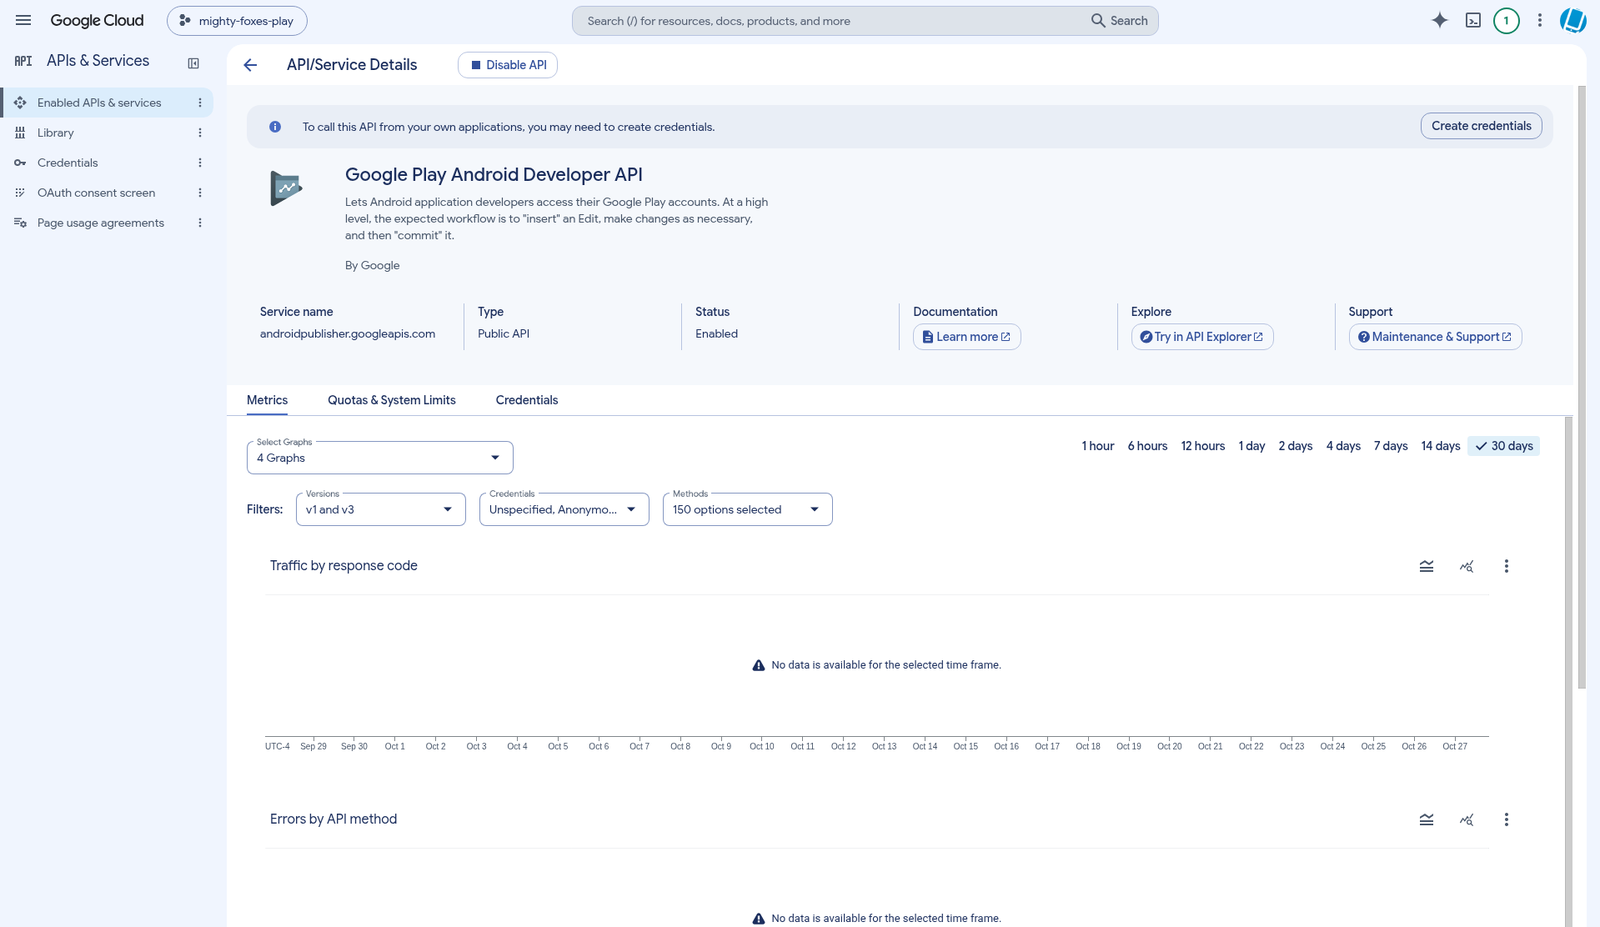
Search for Google Play Android Developer API (or open APIs & Services > Library and search there). Open it and click Enable.
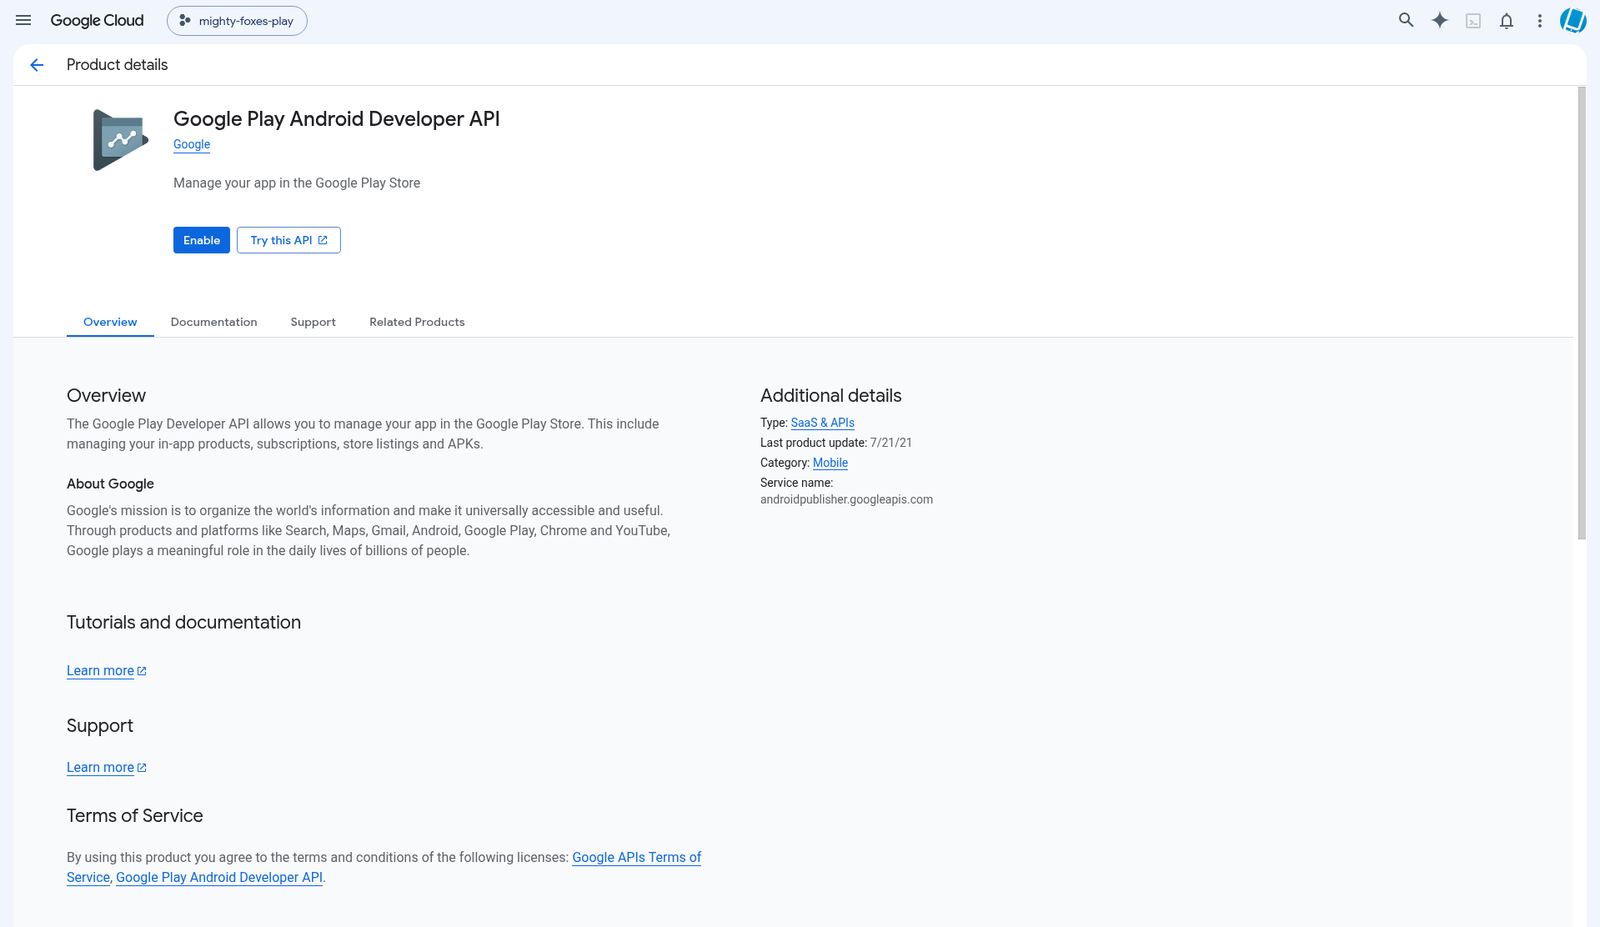
The API's page now shows Status: Enabled.
Step 7: Create the service account and its JSON key
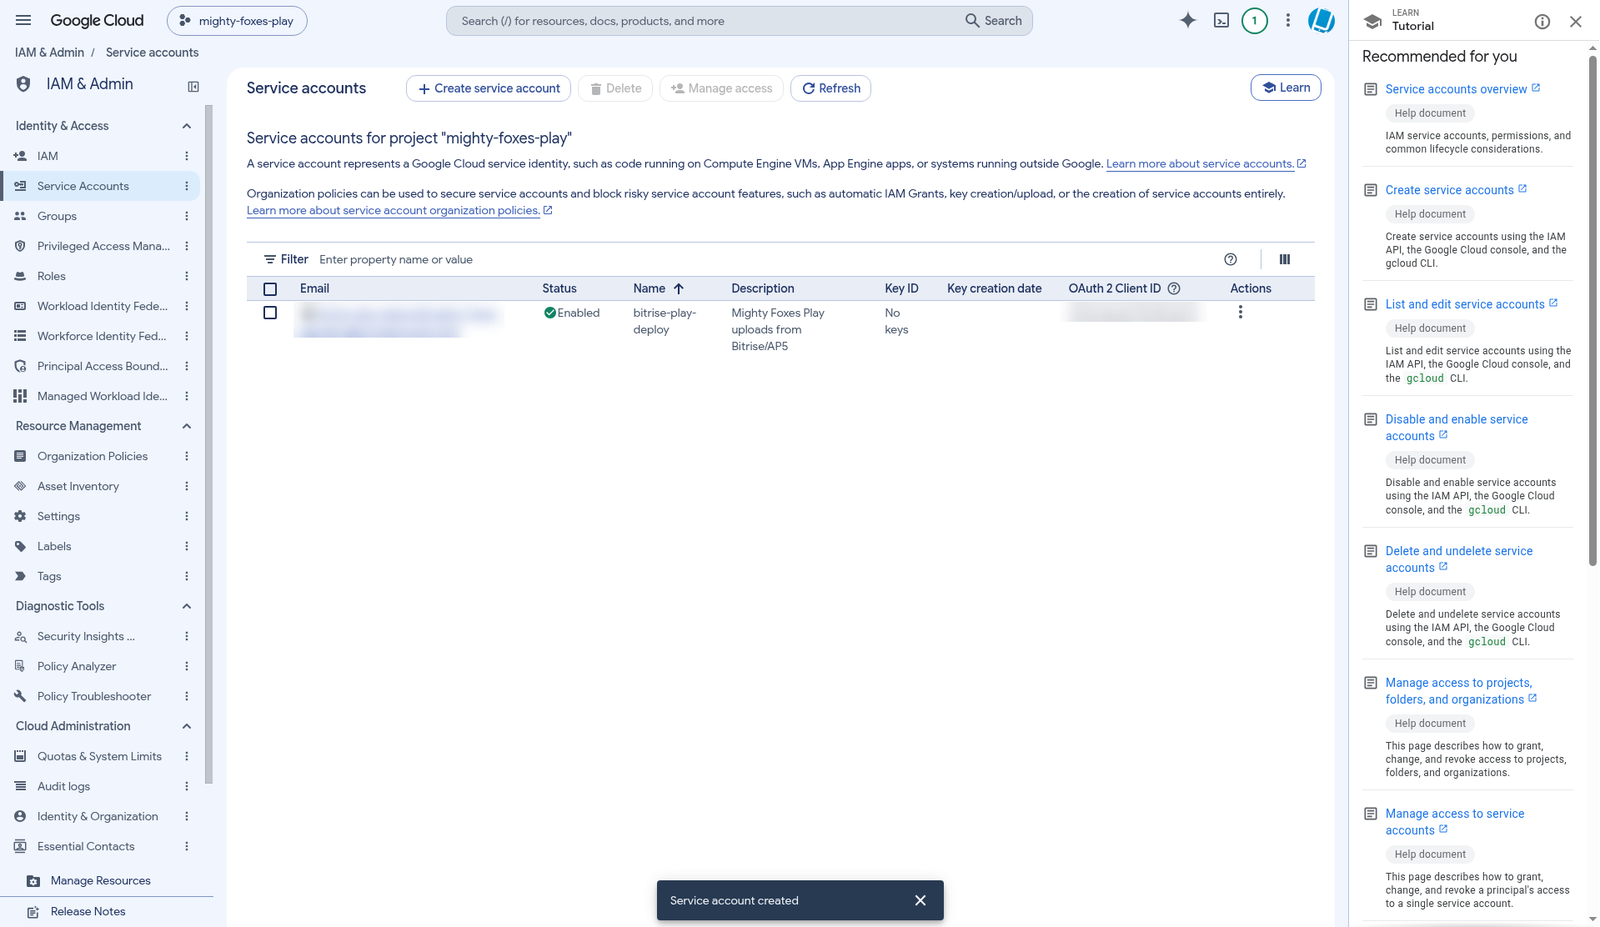
- In the left menu, open IAM & Admin > Service Accounts and click Create service account.
- Give it a name you'll recognize, for example play-uploads, and an optional description such as "Play uploads from AppPresser". Click Create and continue.
- Don't give it any roles in Google Cloud. Skip the optional steps and click Done. (Its permissions come from Play Console in Step 8.)
Copy your new service account's email address from the list. It ends in .iam.gserviceaccount.com. You need it in Step 8.
- Click the service account's email, open the Keys tab and click Add key > Create new key.
Choose JSON and click Create. Google downloads a .json file to your computer and shows Private key saved to your computer.
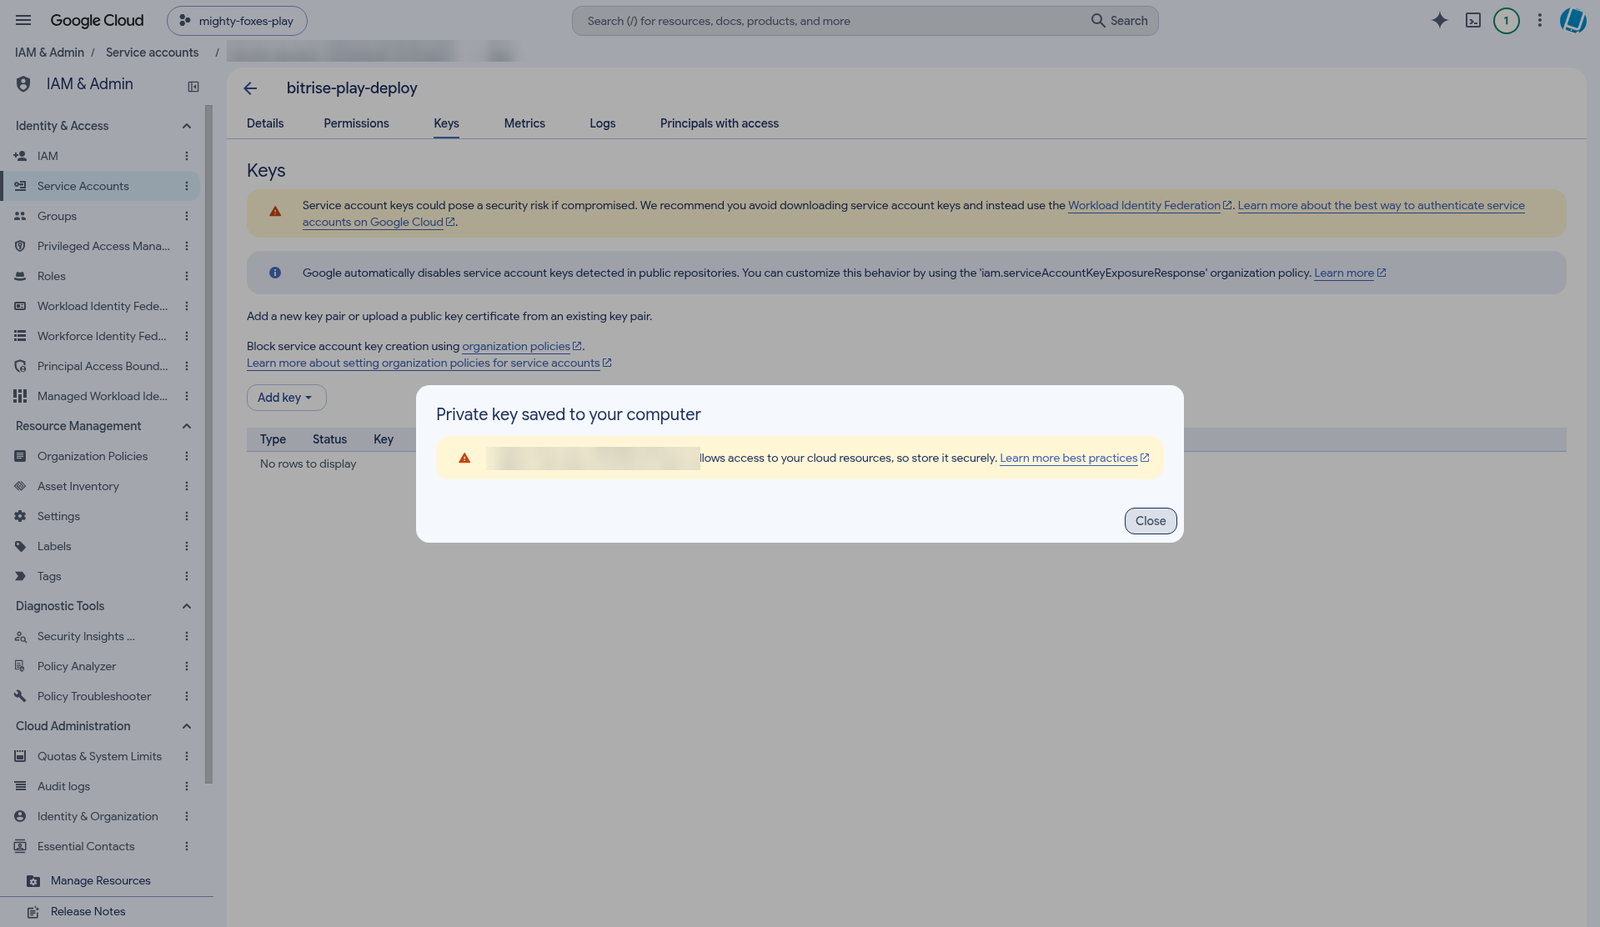
- Save the .json file in your password manager or another private place. Google can't show it to you again. Never email it or put it in a shared folder. If it leaks, delete that key on the same Keys tab and make a new one.
Step 8: Give the service account access in Play Console
- In Play Console, go to Users and permissions (from the Play Console home, under Manage account) and click Invite new users.
In Email address, paste the service account email from Step 7.
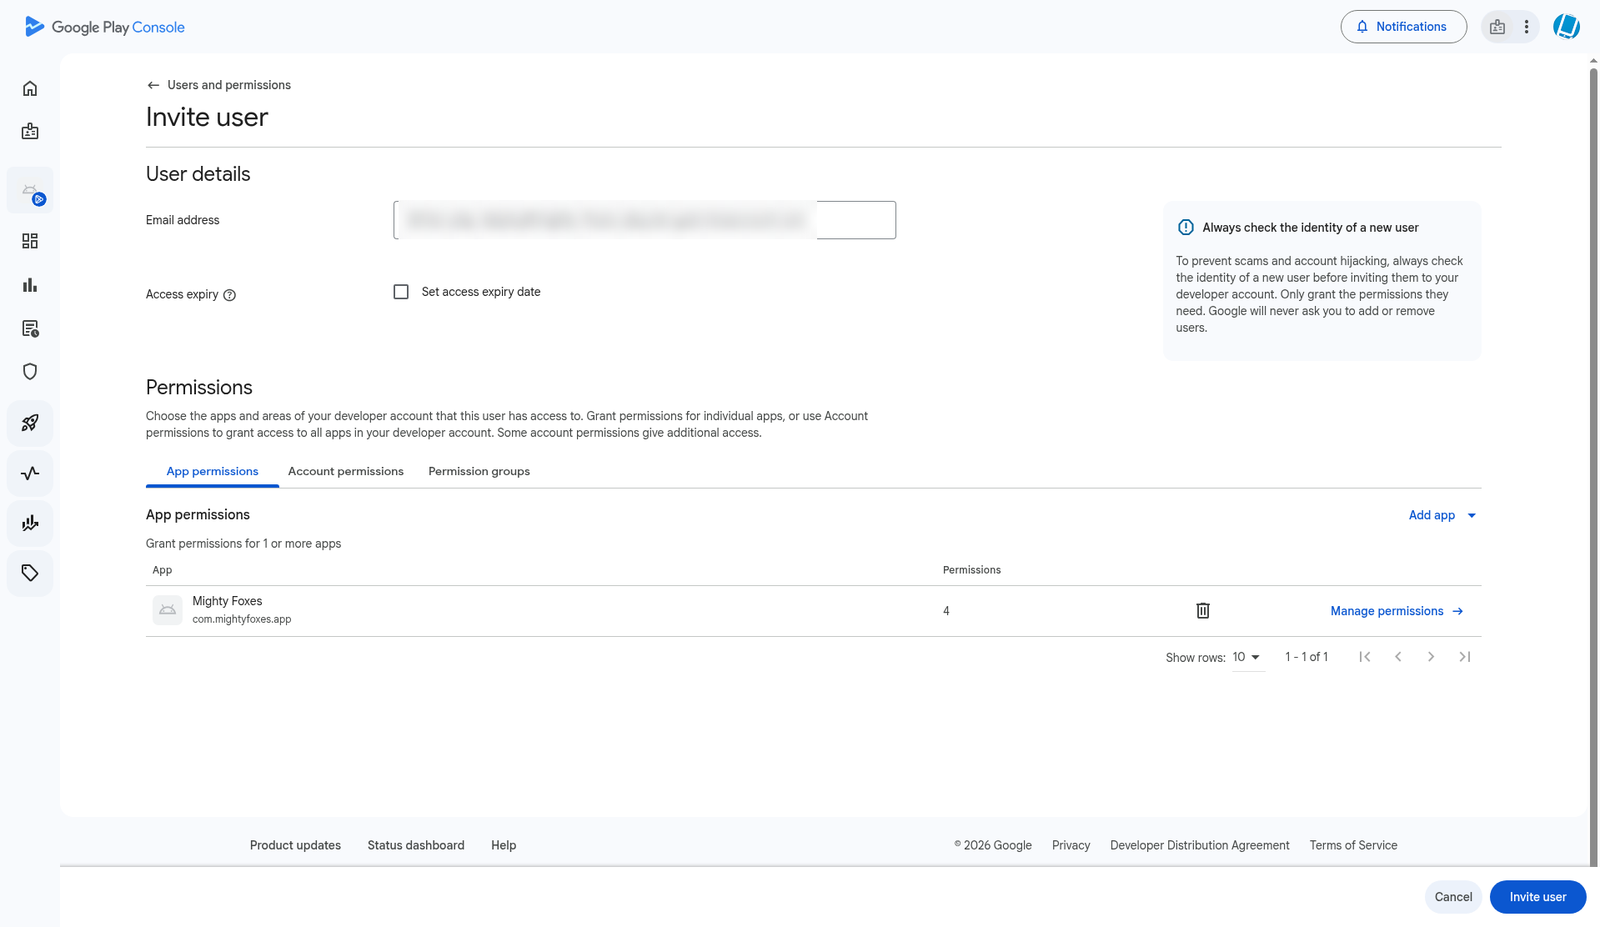
- On the App permissions tab, click Add app, pick your app (for example My Example App) and click Apply.
- In the Permissions for window, check only these:
- View app information (read-only)
- Release apps to testing tracks
Manage testing tracks and edit tester lists
Google adds View app quality information by itself. Leave Release to production, Admin and all the Financial data boxes unchecked. That way AppPresser can only send builds to testing, never to the public store.
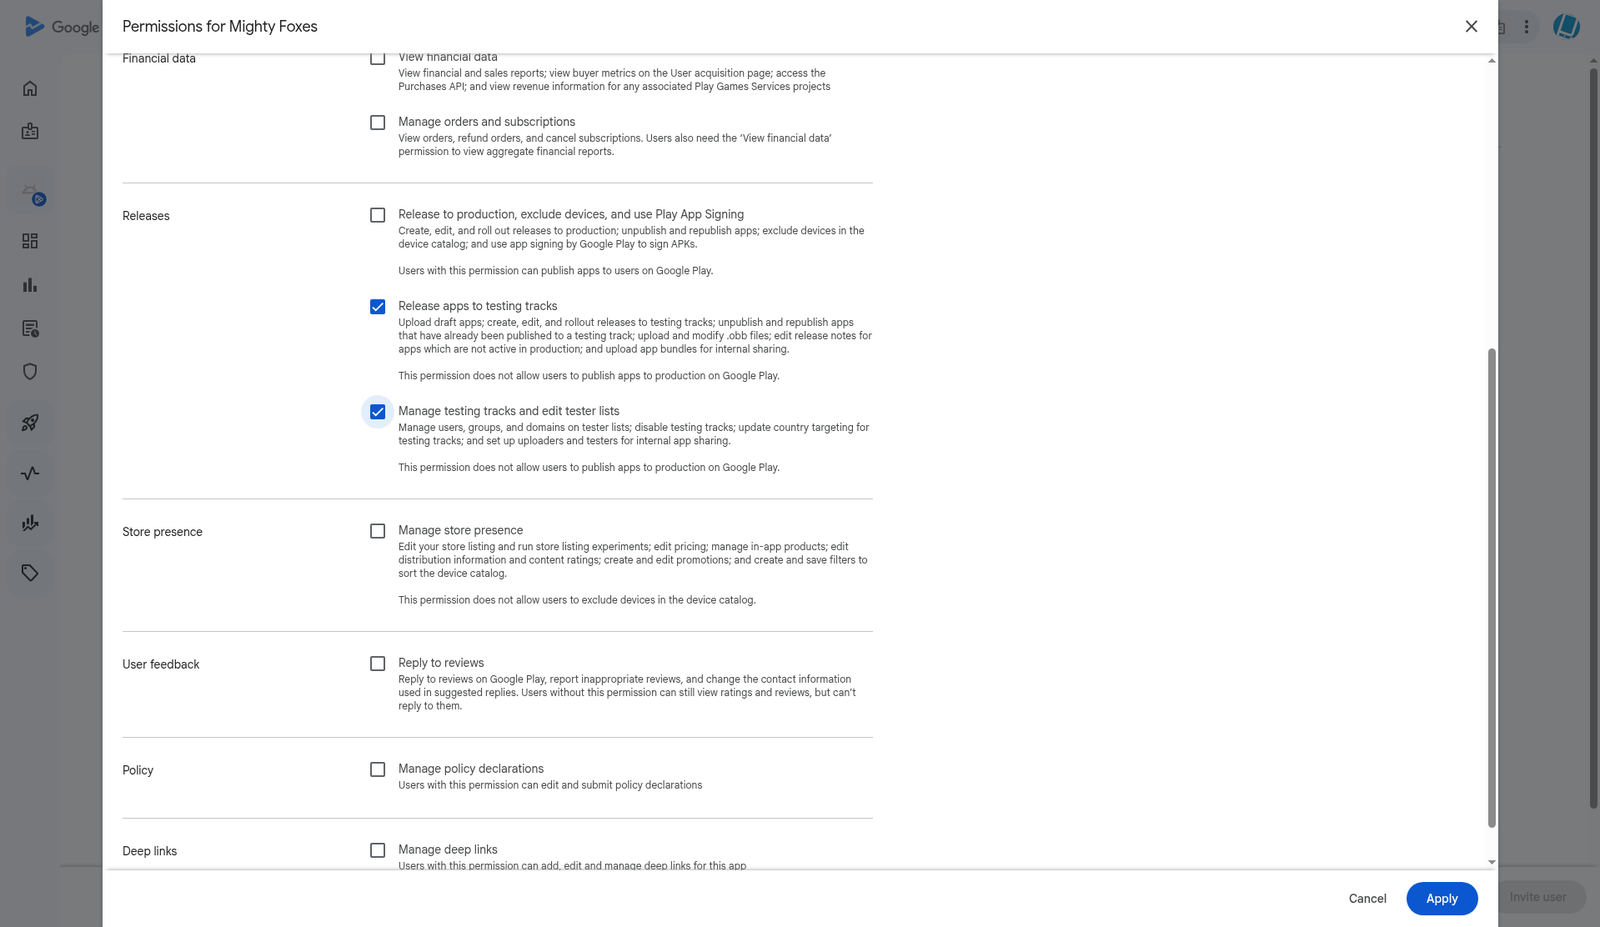
Click Apply, then Invite user, then Send invite. The service account doesn't need to accept anything.
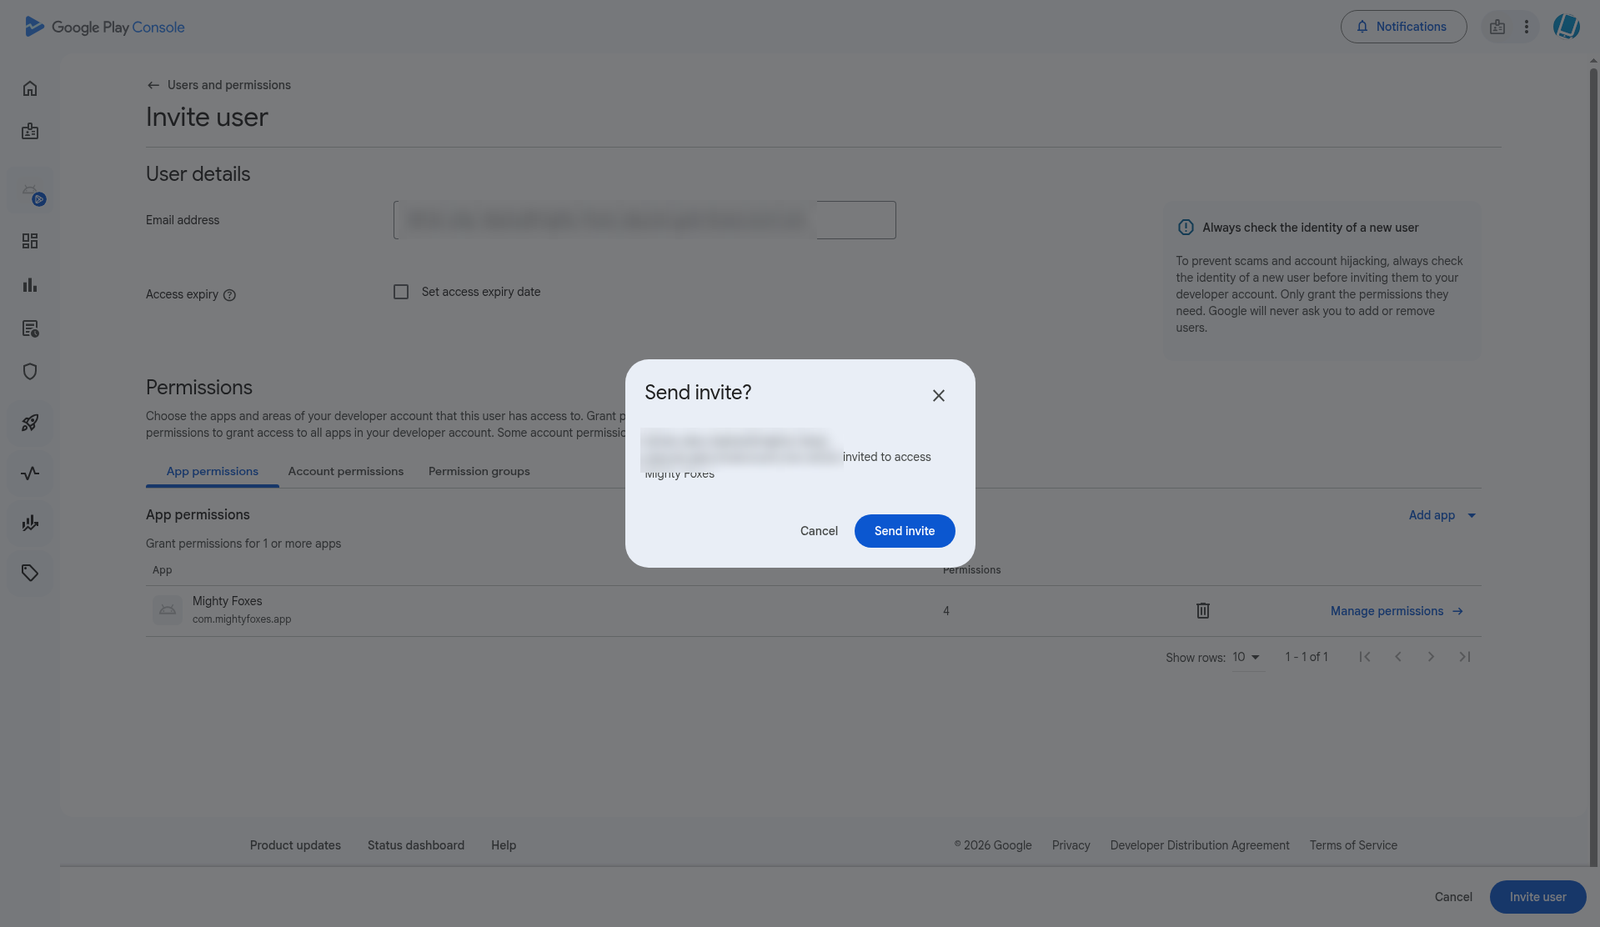
Check that you see Invite sent and that the service account shows in your Users list.
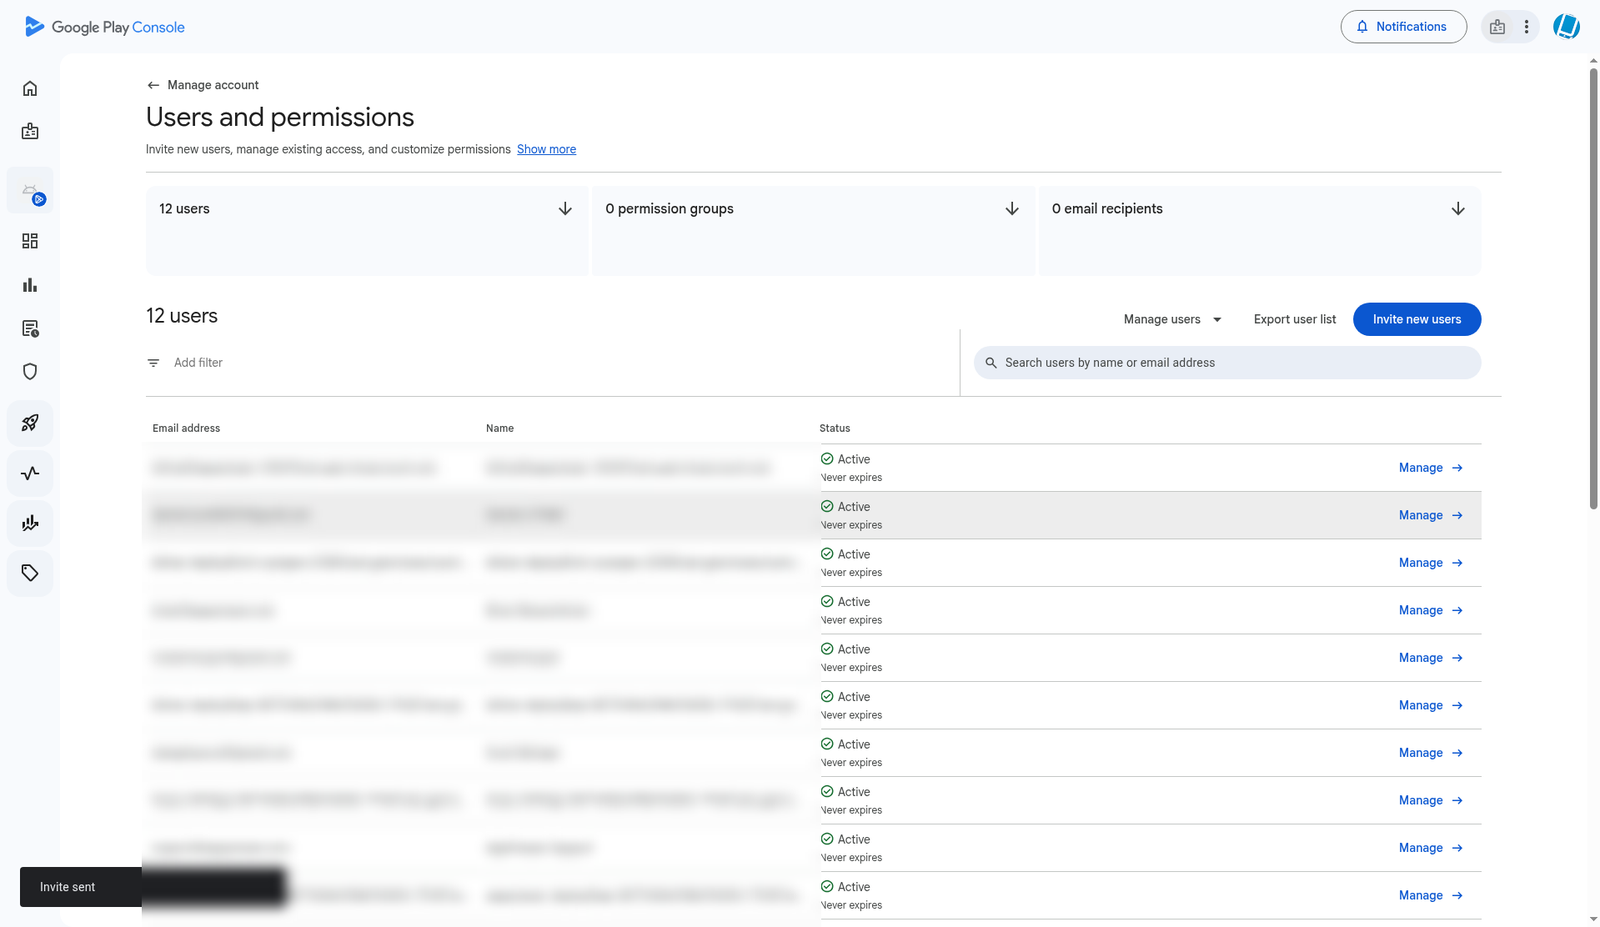
Step 9: Upload the JSON key in AppPresser
- In AppPresser, open Builds and scroll down to Repair Utilities.
Under Android, click Google Play deployment. The Google Play Service Account window opens and says no file has been uploaded yet.
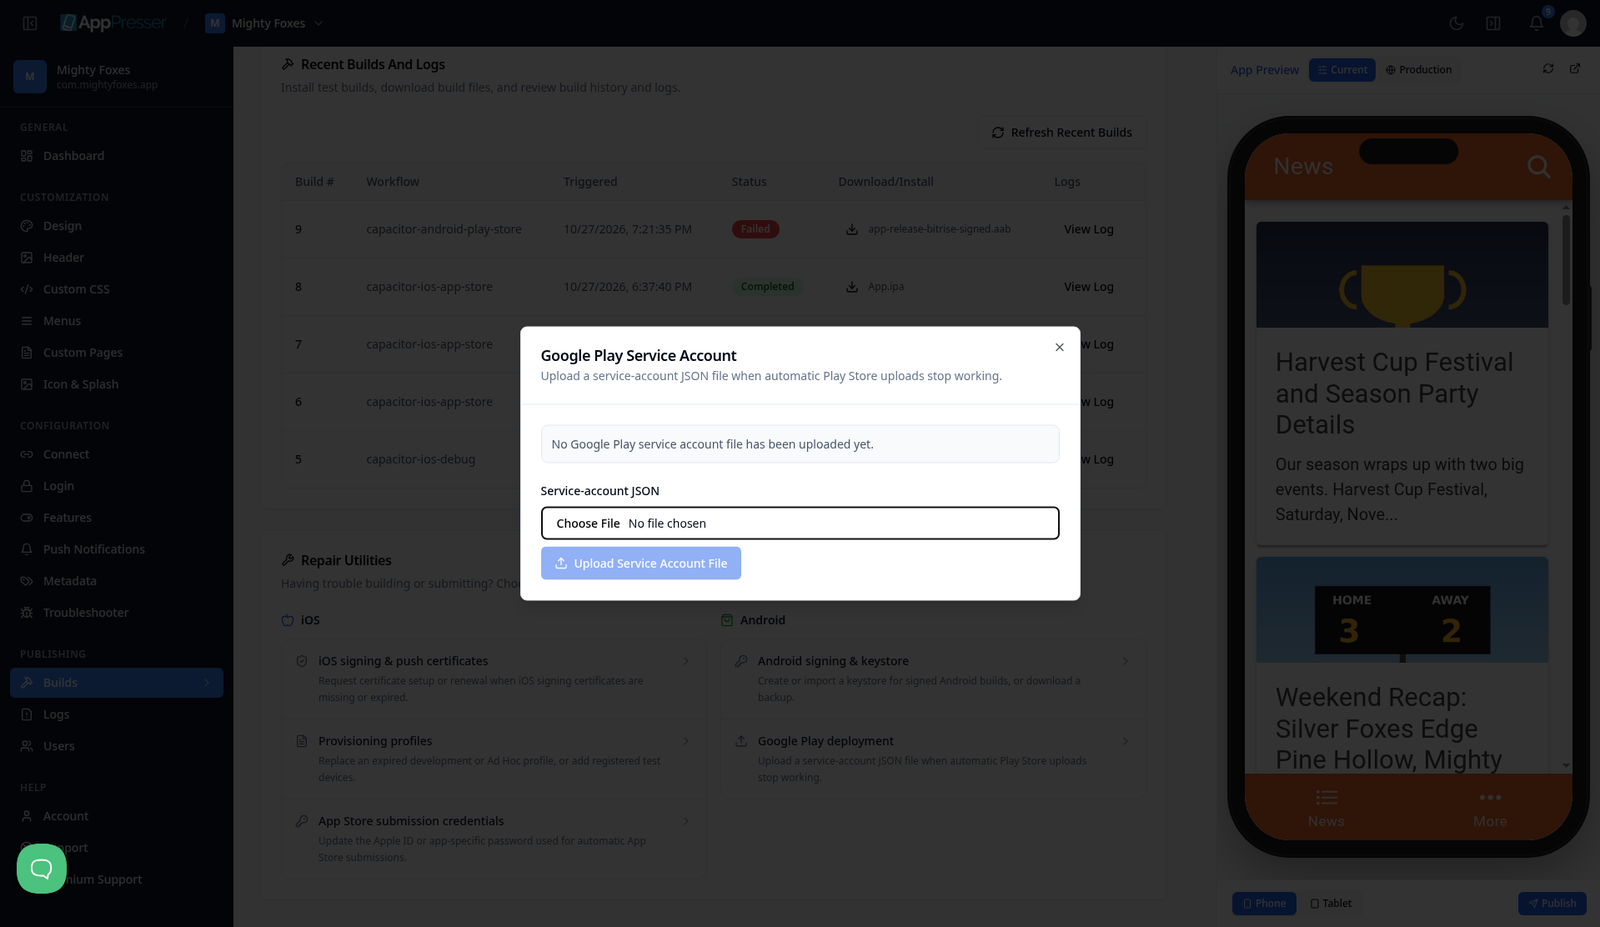
- Click Choose File and pick the .json key from Step 7.
Click Upload Service Account File. You see Google Play API key uploaded successfully and a Last uploaded date.
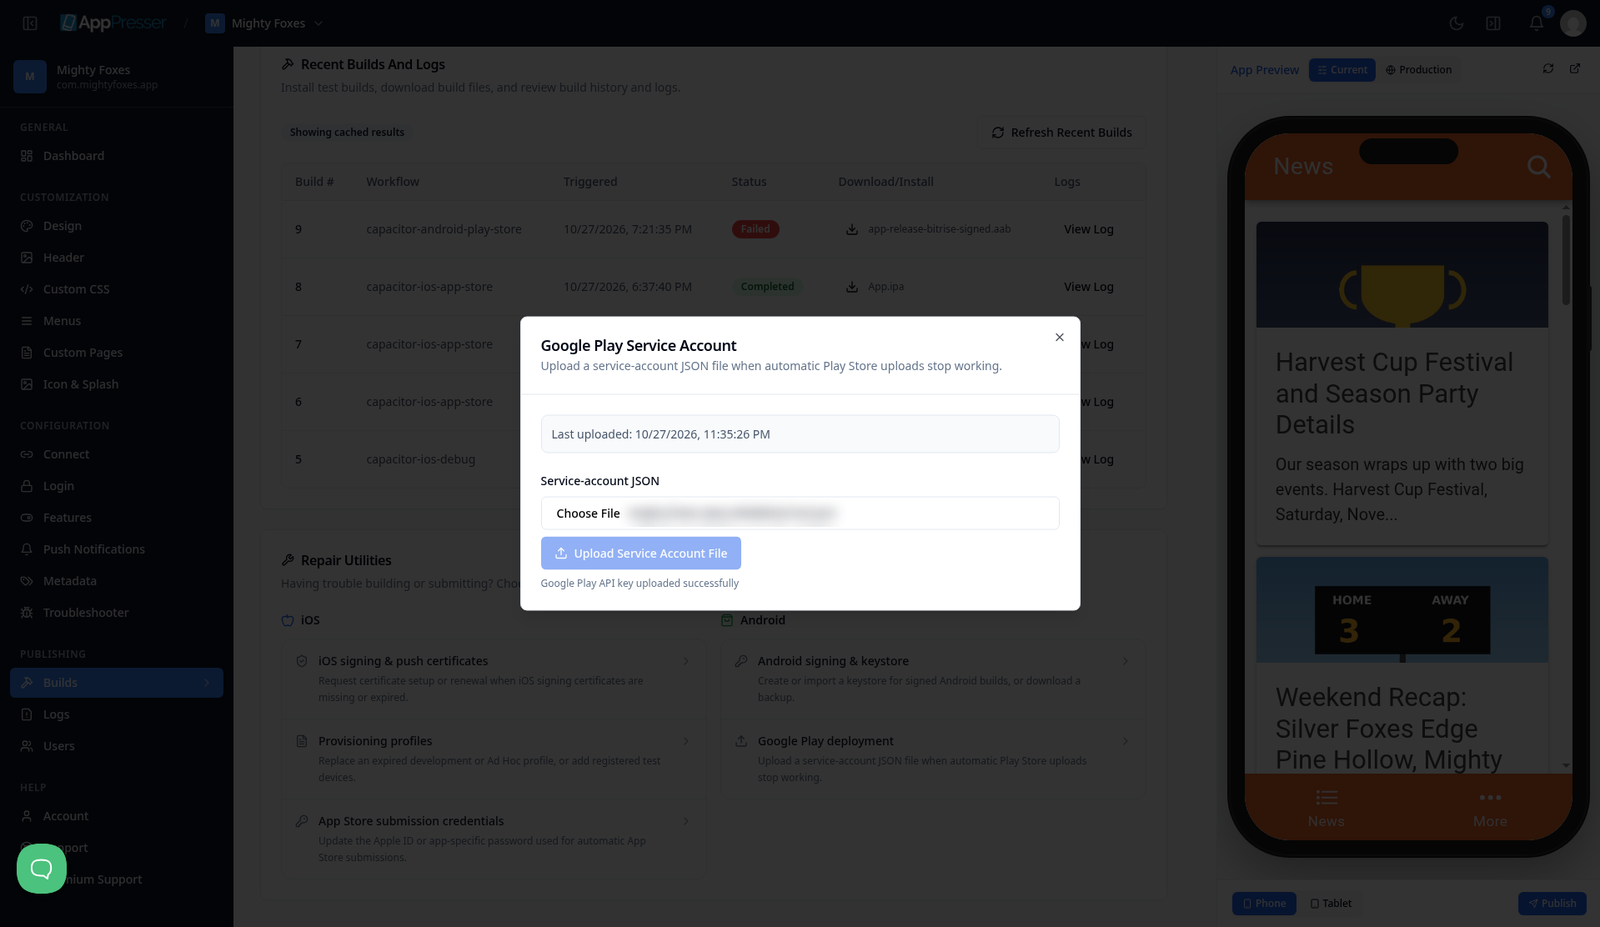
Step 10: Validate your Android setup
- Scroll back up to the Android card and click Validate Setup (or Re-Validate).
Check that all three rows show Ready: Debug Build, Ad Hoc Build and Play Store Build, with the message Validation looks good for these builds.
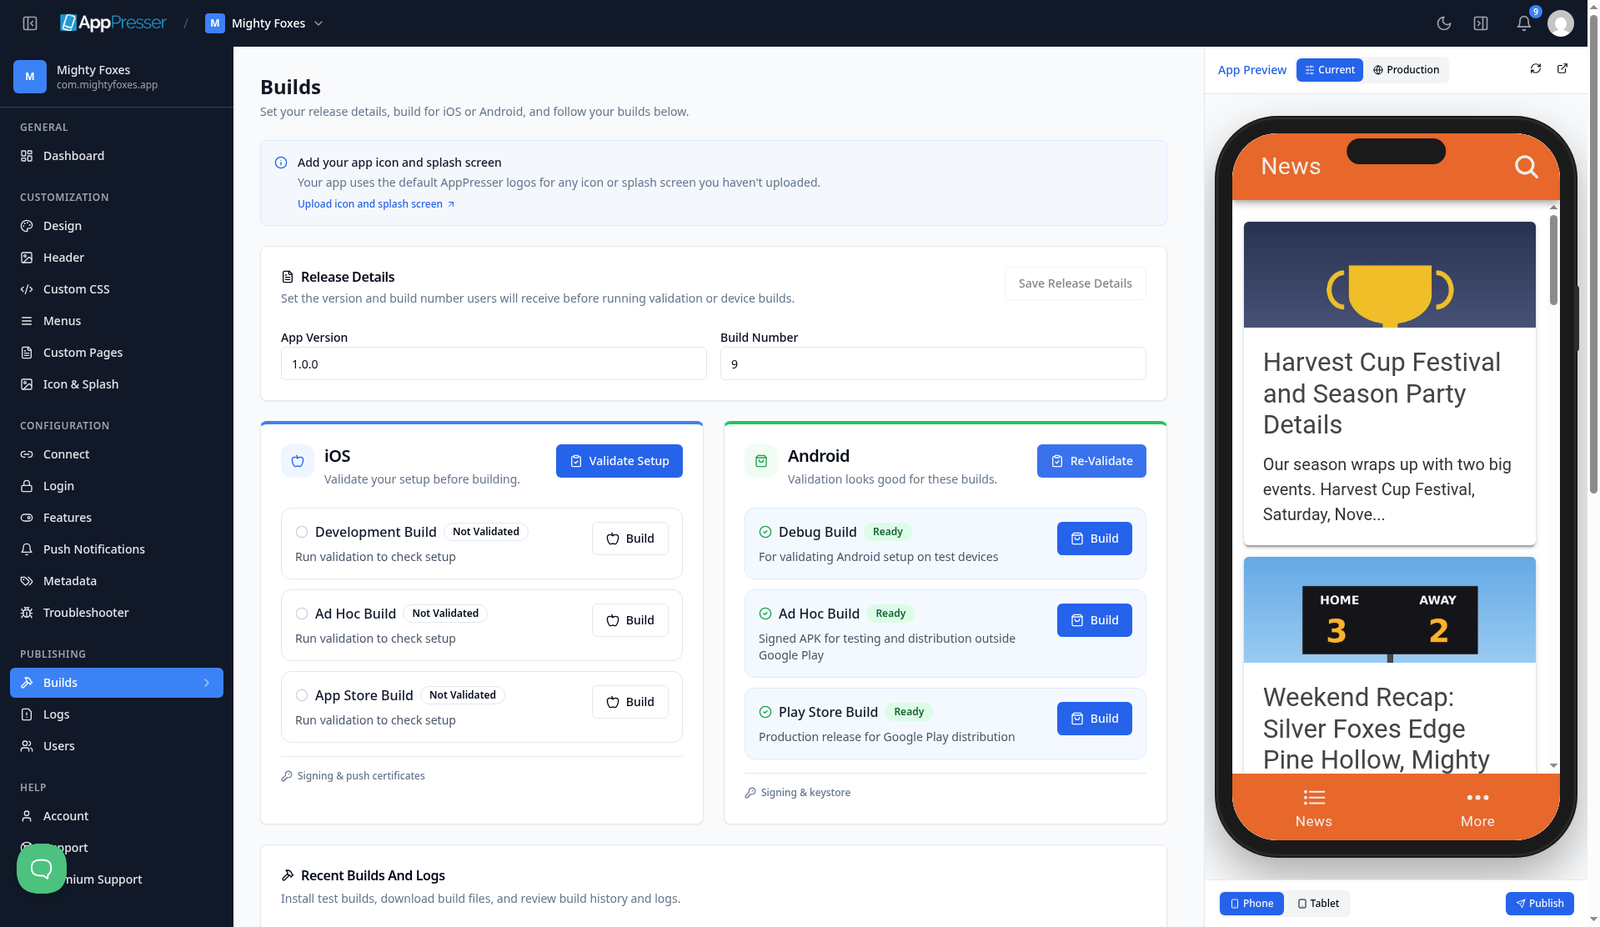
Step 11: Build again (this one uploads by itself)
Click Build on the Play Store Build row. The button shows Building and the page says Build started.
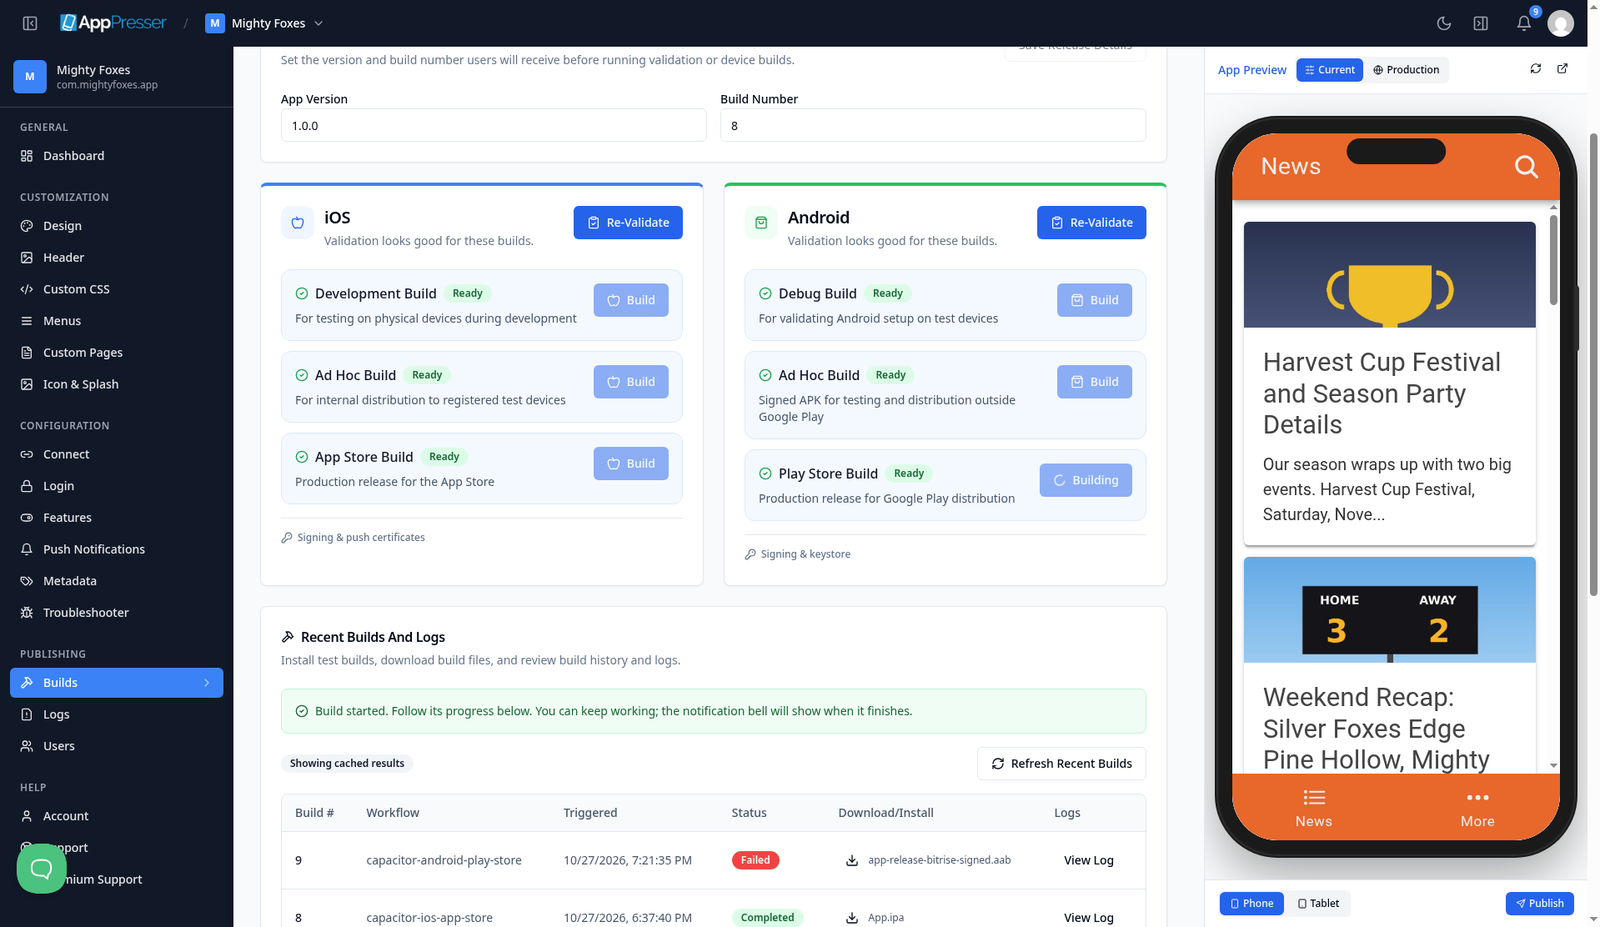
- Wait about 5 minutes. In Recent Builds And Logs, the new build shows Completed.
In Play Console, open Test and release > Testing > Internal testing. The new release shows Available to internal testers, with a higher version code than your first upload.
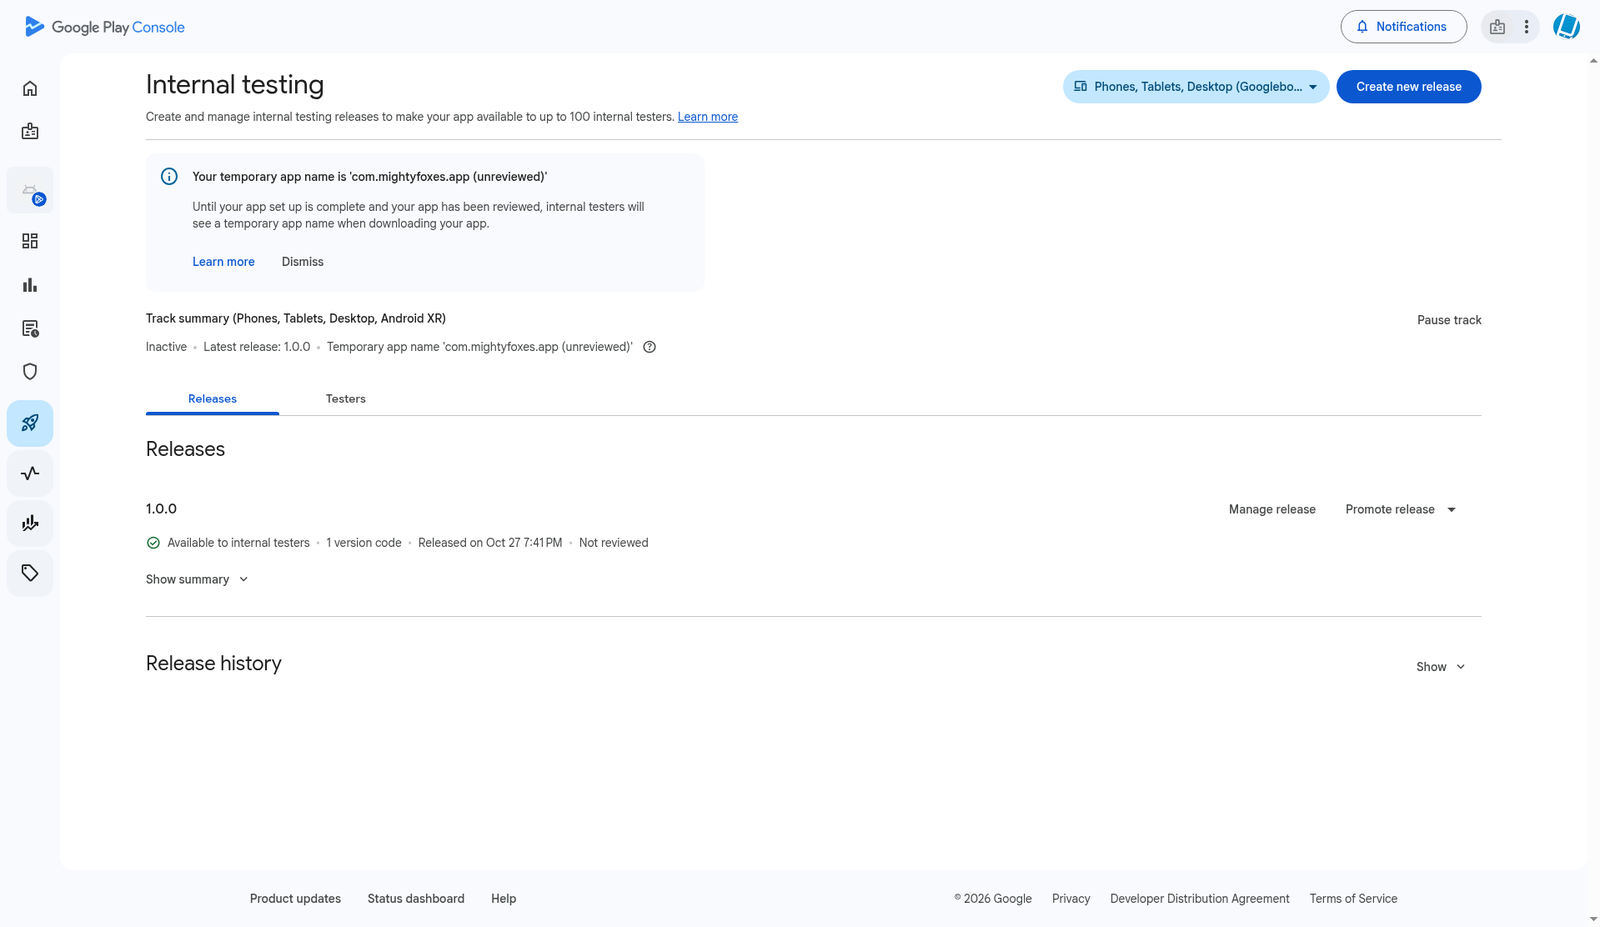
From now on, every Play Store build you run in AppPresser goes to Internal testing by itself. Remember to raise the App Version in Release Details when you release something new to your users.
Step 12: Add your testers
Testers need an Android phone or tablet and a Google account.
- In Play Console, open Test and release > Testing > Internal testing and click the Testers tab.
- Click Create email list. Give it a name (for example "Team"), add your testers' Google account emails (up to 100) and click Save changes.
- Make sure your new list is checked, then click Save.
- Under How testers join your test, click Copy link and send that link to your testers.
- Each tester opens the link on their Android device while signed in with the email you added, taps Accept, then installs the app from Google Play.
What if something goes wrong?
Swipe sideways to see the rest of this table.
| What you see | Why it happens | What to do |
|---|---|---|
| Your first Play Store build shows Failed. The log mentions JSONKeyPath: required variable is not present | AppPresser made your .aab but couldn't send it to Google Play, because no Google Play key is uploaded yet. This is expected on the very first build | Download the .aab from Recent Builds (Step 4), upload it by hand (Step 5), then make and upload the key (Steps 6 to 9) and build again |
| A Play Store build fails at the Google Play upload with Package not found (followed by your package name) | Google doesn't know your app yet. Either nothing was ever uploaded by hand, or the package name in Play Console doesn't match AppPresser | Do the first upload by hand (Steps 3 to 5). Check that the package name in Play Console matches the Bundle ID in AppPresser Metadata exactly |
| Play Console rejects your Release notes | The language tags (for example <en-US> and </en-US> ) are on the same line as your text | Put the opening tag, your notes and the closing tag on three separate lines (Step 5) |
| The upload fails with a permission message such as The caller does not have permission, right after you invited the service account | Google can take a while to apply new Play Console permissions, or the service account is missing an app permission | Wait (it can take up to a day) and build again. Check Step 8: the service account must have Release apps to testing tracks for this app, and its email must match the JSON key you uploaded |
| A Play Store build fails at the upload with a version code that has already been used | Google needs a higher version code for every upload | Build again so AppPresser uses a new number, and don't re-upload an old .aab |
| The Play Store Build row says Not Validated | You haven't validated since your last change or build | Click Validate Setup (or Re-Validate) on the Android card and wait for Ready before you click Build |
| Validation asks you to set up signing, or a keystore error shows | The keystore is missing | Open Signing & keystore. For a new app, let AppPresser make one. If your app is already on Google Play, use I have a keystore and upload the one you used before |
You're done when your testers can install your app from Google Play.
Next step
Turn on push notifications and send a message
Related articles
האם זה עזר?
התוצאות מתעדכנות תוך כדי הקלדה. הקישו על לוכסן (/) כדי לעבור לחיפוש.
לא מצאתם?
צוות התמיכה שלנו יכול לעזור בהגדרה, בבנייה ובשאלות על החנויות.