
Show posts from any API (Custom Post List block)
Build Your App · Docs AppPresser
Show posts from any API (Custom Post List block)
This article has not been translated yet, so it is shown in English.
Your app journey: step 4 of 9, Add pages and features. New here? Read Start here: build your app with AppPresser first.
What you'll do: Show a list of posts in your app from almost any website, not only your WordPress website. You choose which parts of each post show, such as the title and the picture. No coding needed.
Words you'll see
- API: a way for one website or app to ask another website for information.
- API endpoint: the exact web address you open to get one list, such as a list of events.
- JSON: the plain text a website sends back from that address. It holds the list and every post in it.
Before you start
- Find the web address of your list (its API endpoint). Ask the person who runs that website if you are not sure. It must start with https://. For example, a WordPress events list is https://yoursite.com/wp-json/wp/v2/tribe_events?_embed. Put your own website address in place of yoursite.com.
Careful: The endpoint must be public, which means anyone can open it without logging in. The block can't log in for you. Never put a password or a private key (a secret code some websites give you) in the address.
When to use it
- Use the Show your WordPress posts (WordPress Post List block) to show posts from your own WordPress website.
- Use Custom Post List when your list comes from somewhere else, or when you want to choose exactly which values show.
Step 1: Add the block
- In the left menu, under Customization, click Custom Pages.
- Click the name of the page you want to change. To make a new page instead, click Add New Page, type a title, keep Page Builder selected and click Create Page.
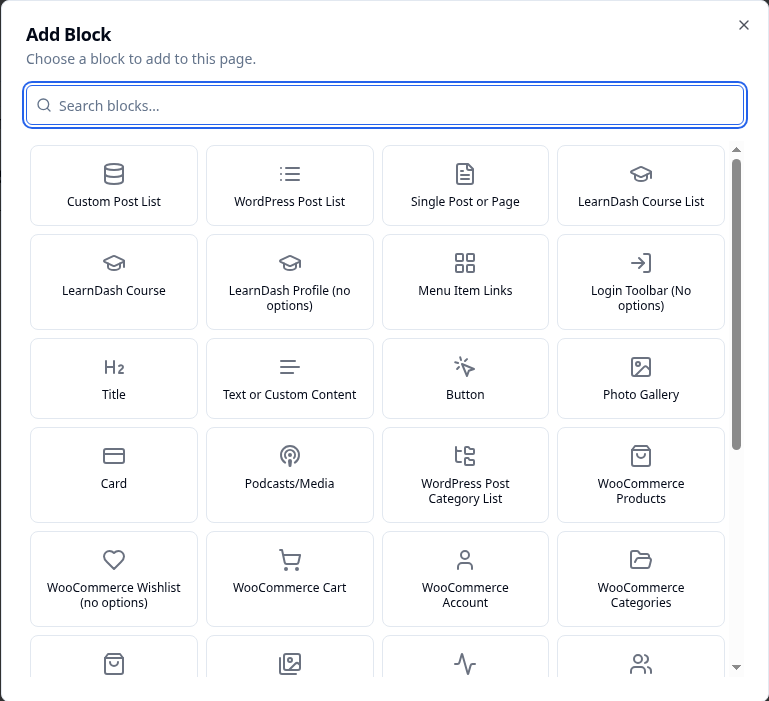
- Below the last block on the page, click Add Block.
- Click Custom Post List. It is the first block in the Add Block window.
Step 2: Connect your data
- Under 1. Connect your data, paste your address into API endpoint.
- Click Load sample. The button says Loading… for a moment.
- Under Which list contains your posts?, choose the list that holds your posts. For many endpoints the only choice is The whole response, followed by the number of items.
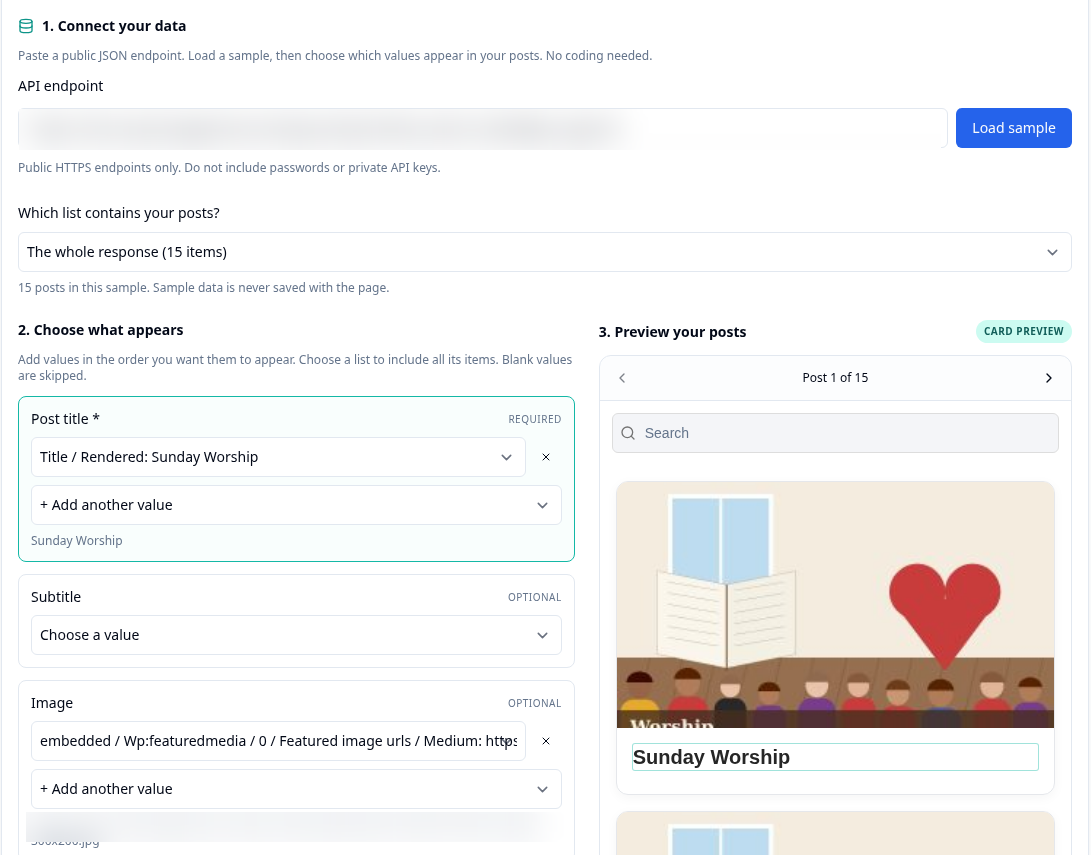
The sample only helps you set up the block. As the block says, "Sample data is never saved with the page."
Tip: Want to see how it works first? Before you paste an address, click Try an example.
Step 3: Choose what appears
Under 2. Choose what appears, pick a value for each part of a post. Each box lists the values found in your sample, with an example next to each one. The names can look technical. Look at the example next to each one and pick the one that looks right.
- In Post title *, click Choose a value and pick the title. For a WordPress endpoint, pick Title / Rendered. This box must be filled in.
- In Image, pick the picture address. For a WordPress endpoint with ?_embed, pick embedded / Wp:featuredmedia / 0 / Featured image urls / Medium.
- If you want, fill in Subtitle, Content, Date, Post ID and Link the same way. For example, pick Excerpt / Rendered for Content.
- To show two values together, such as an author and a date in the subtitle, click + Add another value. Values show in the order you add them. Empty values are skipped.
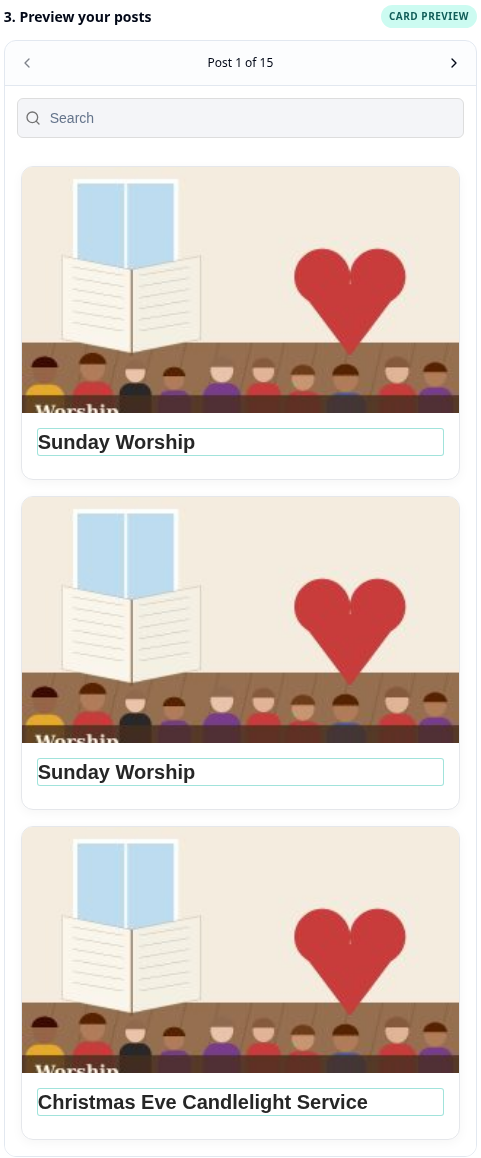
As you choose, 3. Preview your posts shows up to three sample cards with your title and picture. Use the arrows to step through the sample posts. Click a value on a card to see which box it comes from.
Step 4: Choose the list settings
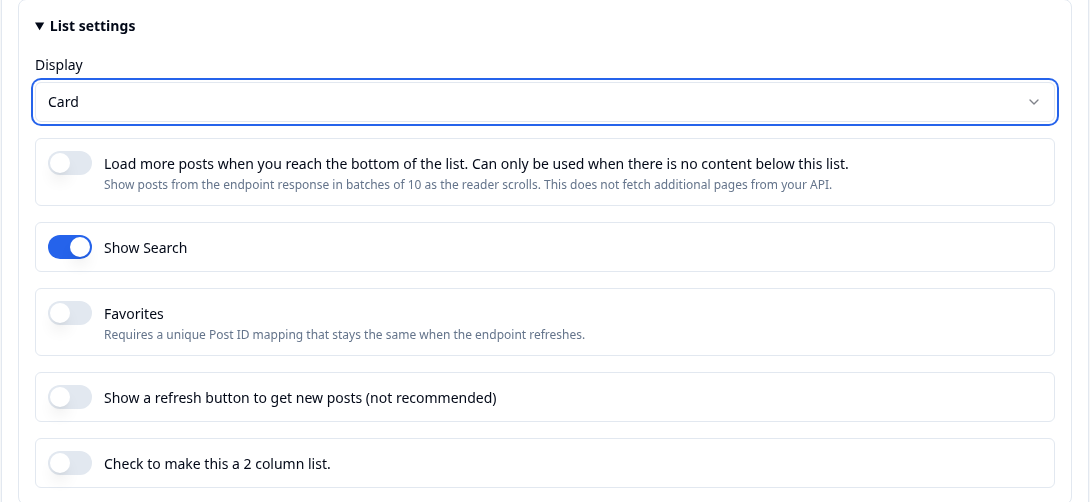
- Click List settings to open it.
Choose the settings you want. See the table below.
- Click Save Changes at the top of the editor. The block says "Your mapping is saved. Load a fresh sample to preview it."
Swipe sideways to see the rest of this table.
| Setting | What it does |
|---|---|
| API endpoint | The public web address of your list. It starts with https://. |
| Load sample | Loads a few sample posts from the address so you can choose what shows. |
| Which list contains your posts? | The list, in what the address sends back, that holds your posts. |
| Post title * | The post's title. Required. |
| Subtitle | A short line under the title. Optional. |
| Image | The address of the post's picture. Optional. |
| Content | The post's text. Optional. |
| Date | The post's date. Optional. |
| Post ID | A number or code that is unique for each post. Optional. Needed for Favorites. |
| Link | The web address of the full post. Optional. |
| Display | How each post looks: Card or List. It starts on Card. |
| Load more posts when you reach the bottom of the list. Can only be used when there is no content below this list. | "Show posts from the endpoint response in batches of 10 as the reader scrolls. This does not fetch additional pages from your API." Off at the start. |
| Show Search | Adds a search box to the list. On at the start. |
| Favorites | Lets people save posts. "Requires a unique Post ID mapping that stays the same when the endpoint refreshes." Off at the start. |
| Show a refresh button to get new posts (not recommended) | Adds a refresh button. Off at the start. |
| Check to make this a 2 column list. | Shows two posts in each row. Off at the start. |
See it in your app
The sample cards show in the editor right away. Colors and fonts in your app may look a little different.
- Add the page to a menu. See Add a page to your app menu.
- Open the page in the App Preview. See Preview your app (App Preview).
You're done when the sample cards show your titles and pictures, and the page shows your list in the App Preview.
Next step
Show your post categories (WordPress Post Category List block)
Related articles
Le è stato utile?
I risultati si aggiornano mentre digita. Premere barra per andare alla ricerca.
Non lo trova?
Il nostro team di supporto può aiutarLa con configurazione, build e domande sugli store.