
Set up login (Login)
Build Your App · AppPresser 文档
Set up login (Login)
本文尚未翻译,因此以英文显示。
Your app journey: step 3 of 9, Connect and set up. New here? Read Start here: build your app with AppPresser first.
What you'll do: Decide if people can log in to your app, if they must log in and if they can sign up. You can also let them sign in with Apple or Google. People log in with their account from your WordPress website.
Before you start
- Connect your WordPress website and install the JWT Authentication for WP REST API plugin. See Connect your WordPress site and turn on Features.
- For Apple and Google sign-on, you need the Advanced plan. See Get your AppPresser account.
Choose who can log in
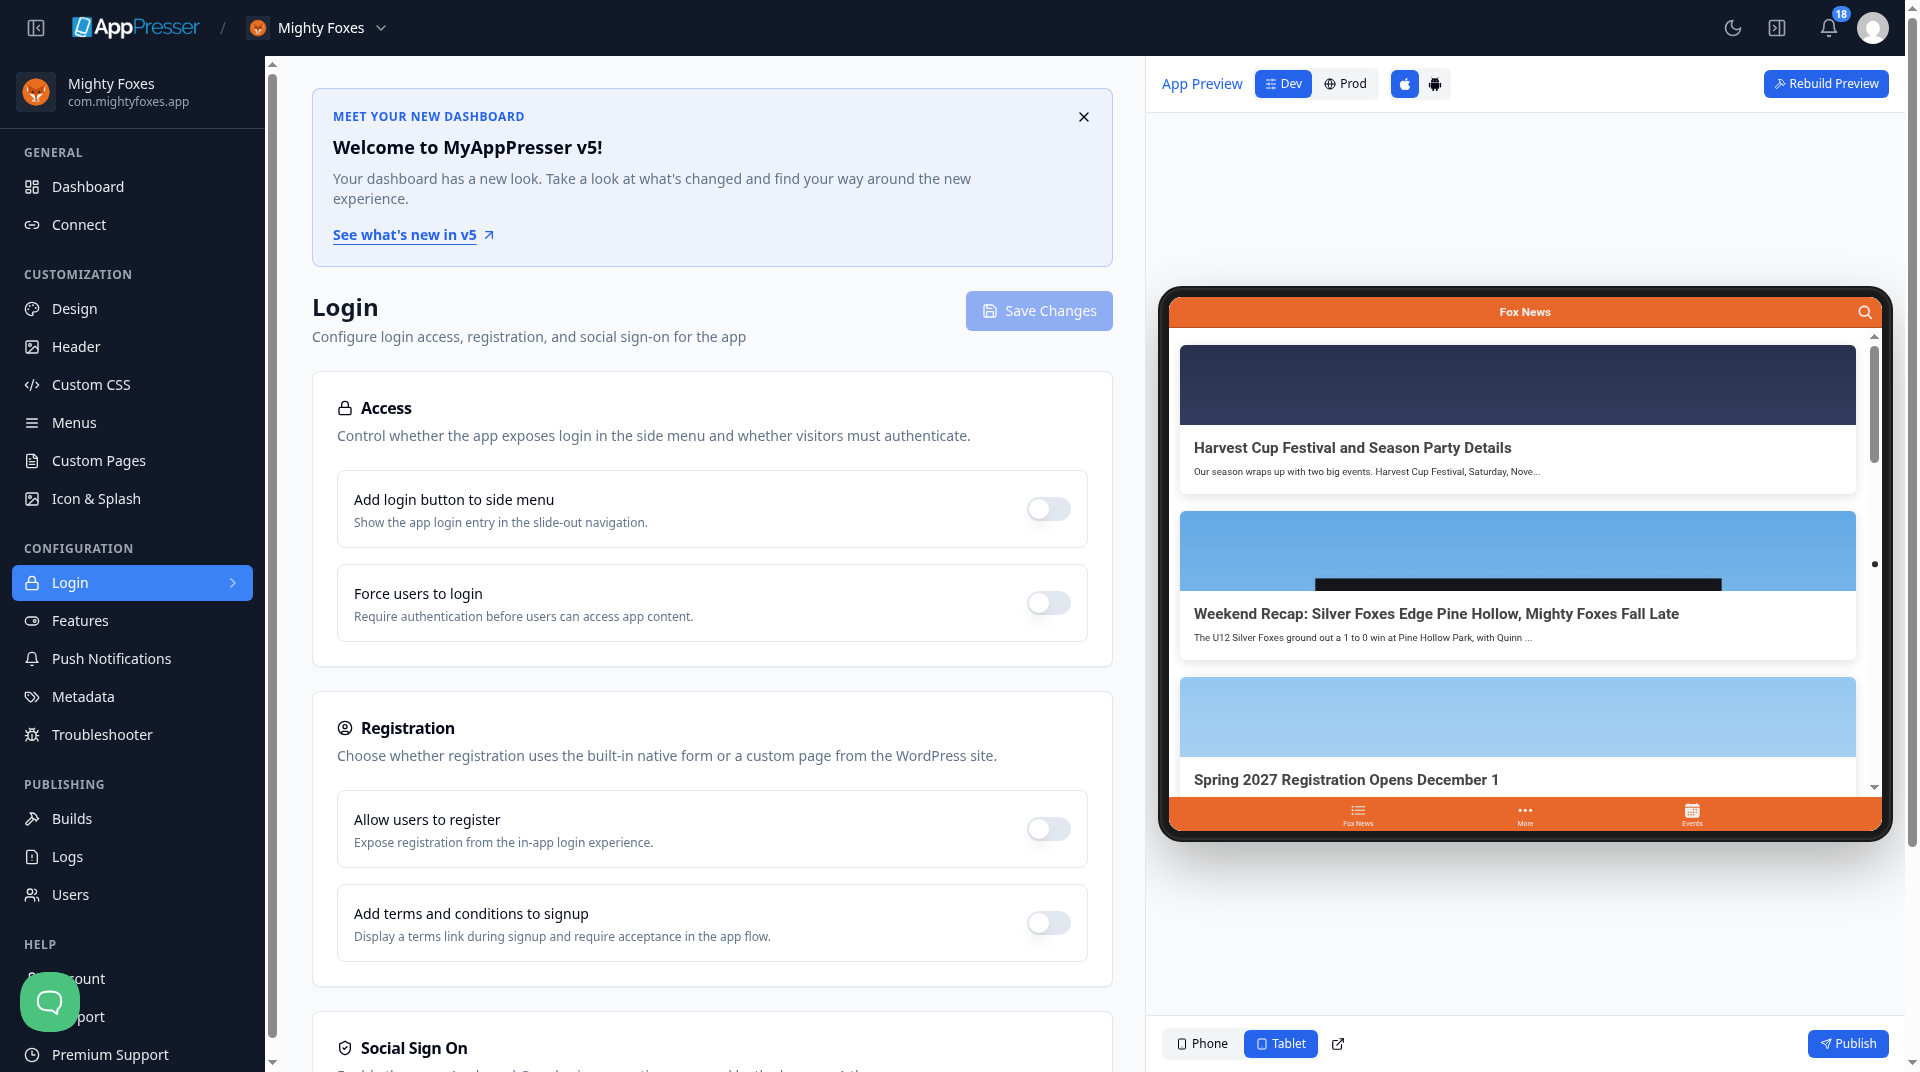
- In the left menu, under Configuration, click Login.
- Under Access, turn on Add login button to side menu. This puts a login link in the side menu of your app.
- Turn on Force users to login only if people must log in before they see anything in your app.
Let people sign up
- Under Registration, turn on Allow users to register. People can then make an account from the app's login screen.
- If people must agree to your terms before they sign up, turn on Add terms and conditions to signup. A link to your terms shows during sign-up.
Add Apple and Google sign-on
- Under Social Sign On, turn on Enable Apple Sign On to let people log in with their Apple account.
- Turn on Enable Google Sign On to let people log in with their Google account. Google sign-on uses Firebase, Google's service for apps.
- Click Save Changes at the top right.
Tip: To show a login bar on one page instead, add the Add a login bar (Login Toolbar block).
You're done when your switches are set and Save Changes is gray again.
Next step
Add your app details (Metadata)
Related articles
这篇文章对您有帮助吗?
输入时结果会实时更新。按斜杠键(/)可跳转到搜索。
没有找到?
我们的支持团队可协助解决设置、构建和应用商店相关问题。