
Set up your menus and bottom tabs (Menus)
Build Your App · AppPresser Docs
Set up your menus and bottom tabs (Menus)
ఈ వ్యాసం ఇంకా అనువదించబడలేదు, కాబట్టి ఇది ఇంగ్లీష్లో చూపబడుతోంది.
Your app journey: step 3 of 9, Connect and set up. New here? Read Start here: build your app with AppPresser first.
What you'll do: Choose your app's side menu, bottom tabs and extra links menu, and decide what each one shows. Menus help people move around your app.
Before you start
- Open your app in the builder. See Get to know the app builder.
- Make the pages you want in your menus. See Build app pages with blocks (Custom Pages).
Choose which menu goes where
- In the left menu, under Customization, click Menus.
- Under App Menu Assignments, choose a menu for each place:
- Side Menu: the menu that slides in from the side.
- Bottom Tabs: the tabs along the bottom of your app.
- Auxiliary Menu: an extra menu of links.
- Under Menu Behavior, turn options on or off, such as Show app menu on all pages, Right side menu and Show tab menu on every page.
- Click Save Assignments.
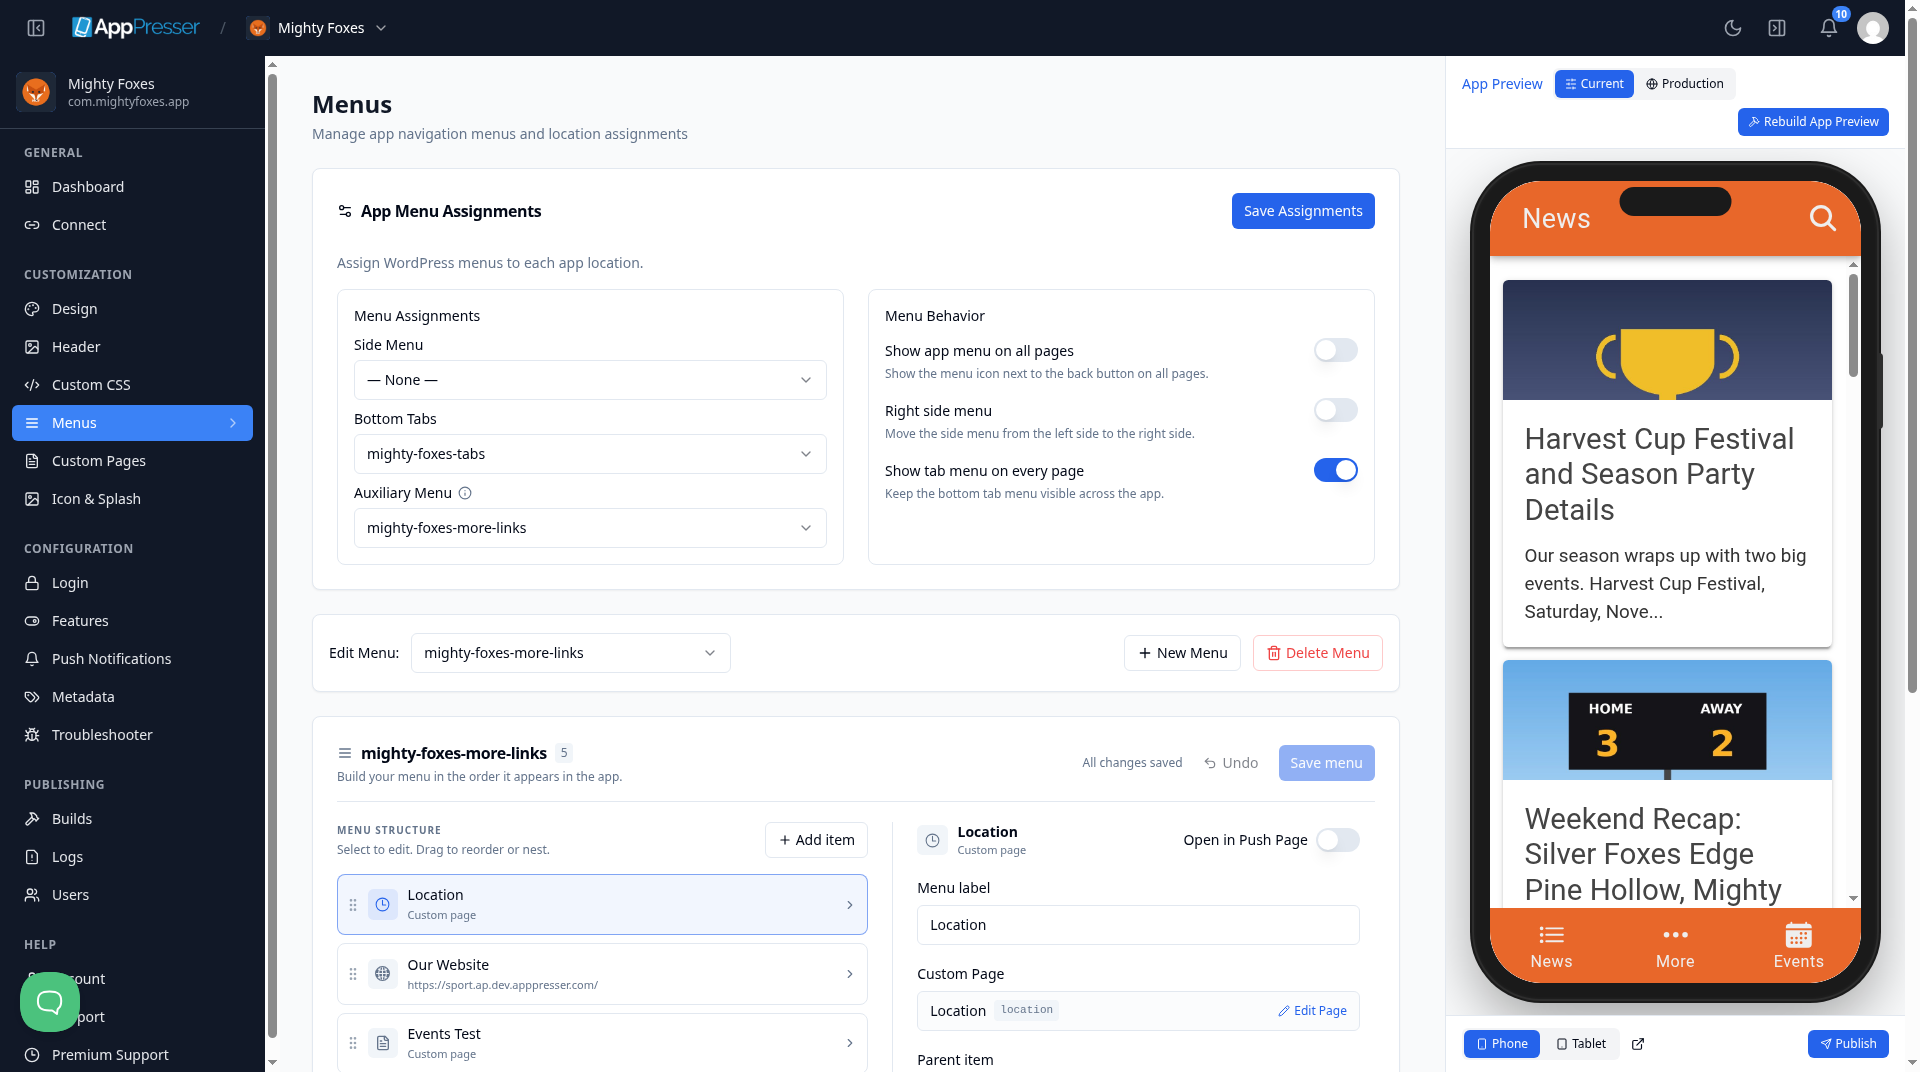
Change a menu
- Next to Edit Menu, choose the menu you want to change.
- To add a link, click Add item.
- Click an item to change it. For example, change its Menu label, the words people see.
- To change the order, drag an item up or down. Drag it right to put it under the item above.
- Click Save menu.
To make a new menu, click New Menu.
Tip: You can also add a page to a menu from the page itself. See Add a page to your app menu.
You're done when your menus show the right items in the App Preview.
Next step
Add your app icon and splash screen (Icon & Splash)
Related articles
ఇది సహాయకరంగా ఉందా?
టైప్ చేస్తూనే ఫలితాలు అప్డేట్ అవుతాయి. శోధనకు వెళ్లడానికి స్లాష్ నొక్కండి.
కనుగొనలేకపోయారా?
మా సపోర్ట్ టీమ్ సెటప్, బిల్డ్లు మరియు app store ప్రశ్నలలో సహాయపడగలదు.