
Set up your menus and bottom tabs (Menus)
Build Your App · AppPresser डॉक्युमेंटेशन
Set up your menus and bottom tabs (Menus)
हा लेख अद्याप भाषांतरित झालेला नाही, त्यामुळे तो इंग्रजीत दाखवला आहे.
Your app journey: step 3 of 9, Connect and set up. New here? Read Start here: build your app with AppPresser first.
What you'll do: Choose your app's side menu, bottom tabs and extra links menu, and decide what each one shows. Menus help people move around your app.
Before you start
- Open your app in the builder. See Get to know the app builder.
- Make the pages you want in your menus. See Build app pages with blocks (Custom Pages).
Choose which menu goes where
- In the left menu, under Customization, click Menus.
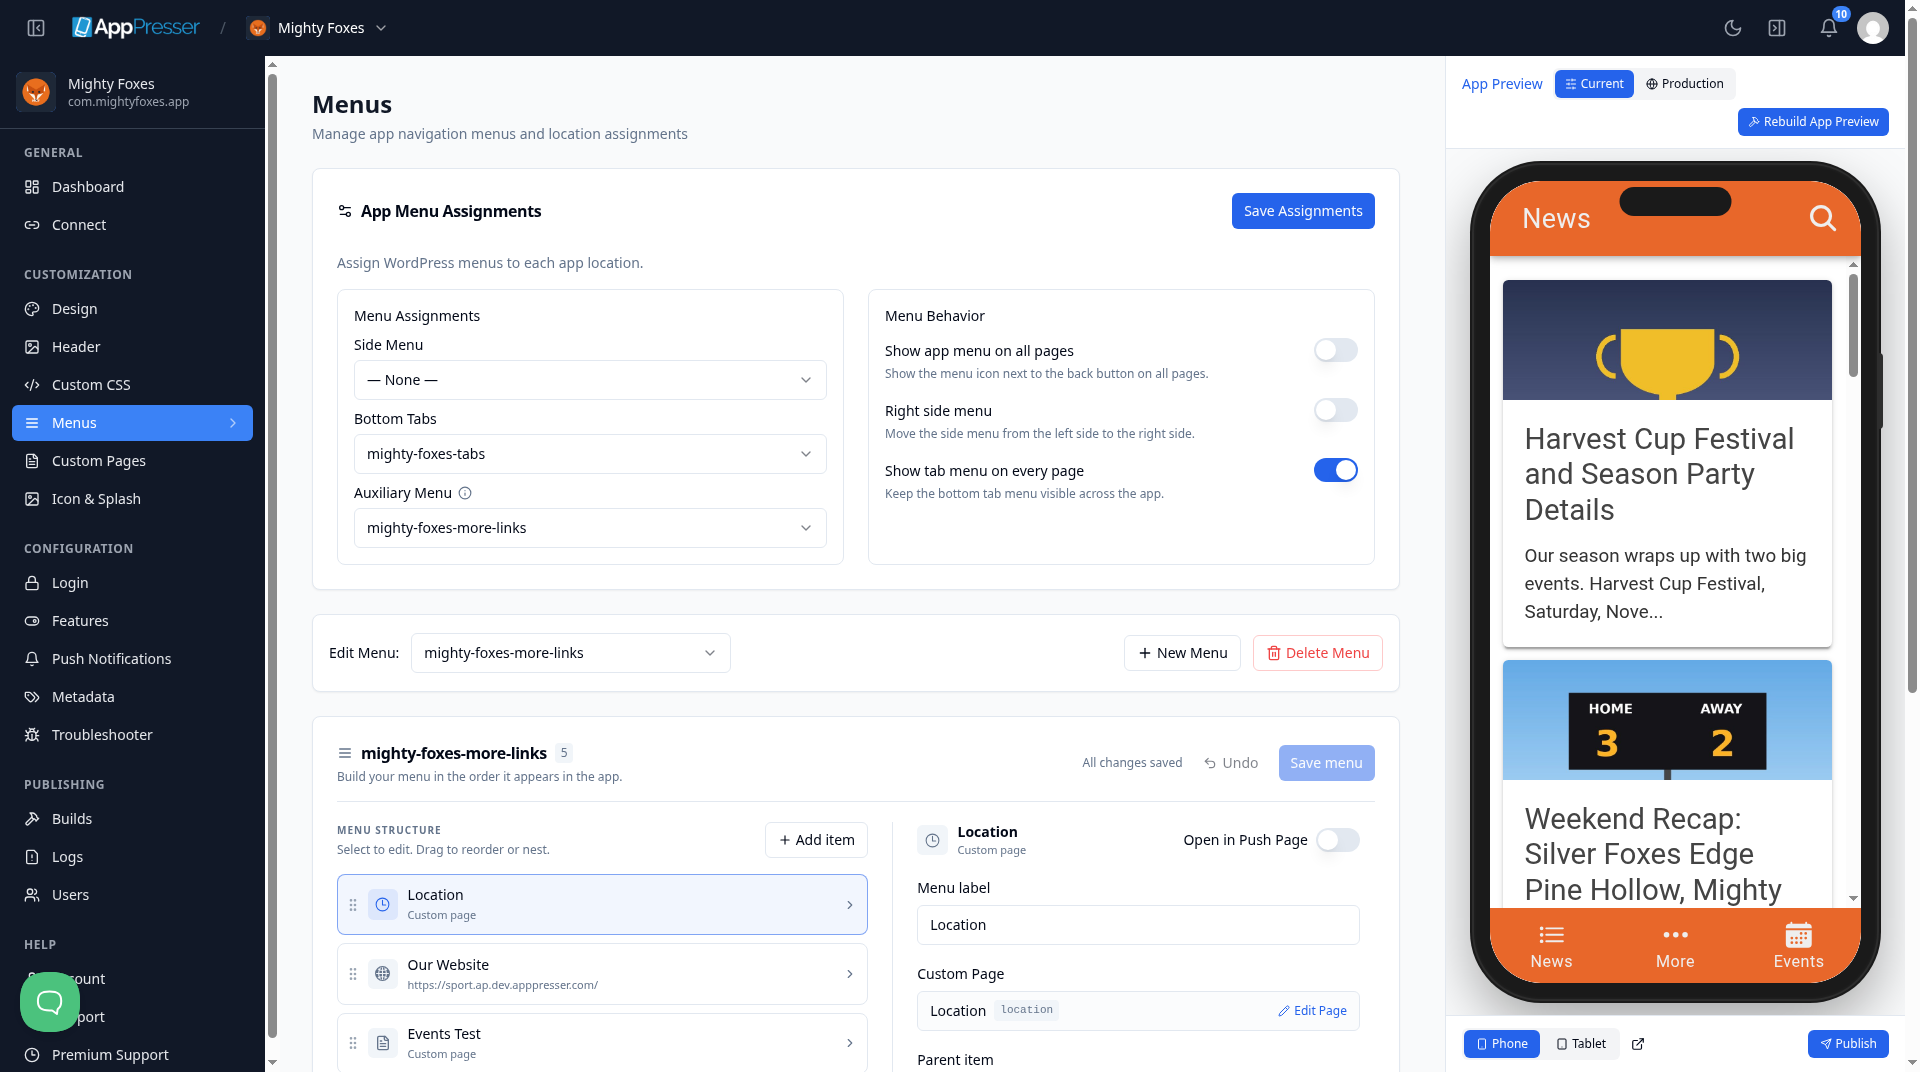
- Under App Menu Assignments, choose a menu for each place:
- Side Menu: the menu that slides in from the side.
- Bottom Tabs: the tabs along the bottom of your app.
- Auxiliary Menu: an extra menu of links.
- Under Menu Behavior, turn options on or off, such as Show app menu on all pages, Right side menu and Show tab menu on every page.
- Click Save Assignments.
Change a menu
- Next to Edit Menu, choose the menu you want to change.
- To add a link, click Add item.
- Click an item to change it. For example, change its Menu label, the words people see.
- To change the order, drag an item up or down. Drag it right to put it under the item above.
- Click Save menu.
To make a new menu, click New Menu.
Tip: You can also add a page to a menu from the page itself. See Add a page to your app menu.
You're done when your menus show the right items in the App Preview.
Next step
Add your app icon and splash screen (Icon & Splash)
Related articles
हे उपयुक्त होते का?
आपण टाइप करताच निकाल अपडेट होतात. शोधाकडे जाण्यासाठी स्लॅश दाबा.
सापडत नाही?
आमची सहाय्य टीम सेटअप, बिल्ड्स आणि app store विषयक प्रश्नांमध्ये मदत करू शकते.