
Add your app details (Metadata)
Build Your App · Документация AppPresser
Add your app details (Metadata)
Эта статья ещё не переведена, поэтому показана на английском.
Your app journey: step 3 of 9, Connect and set up. New here? Read Start here: build your app with AppPresser first.
What you'll do: Fill in your app's name, version, IDs and the details the app stores show. Do this before you publish your app.
Before you start
- Decide your app's name as you want it in the stores.
- Have two web addresses ready: your privacy policy page and a support page where people can get help.
Check your app identity
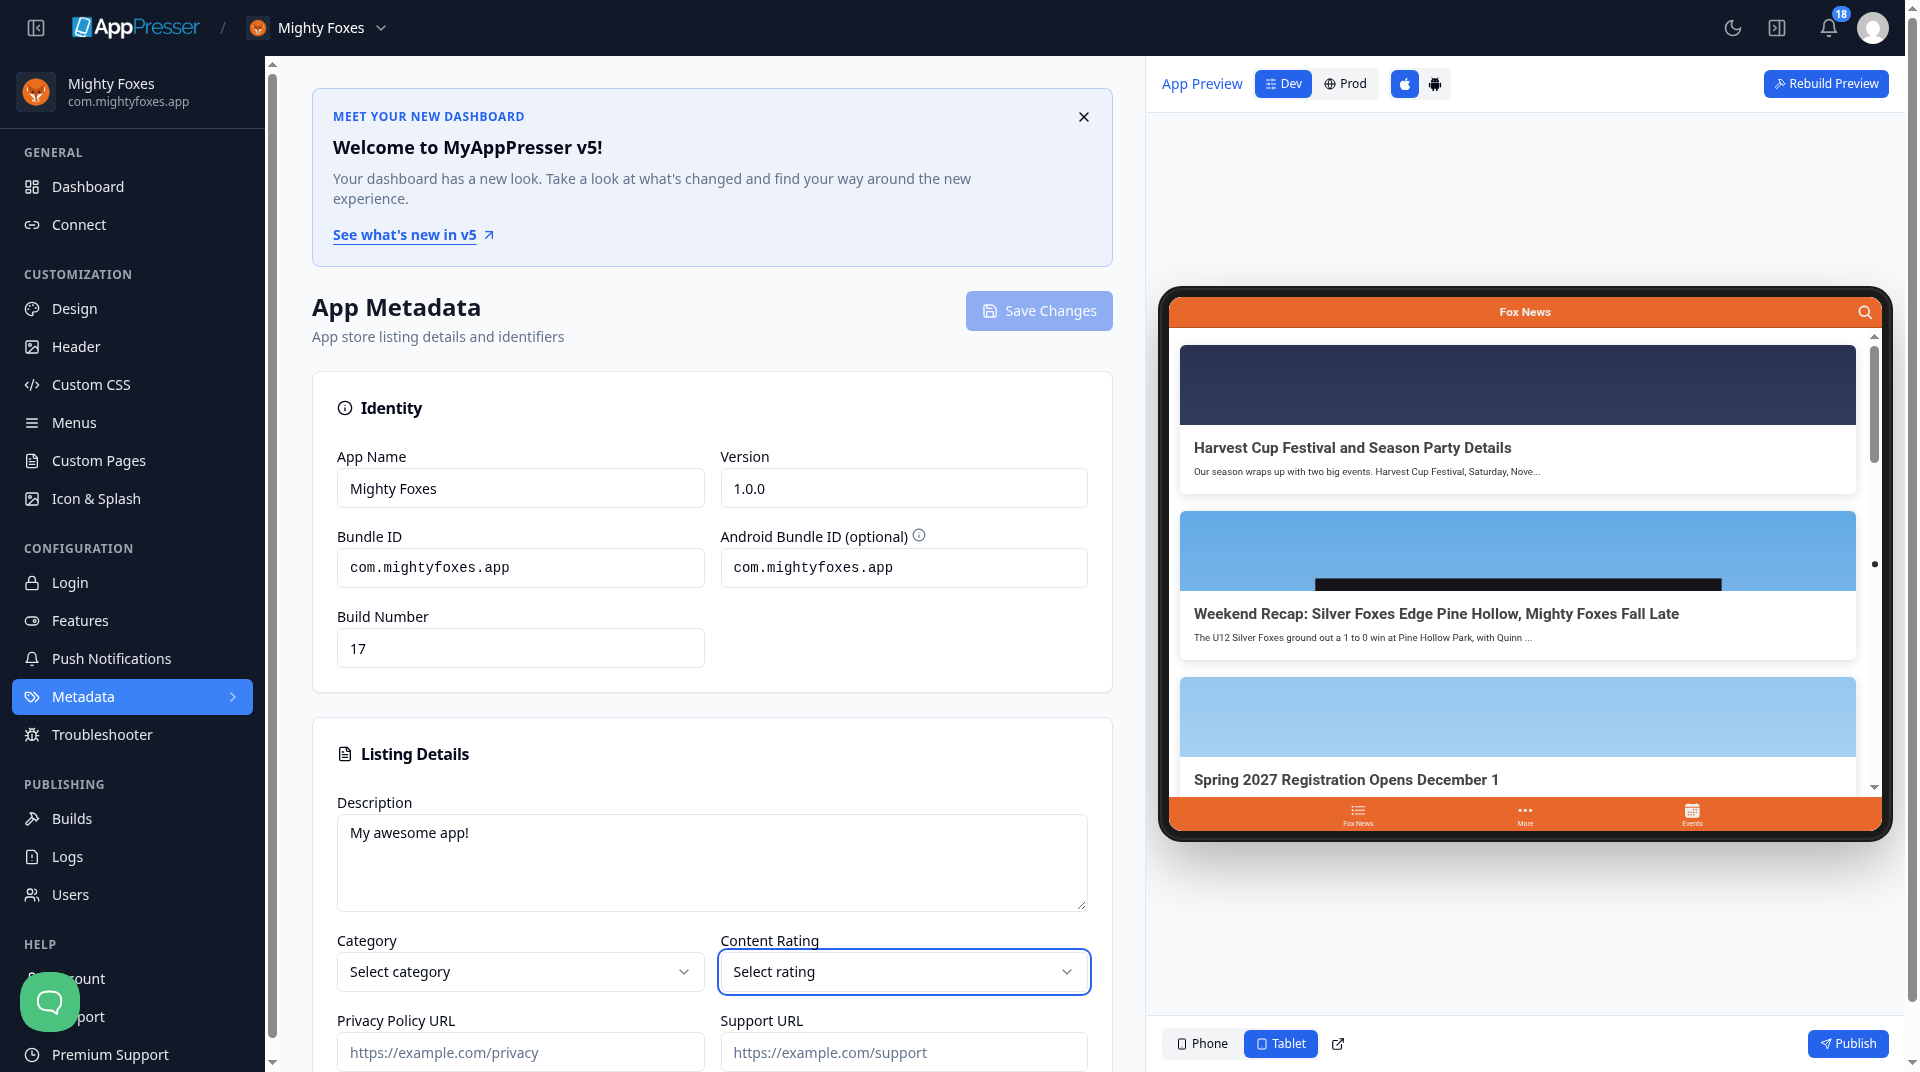
- In the left menu, under Configuration, click Metadata.
- Under Identity, check App Name. This is the name under your icon.
- Check Version and Build Number. The version is the number people see, like 1.0.0. The build number goes up by one each time you send a new build to the stores.
- Check Bundle ID. This is your app's unique name in the stores, like com.example.app. Your bundle ID is set when you create your app. Don't change it after your app is in a store.
- Fill in Android Bundle ID (optional) only if your Android app needs a different ID. Click the small i icon (About Android Bundle ID) next to it to learn more.
Add your store listing details
- Under Listing Details, type a short Description of your app.
- Choose a Category, for example News, Education or Lifestyle.
- Choose a Content Rating: 4+, 9+, 12+ or 17+. This is the youngest age your app is right for.
- Paste your Privacy Policy URL and your Support URL.
- Click Save Changes at the top right.
Tip: You can also set App Version and Build Number on the Builds screen, under Release Details. See Build your iOS and Android apps (Builds tab).
You're done when every field is filled in and Save Changes is gray again.
Next step
Add your own styles (Custom CSS)
Related articles
Это было полезно?
Результаты обновляются по мере ввода. Нажмите «/», чтобы перейти к поиску.
Не нашли ответ?
Наша служба поддержки поможет с настройкой, сборками и вопросами о магазинах приложений.