
Turn on push notifications and send a message
Publish and Grow · Dokumentacja AppPresser
Turn on push notifications and send a message
Ten artykuł nie został jeszcze przetłumaczony, dlatego jest wyświetlany po angielsku.
Your app journey: step 8 of 9, Grow your audience. New here? Read Start here: build your app with AppPresser first.
What you'll do: Set up push notifications, turn them on and send your first message. A push notification is a short message that pops up on people's phones, even when your app is closed.
Before you start
- Build your app and install it on a phone. Only people who have your app can get push notifications. See Build your iOS and Android apps (Builds tab).
- For Android, create a Firebase project for your app. Firebase is Google's app service.
- For iPhone (iOS), get a push certificate for your app, or let the AppPresser team make one (Step 2). A push certificate is a file from Apple that lets AppPresser send messages to iPhones. See Make your own iOS certificates and profiles (step by step).
The Push Notifications screen
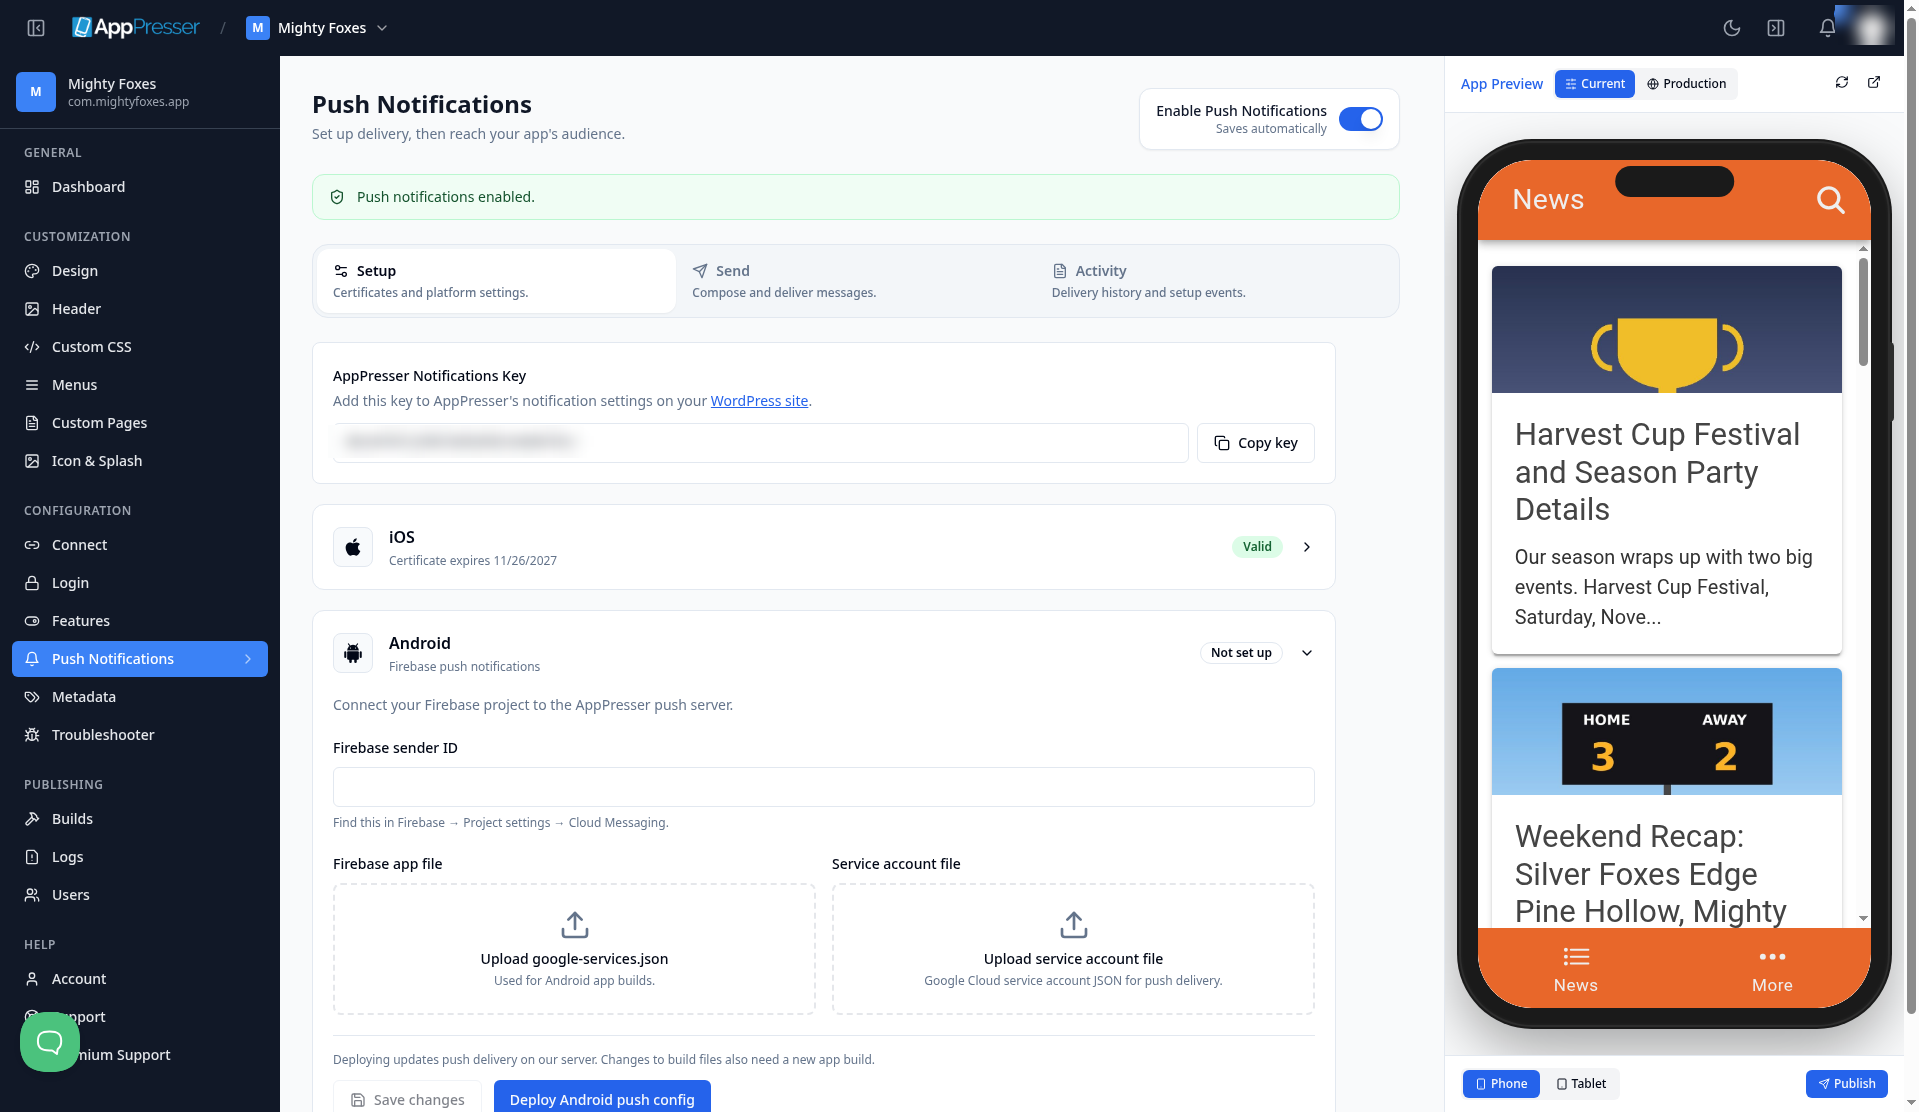
In the left menu, under Configuration, click Push Notifications. The screen has three tabs:
- Setup: certificates and platform settings.
- Send: write and send messages.
- Activity: a history of what was sent, and any errors.
Step 1: Link push to your WordPress website
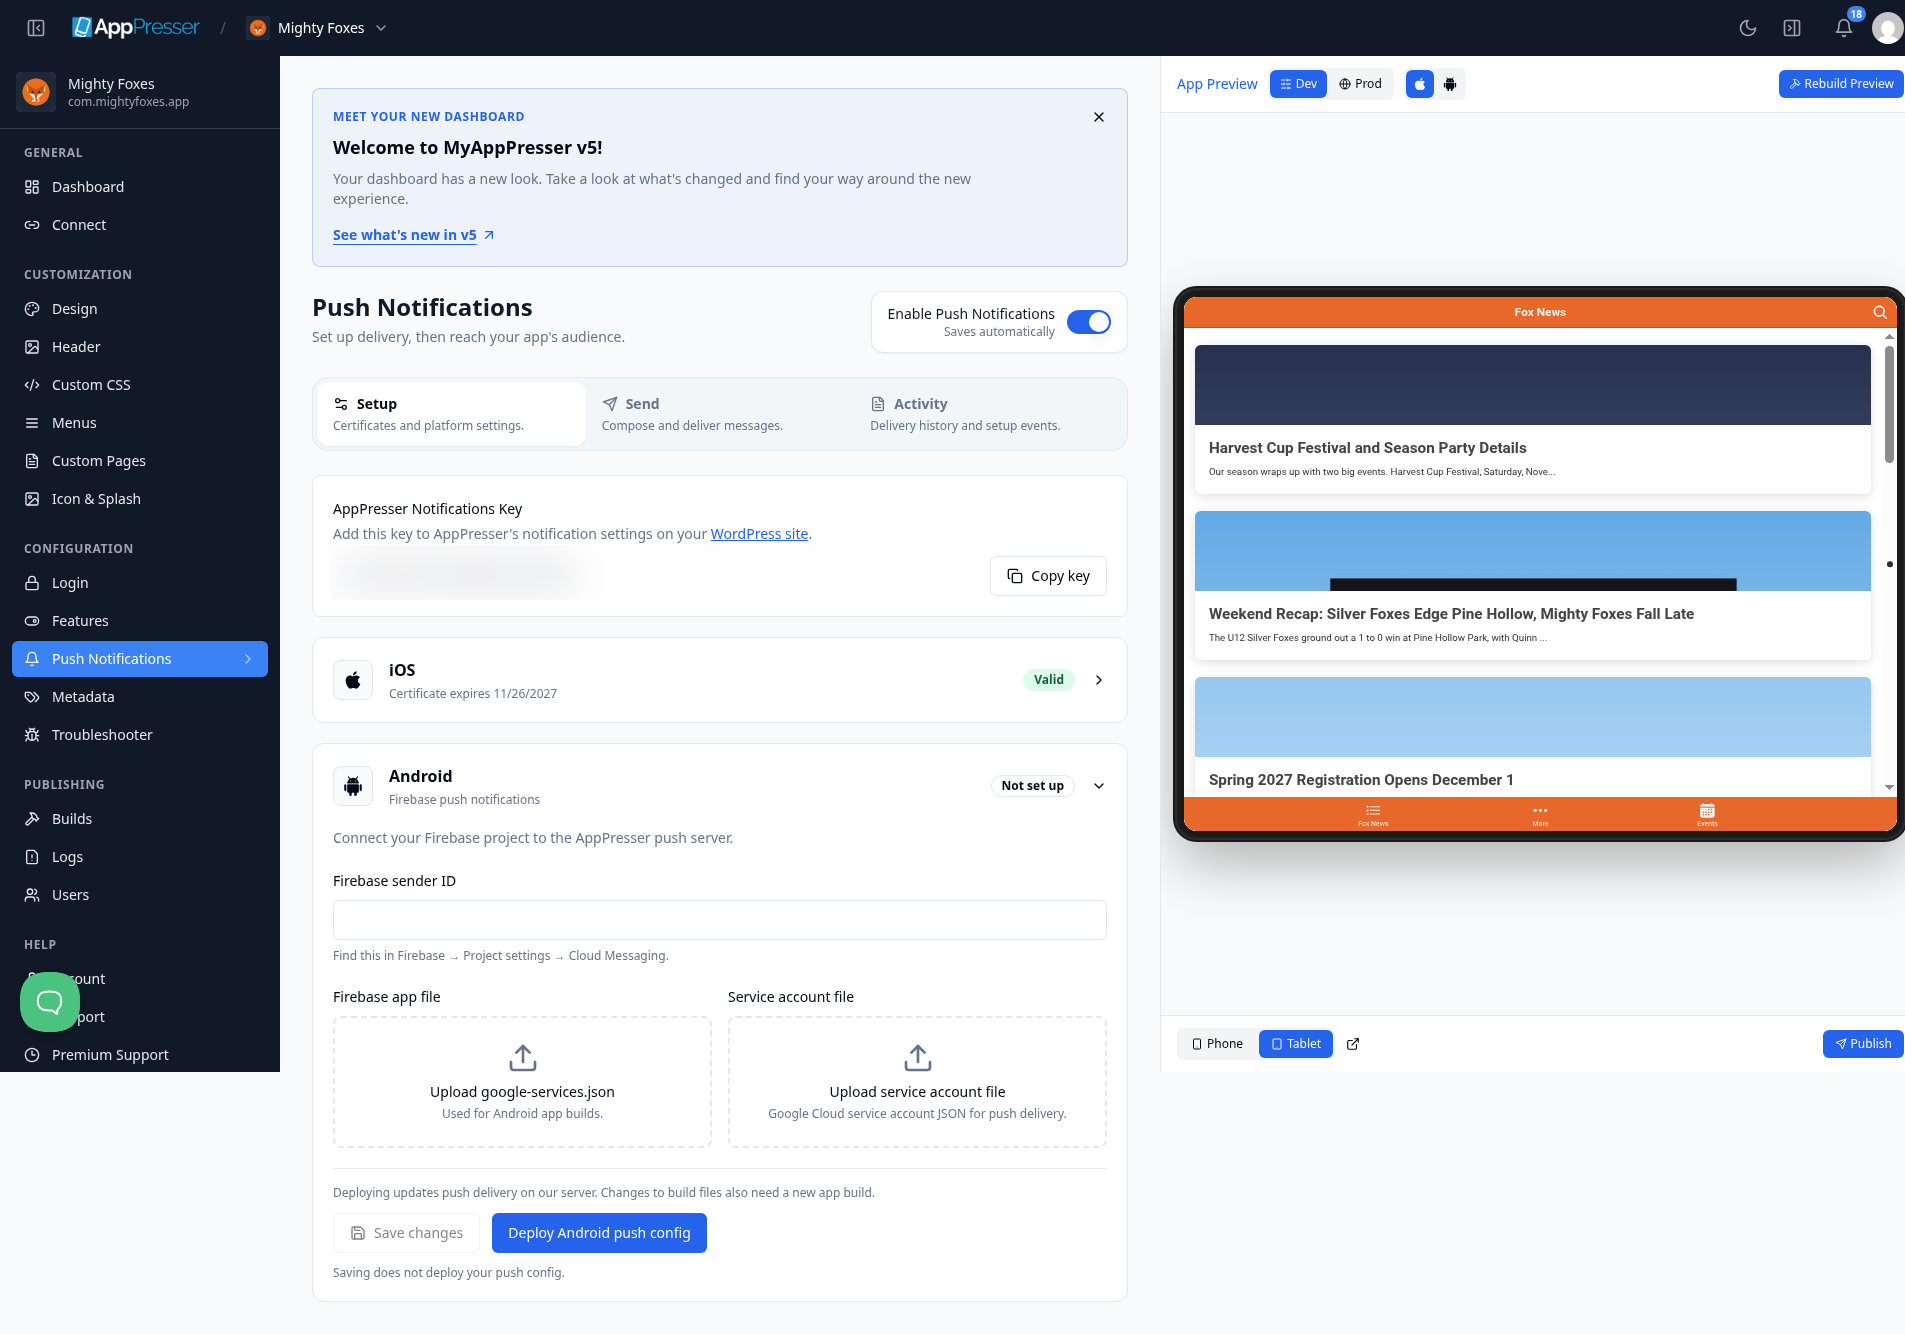
- Click the Setup tab.
- Under AppPresser Notifications Key, click Copy key.
- In your WordPress admin, open the AppPresser notification settings and paste the key there.
Step 2: Set up iPhone push
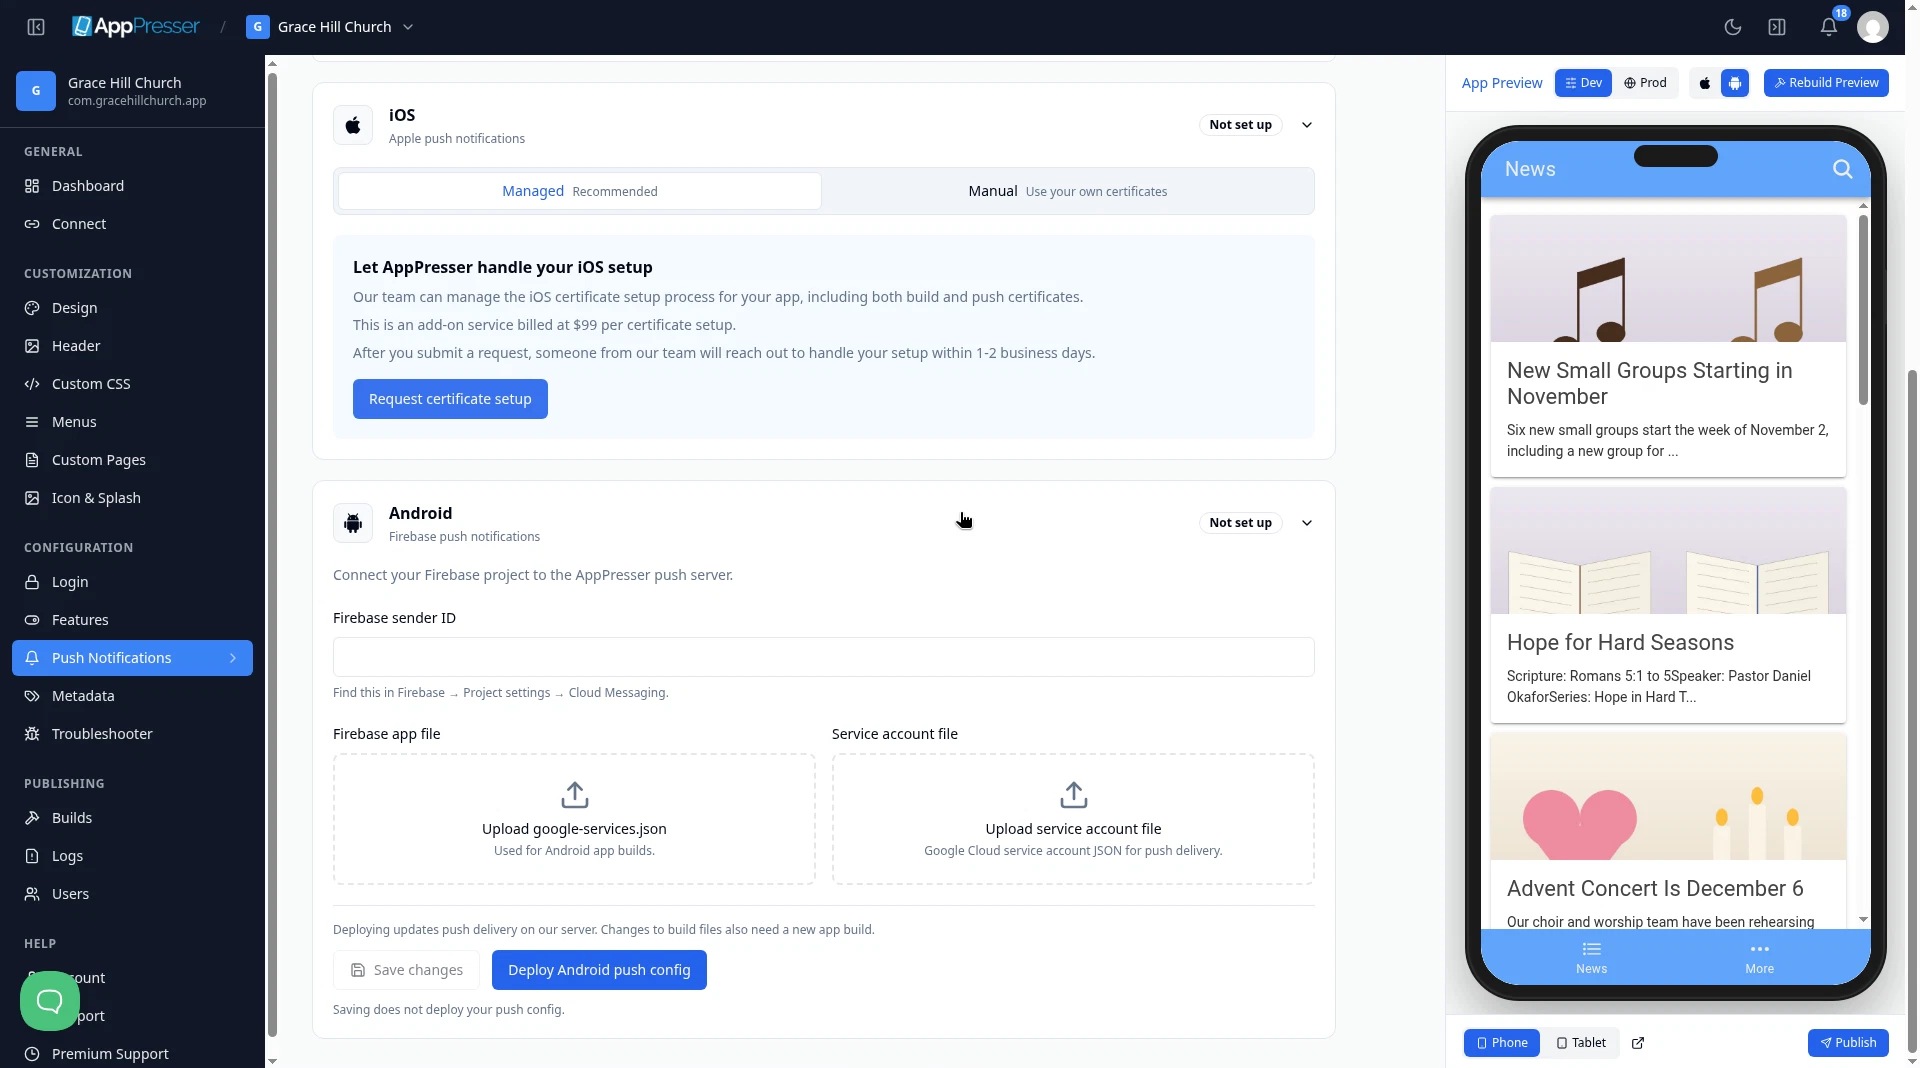
On the Setup tab, open the iOS card. Choose how to set it up:
- Managed (Recommended): the AppPresser team makes your iPhone certificates for you. Click Request certificate setup. This is an add-on service with a fee for each certificate setup, shown on the card. Someone from the team contacts you within 1 to 2 business days.
- Manual: use your own certificates.
If you choose Manual ("Use your own certificates"):
- Under Push certificate .p12, click Upload .p12 certificate and choose your push .p12 file.
- Under Provisioning profile .mobileprovision, click Upload provisioning profile and choose your .mobileprovision file.
- In Certificate password, type the password for your push .p12.
- Click Save changes.
- Click Deploy iOS push config. Saving does not deploy your push config.
Good to know: Changes to these build files also need a new app build.
Make your own iOS certificates and profiles (step by step) shows each screen.
Step 3: Set up Android push
Android push uses Firebase, Google's app service. You need a Firebase project for your app.
- On the Setup tab, click the Android card to open it.
- In Firebase sender ID, paste your sender ID. You find it in Firebase under Project settings, then Cloud Messaging.
- Under Firebase app file, click Upload google-services.json and choose that file from Firebase.
- Under Service account file, click Upload service account file and choose your Google Cloud service account file (a .json file).
- Click Save changes.
- Click Deploy Android push config. Saving alone does not turn on your Android settings. Deploying does.
Careful: If you upload a new google-services.json file, make a new Android build too. See Build your iOS and Android apps (Builds tab).
Step 4: Turn push notifications on
At the top right, find the Enable Push Notifications switch.
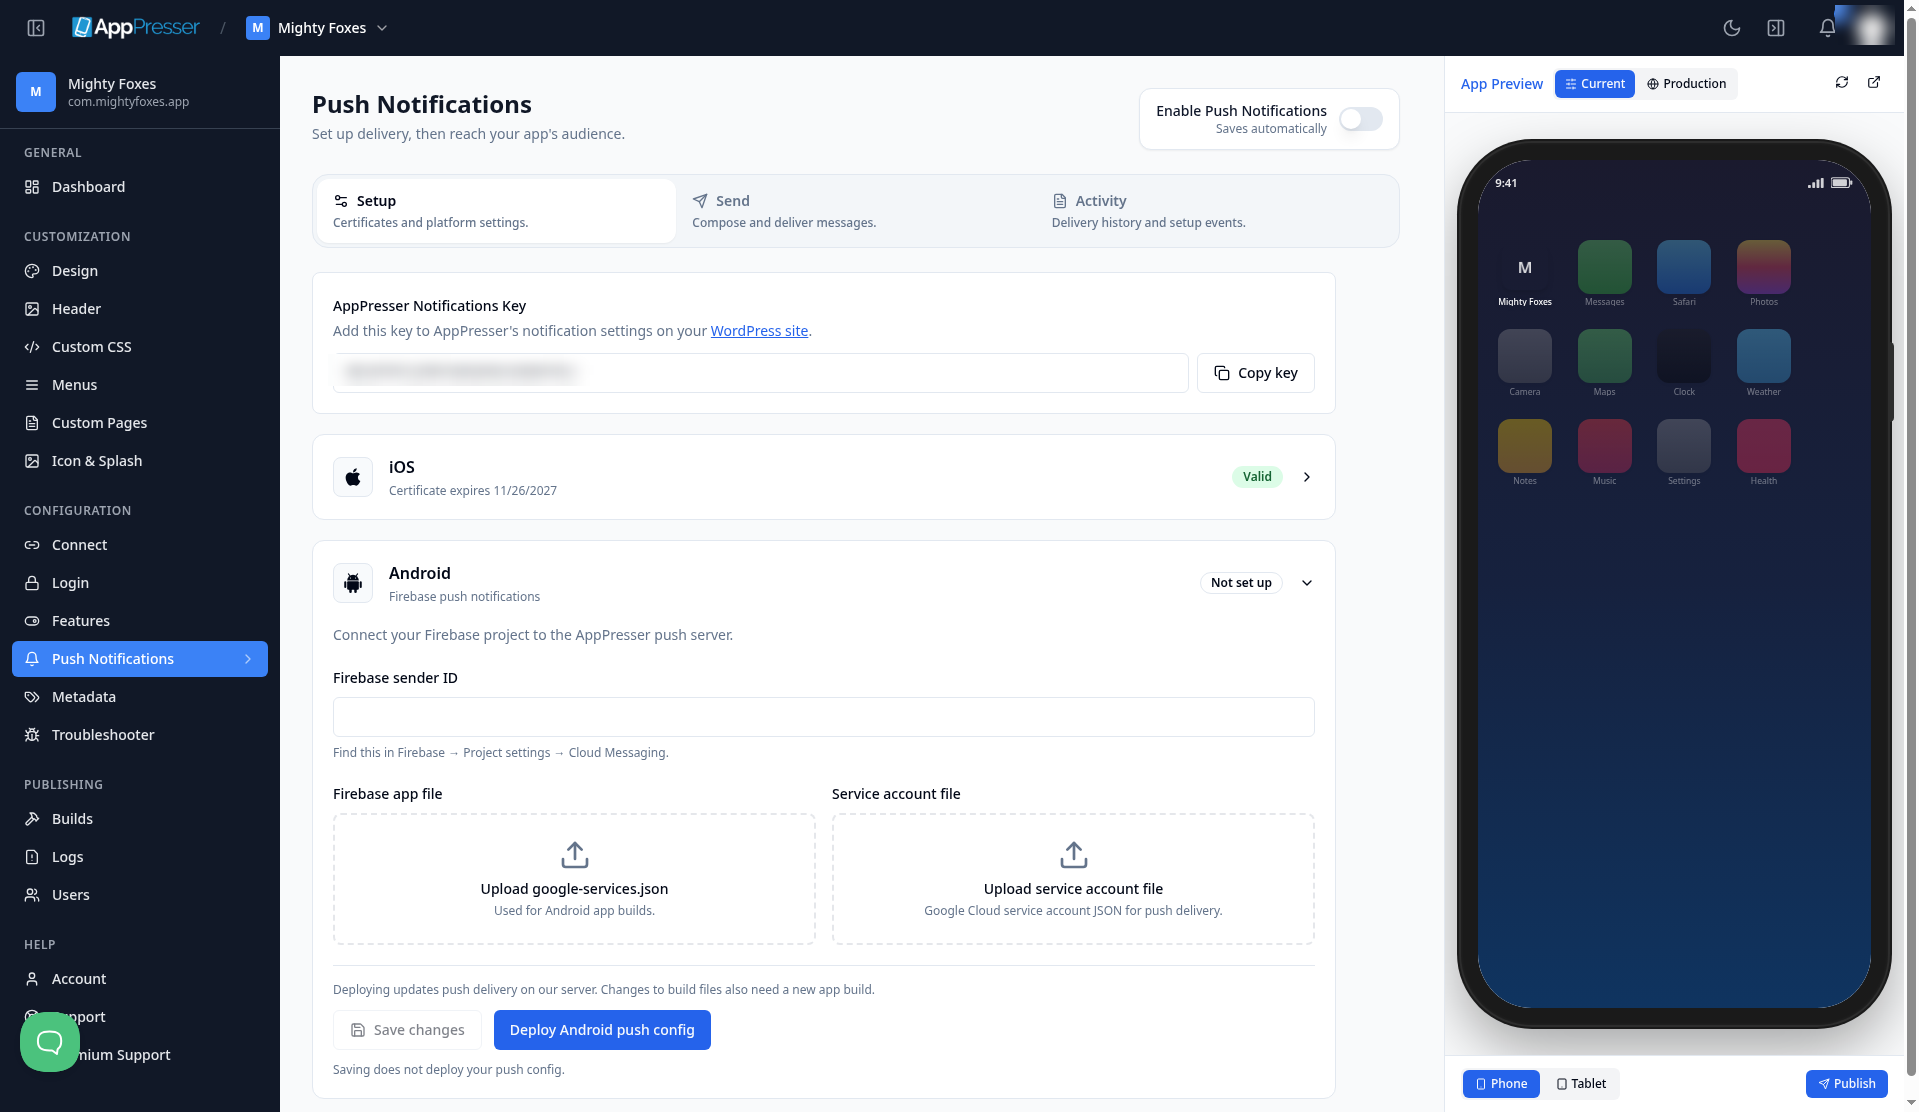
- Click it to turn it on. It saves by itself and shows Push notifications enabled.
Good to know: On the right of the Send tab, under Platforms, iOS shows Valid when your certificate is good. Valid does not mean push is on, so always check that the switch is on too.
Step 5: Write and send a message
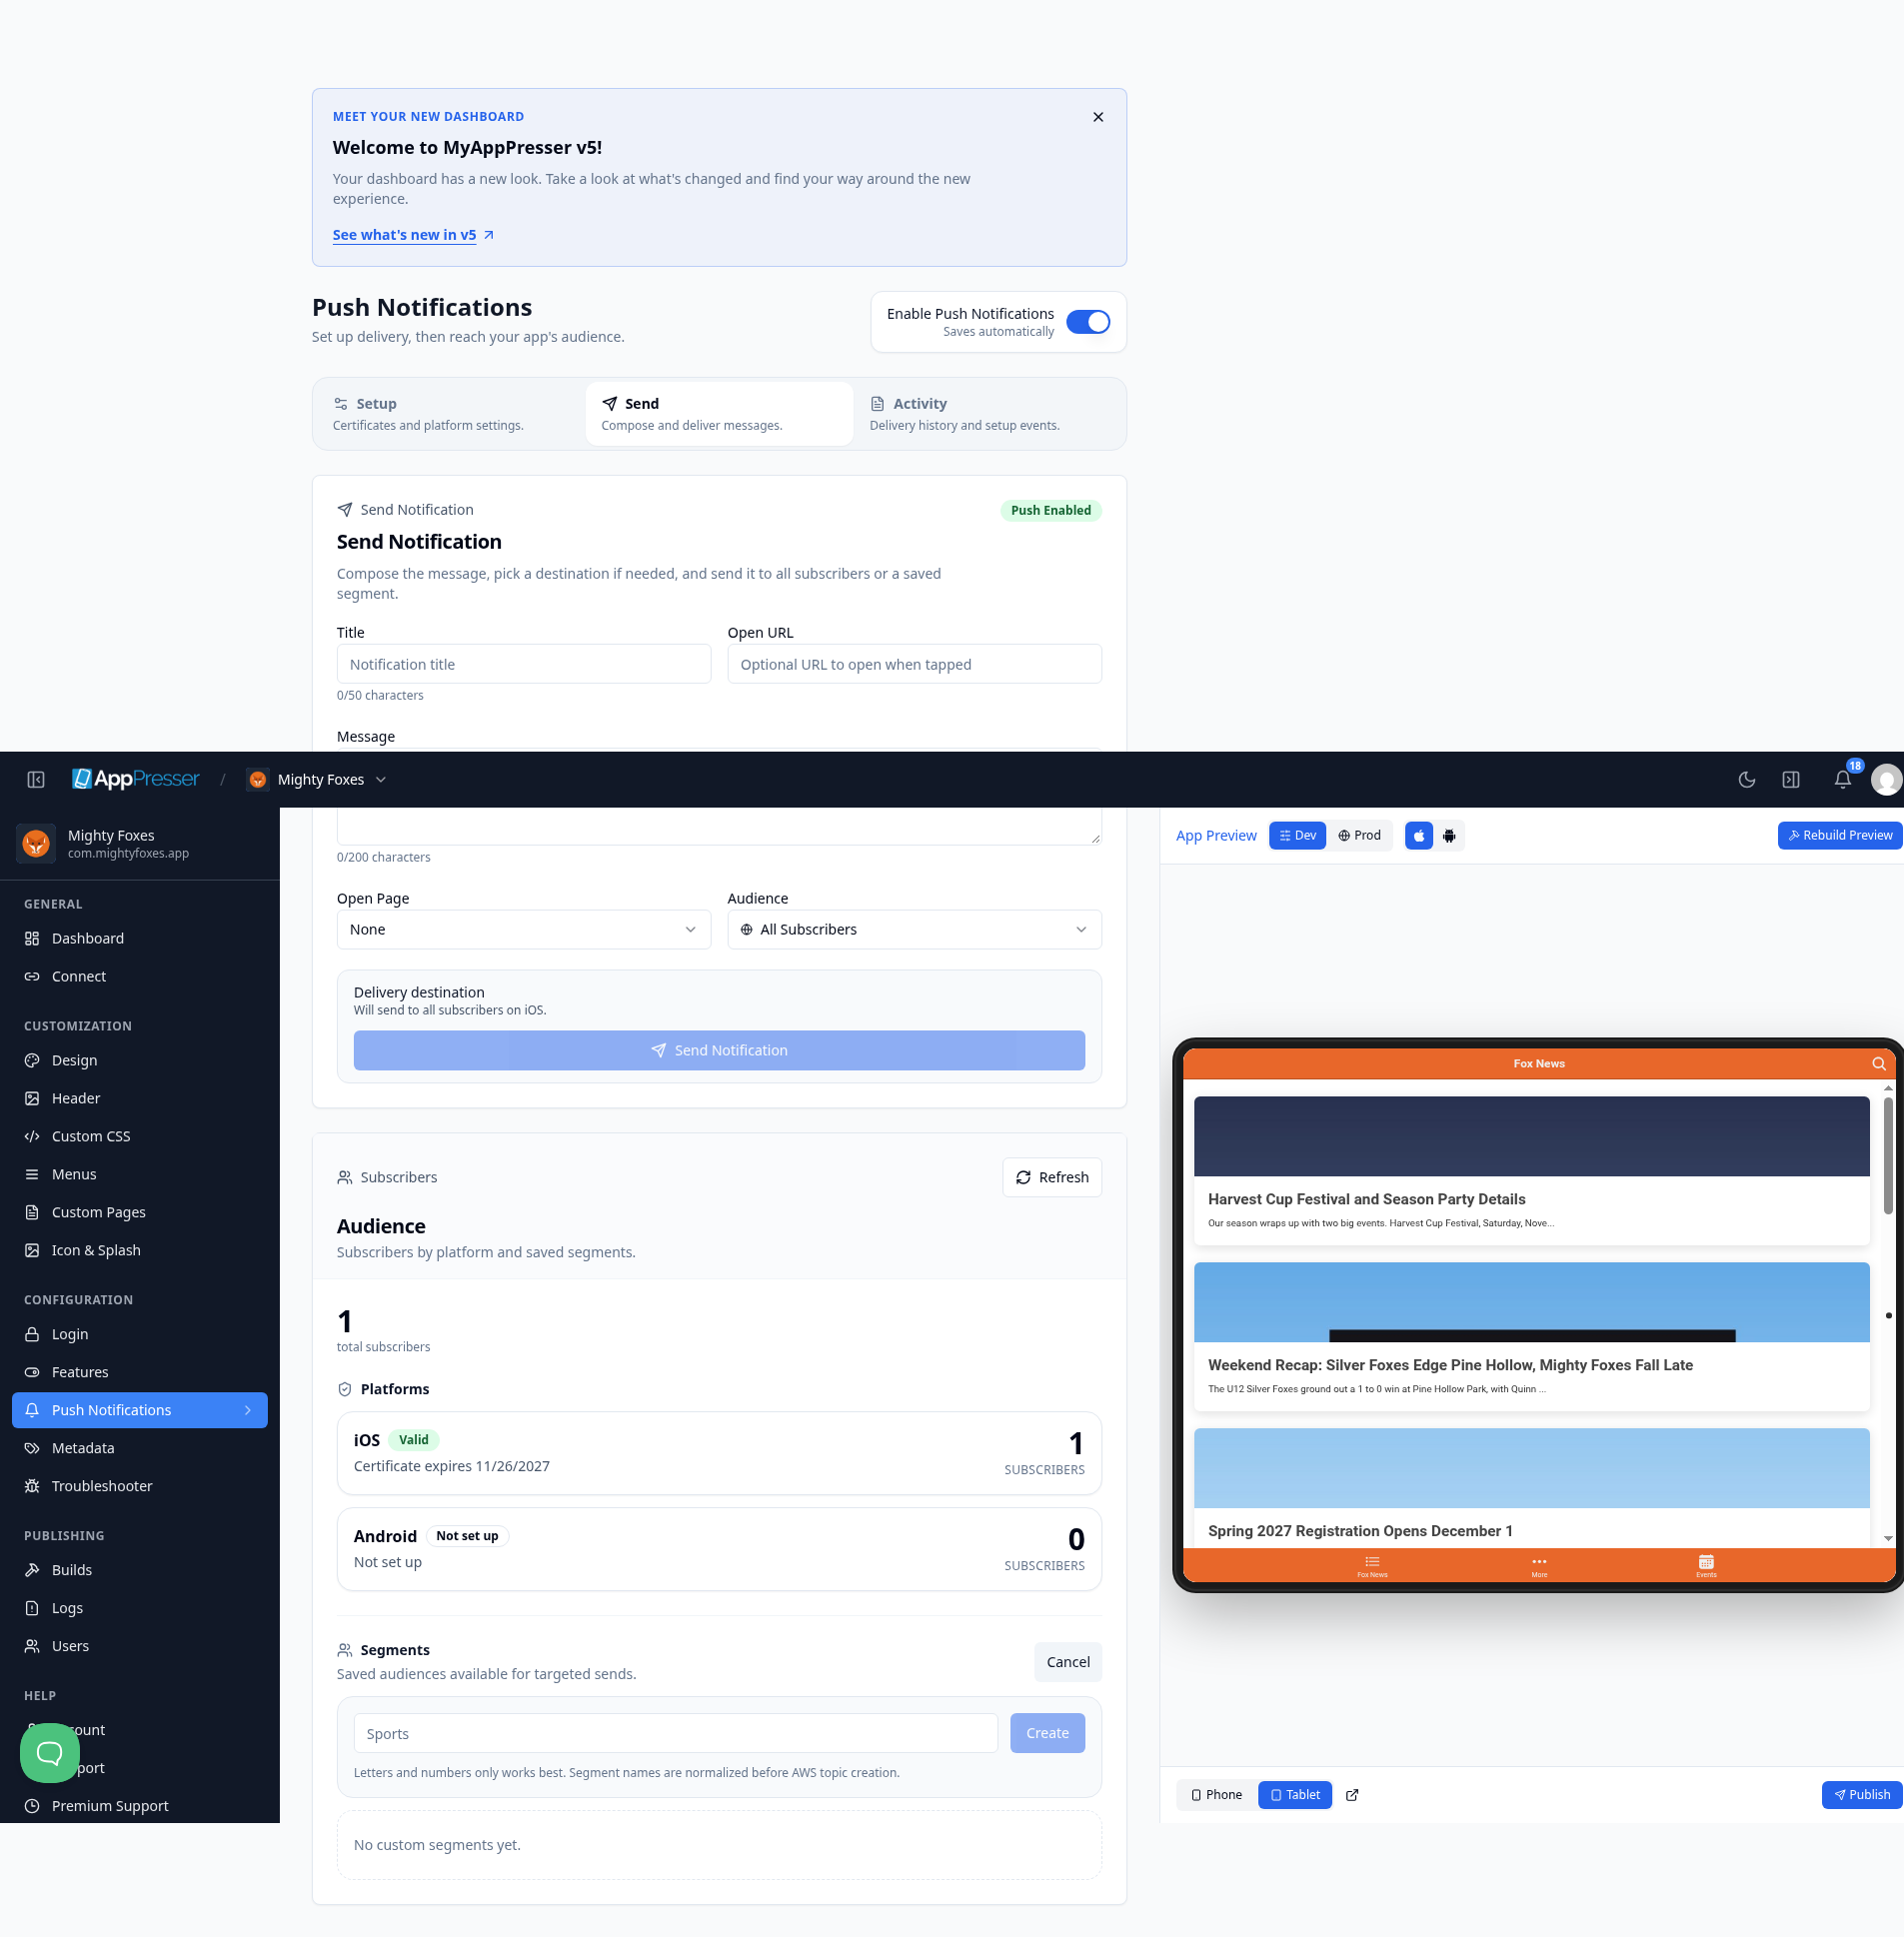
- Click the Send tab.
- In Title, type a short title of up to 50 characters.
- In Message, type your message of up to 200 characters.
- If you want, add an Open URL, a web page that opens when someone taps the message.
- If you want, choose an Open Page, a page in your app that opens when someone taps the message.
- Under Audience, keep All Subscribers to send to everyone. Subscribers are people who allowed push notifications from your app.
- Read Delivery destination to confirm who will get the message.
- Click Send Notification.
Careful: Messages are real. Everyone in the audience gets them right away.
See who gets your messages
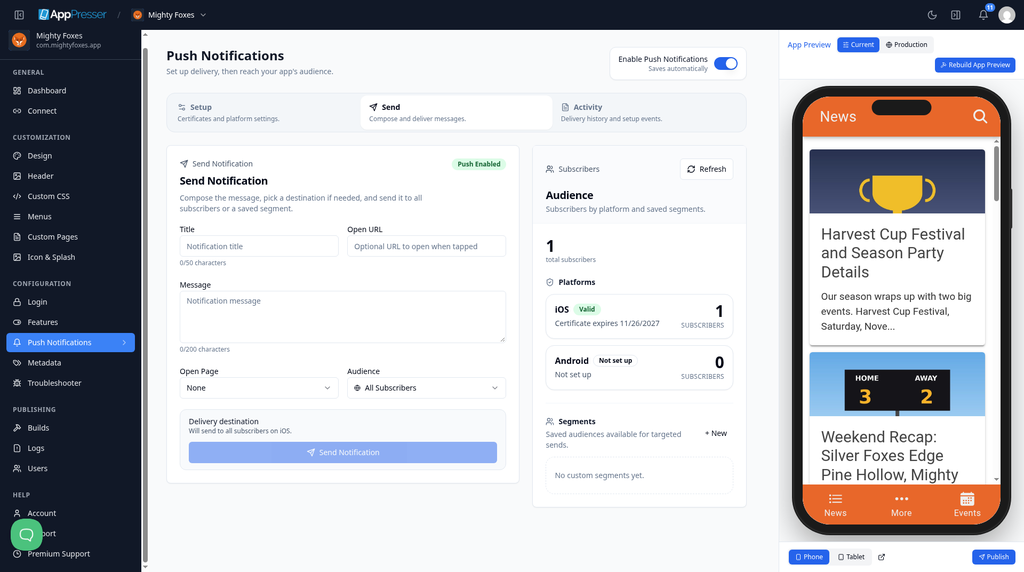
The right side of the Send tab shows your Audience:
- The total number of subscribers.
- The number of subscribers on iOS and on Android.
- Your Segments.
Click Refresh to update the numbers.
Send to only some people (segments)
A segment is a group of people who chose a topic, like "News" or "Events".
Segments come with the Professional and Advanced plans.
- On the Send tab, under Segments, click + New.
- Type a name for the segment, for example Sports. Letters and numbers work best.
- Click Create, or click Cancel to stop.
When you send a message, choose the segment under Audience.
To let people choose their segments in your app, add the Let people choose their push topics (Segmented Push Notification Settings block) to a page.
Check what was sent
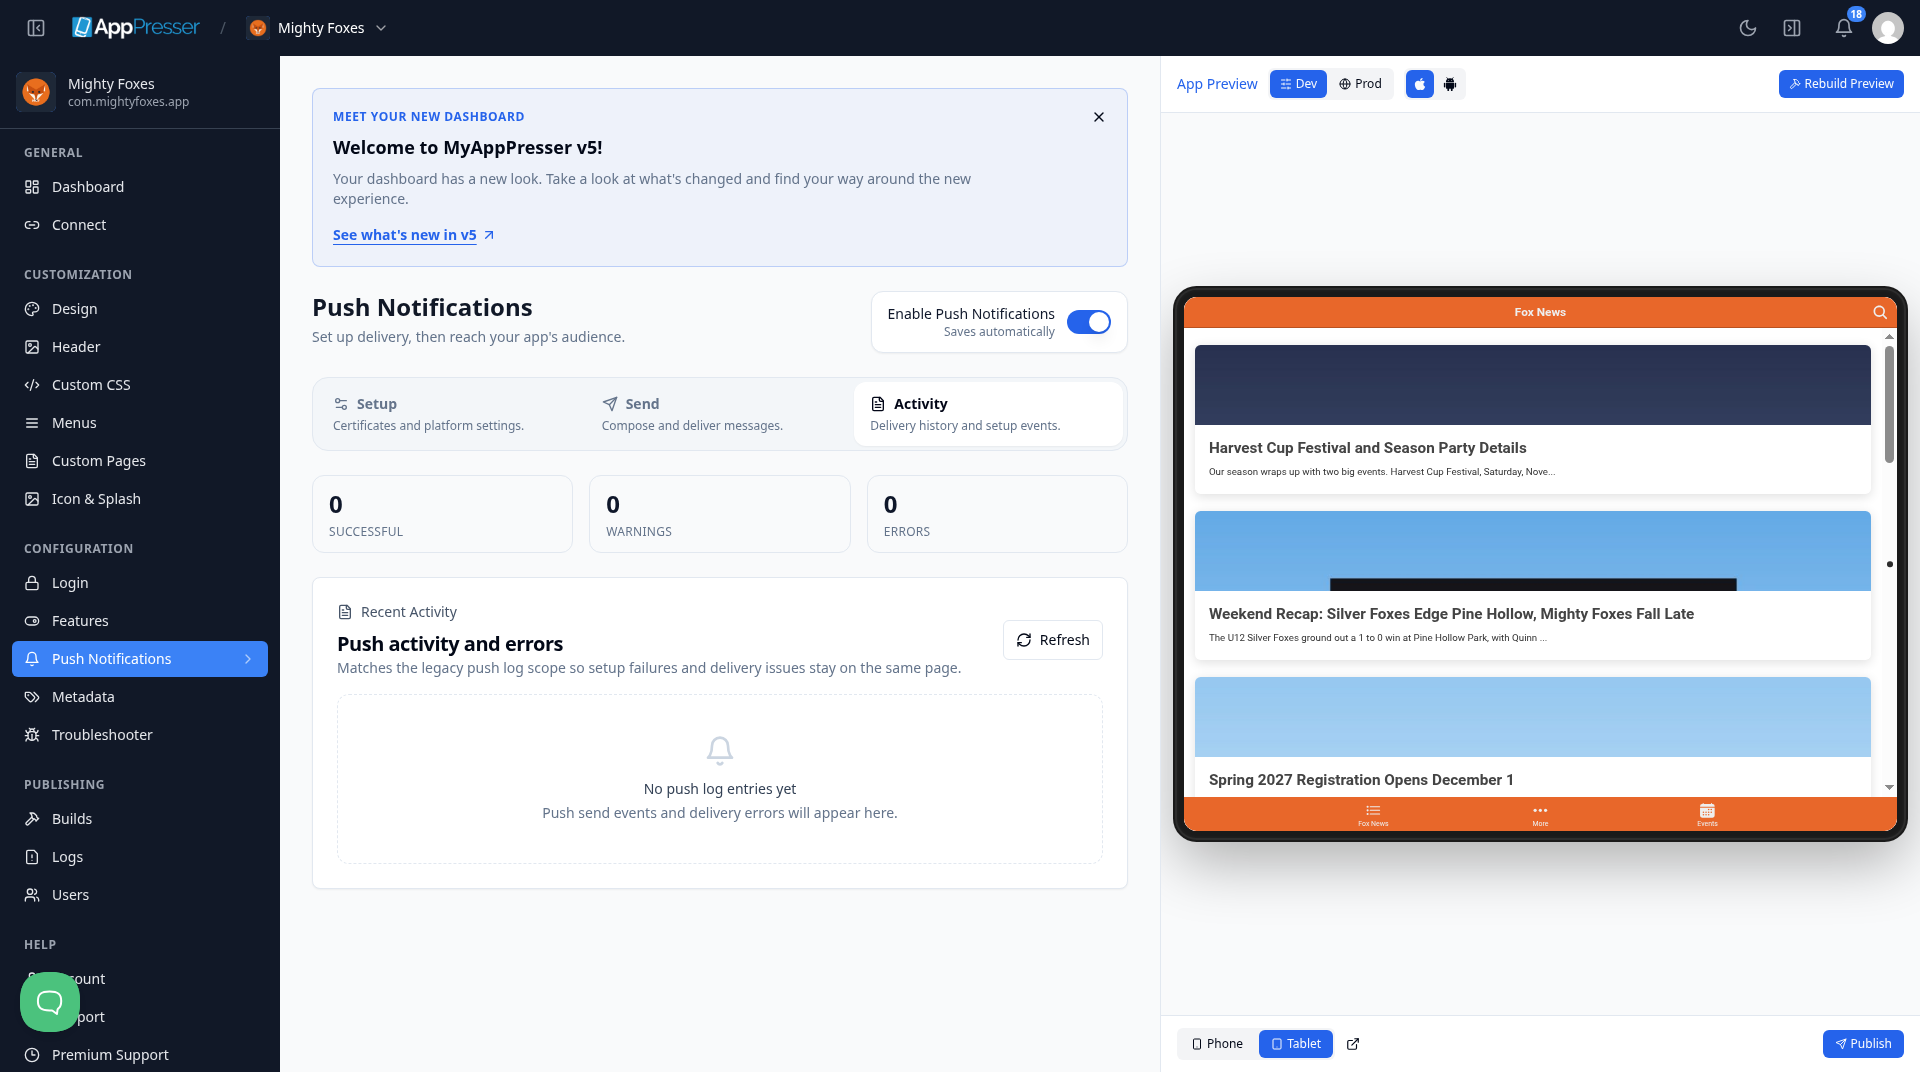
- Click the Activity tab.
- At the top, check how many sends were Successful and how many had Warnings or Errors.
- Under Recent Activity, read the list of sends and setup problems.
- Click Refresh to update the list.
You can also see push messages on the Check your app logs (Logs) screen.
You're done when your message shows on a test phone.
Next step
Let people choose their push topics (Segmented Push Notification Settings block)
Related articles
Czy to było pomocne?
Wyniki aktualizują się podczas pisania. Naciśnij ukośnik, aby przejść do wyszukiwania.
Nie mogą Państwo znaleźć?
Nasz zespół wsparcia pomoże w konfiguracji, buildach i sprawach sklepów z aplikacjami.