
Submit WordPress Posts from the Front-End with the WP-API
In this article you will learn how to create a front-end WordPress post submission form using the WP-API. We’ll focus specifically on why this is better than the “old way” of using admin-ajax.
Why would you want to do this? Because it’s faster, easier, and more secure. Let’s take a look at how it’s done.
Using admin-ajax as the endpoint to process front-end AJAX requests has become a standard because it works, and it’s seen as “the WordPress way.” But it’s not particularly performant. In addition, it requires setting up a system for validation, sanitization and nonce checking for each request.
Of course, many developers, myself included, create systems for abstracting their use of admin-ajax, or a create custom APIs for front-end AJAX. That’s a smart thing to do, but it doesn’t contribute to code maintainability since everyone has their own way of doing it and there is no real standard.
The REST API can change that. It defines “The WordPress Way” for creating custom APIs, which can be used for responding to front-end AJAX requests. The REST API provides fantastic architecture for sanitization, validation, and authentication of requests.
In this article, I’m going to show you how to create a front-end form that will let users with the contributor role submit posts. A great use case for this sort of system is to allow contributors to submit drafts or story pitches from the front-end.
The example I am showing relies on WordPress’ existing capabilities system and trusts it to prevent the unauthorized creation of published posts — something that is a big risk, when wrapping a traditional AJAX request around wp_insert_post().
This practical example is also designed to show you, in general, how you can use the REST API to replace admin-ajax in the front-end. Because of the example I have chosen, we can use a default post endpoint “wp-json/wp/v2/posts” instead of creating a custom endpoint. That’s awesome, and means we’ll be writing almost no server-side code.
In some cases you will need to add custom endpoints to the REST API for your AJAX. When that is needed, I recommend reading through the docs on extending the API.
Also, please keep in mind that this article assumes you are using version 2 of the API. It is available as a plugin, and hopefully will be merged into WordPress core soon.
If you want to see the complete source for the examples in this article, you can. I have packaged them into a small plugin:
Download Post Submitter Plugin
What If I Don’t Want To Return JSON?
In the example I am showing you in this article, JSON is a perfectly acceptable format to get the data back in. In many cases, when you are looking to replace admin-ajax with the REST API, you may prefer to get plain text, HTML, or even images back from the API.
While the REST API is designed to return JSON, it is also highly extensible. The “rest_pre_serve_request” filter provides an entry point to hijack a request and respond with any data you want. That could be a previously cached response, text, XML, an image — whatever. If that filter is set to anything besides null, then its value will be served, instead of continuing with the rest (pun intended) of the REST API’s process.
Making It Work
Honestly, there is nothing particularly exciting about what I’m about to show you. It’s very standard stuff. That’s exactly the point I’m trying to get across. The fact that I have to follow this section on how to make it work, with a breakdown of what I didn’t have to do, speaks to how awesome this new REST API really is.
The Form

This is the form in the front-end, about to be submitted.
To make this work, I created a form with three fields: title, excerpt and content. I left content as a non-required field as that allows excerpt to be used to create “pitches” for posts. You can adapt the form to fit your needs.
I wrote a simple function, hooked to the_content to create my form markup when a page with the slug “submit-post” was being outputted. You could write your form directly into a template file in your theme or child theme if you wanted.
In addition, I chose to only output the form for logged in users, who had the capability to edit posts — IE those with the contributor role or higher. This isn’t 100% necessary as the form wouldn’t work for logged out users, or subscribers. But, there is no need to show a non-functional form. Instead I created a link to wp-login for non-logged in users.
Here is the hook and function that creates the markup:
add_filter( 'the_content', function( $content ) {
	if ( is_page( 'submit-post' ) ) {
		//only show to logged in users who can edit posts
		if ( is_user_logged_in() && current_user_can( 'edit_posts' ) ) {
			ob_start();?>

<form id="post-submission-form">

<div>
					<label for="post-submission-title">
						<?php _e( 'Title', 'your-text-domain' ); ?>
					</label>
					<input type="text" name="post-submission-title" id="post-submission-title" required aria-required="true">
				</div>

<div>
					<label for="post-submission-excerpt">
						<?php _e( 'Excerpt', 'your-text-domain' ); ?>
					</label>
					<textarea rows="2" cols="20" name="post-submission-excerpt" id="post-submission-excerpt" required aria-required="true"></textarea>
				</div>

<div>
					<label for="post-submission-content">
						<?php _e( 'Content', 'your-text-domain' ); ?>
					</label>
					<textarea rows="10" cols="20" name="post-submission-content" id="post-submission-content"></textarea>
				</div>

				<input type="submit" value="<?php esc_attr_e( 'Submit', 'your-text-domain'); ?>">
			</form>

			<?php
			$content .= ob_get_clean();
		}else{
			$content .=  sprintf( '<a href="%1s">%2s</a>', esc_url( wp_login_url() ), __( 'Click Here To Login', 'your-text-domain' ) );
		}
	}

	return $content;
});
Feel free to modify this form to fit your needs. Just make sure to keep the IDs of the form fields in sync with the JavaScript we’ll be creating shortly.
Loading The JavaScript
We’re going to need a little bit of JavaScript to make this form work. To do so, we’ll want to load a file, using wp_enqueue_script(), like we would any other script.
In addition, we’ll want to make a few pieces of information available to the JavaScript. We can do this with wp_localize_script(). What we will need to make available is the root URL of the REST API, and a nonce with the action “wp_rest”. I also added two strings to the localized object — one for a success message and one for a failure message. Doing this server side makes the strings translatable.
The most important part of what we are doing in this step, is making a nonce. The REST API will use the regular WordPress auth cookie to authenticate the user, but only if that nonce is present. If you’re not familiar with nonces, then that’s OK, it’s a cool trick to prevent cross-scripting attacks and otherwise ensure the data submitted to a server is coming from who the nonce was created for, not a malicious user, bot or other evildoer.
Here is how I set up my JavaScript:
add_action( 'wp_enqueue_scripts', function() {

	//load script
	wp_enqueue_script( 'my-post-submitter', plugin_dir_url( __FILE__ ) . 'post-submitter.js', array( 'jquery' ) );

	//localize data for script
	wp_localize_script( 'my-post-submitter', 'POST_SUBMITTER', array(
			'root' => esc_url_raw( rest_url() ),
			'nonce' => wp_create_nonce( 'wp_rest' ),
			'success' => __( 'Thanks for your submission!', 'your-text-domain' ),
			'failure' => __( 'Your submission could not be processed.', 'your-text-domain' ),
			'current_user_id' => get_current_user_id()
		)
	);

});
The JavaScript
Ok, so now we’re ready for the main event. I’m sorry, but it’s really not that exciting. If you’re familiar with how AJAX works, this should be very familiar looking.
All we are doing is getting the data from the form, POSTing it via AJAX to the posts endpoint of the API — “/wp-json/wp/v2/posts”. If the server returns a success code, we alert the success message setup in the last step, if not, we alert the failure message.
The most important thing to notice in this code is the beforeSend function. This is where we add the nonce to the header of the request. The nonce must be in a header called “X-WP-Nonce” for the REST API to pick it up. To do this we use xhr.setRequestHeader.
Here is the full JavaScript we need:
jQuery( document ).ready( function ( $ ) {
    $( '#post-submission-form' ).on( 'submit', function(e) {
        e.preventDefault();
        var title = $( '#post-submission-title' ).val();
        var excerpt = $( '#post-submission-excerpt' ).val();
        var content = $( '#post-submission-content' ).val();
        var status = 'draft';

        var data = {
            title: title,
            excerpt: excerpt,
            content: content
        };

        $.ajax({
            method: "POST",
            url: POST_SUBMITTER.root + 'wp/v2/posts',
            data: data,
            beforeSend: function ( xhr ) {
                xhr.setRequestHeader( 'X-WP-Nonce', POST_SUBMITTER.nonce );
            },
            success : function( response ) {
                console.log( response );
                alert( POST_SUBMITTER.success );
            },
            fail : function( response ) {
                console.log( response );
                alert( POST_SUBMITTER.failure );
            }

        });

    });

} );
What We Didn’t Do
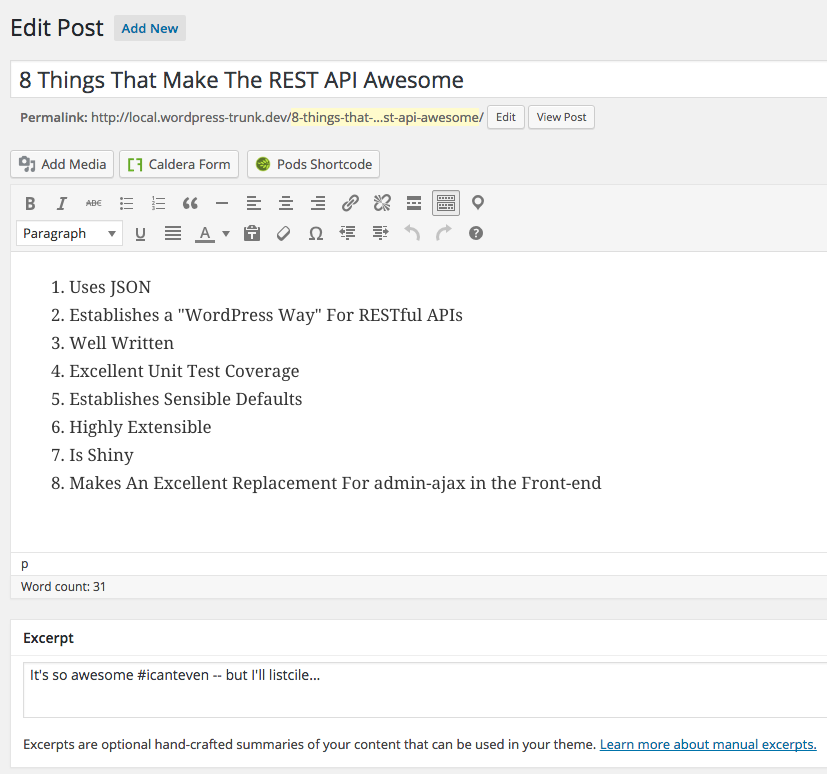
Now the post is in the backend for further work.
What I have shown so far is very standard stuff and that’s what’s exciting about it. What is actually exciting is what we didn’t have to do.
If I was creating the same functionality using admin-ajax, I would have needed to verify the nonce, ensured the current user had the right capabilities, validated and sanitized the data for the post. In this example, we are able to offload all of that to the REST API. Another thing we didn’t do here was set the post author. The REST API will handle that for us.
I can’t overstate the importance of this. We use WordPress because it handles security for us. The more we follow standards the less we have to do and the more we can rely on code that has been reviewed and used many times over.
It’s always important to remember that when writing JavaScript, any code you write can be edited in the browser. I didn’t include a key in post data object for post status, but it would be trivial to add that in the browser. But here is the thing, if someone did add it and set it to “publish” the only way that would work is if they were logged in as a user who could publish a post.
If I was writing this same functionality using admin-ajax, I would have to validate post status, and post author, and ensure that none of the fields I was using contained malicious data. I’d also have to trust myself not to screw any of that up. Not that I ever make mistakes…
All That And It’s Faster
The benefits of using the REST API as a replacement for admin-ajax are not limited to increased security and easier development. It’s also way more efficient than using admin-ajax when the admin isn’t actually needed. Pretty awesome, right?
I encourage you to take what you have learned and apply it to other cool uses of AJAX to make your sites more dynamic. You can use it to lazy load posts, or images. You can write custom endpoints to pretty much anything. Like the all of WordPress, the REST API is a highly extensible tool, limited only by your creativity, and your willingness to experiment. I hope you use it to create awesome things.
On line 17 of the JavaScript file, I needed to add a slash before ‘wp/v2/posts’. Making it ‘/wp/v2/posts’
Otherwise, your example worked fine.
Updated the code, thanks Mike!
Mike! It’s great to see you around once in a while.
Scott, you are right, WP REST API is a like a blessing. Being a front-end fanatic (though full stack dev) I have always wanted to use Backbone.js in a better way with WP. Now with REST API it is finally possible.
E.g. the platform agnostic behavior -> http://codepen.io/ahmadawais/pen/aORdVV and lots of stuff like that will be possible once it gets inculded in the core.
Thanks for sharing the example Ahmad! I’m an Angular guy myself, but Backbone is cool too 😉
In my case I had to remove the slash before ‘wp/v2/posts’, otherwise console output an error message: showing it cannot find the URL because it becomes: root/wp-jason//wp/v2/posts
Would this view on the front end so others can see? Would it also be possible for other users to reply to OP? Sorry very new with WP trying to get my feet wet.
Hi Derrick, yes this would show on the front end. I’m not sure what you mean by ‘reply to OP’ but this is a custom form, so you could modify it any way you want.
I tried creating my own .js file and put all the jquery you referenced above in it. Then I enqueued that script in my theme’s function.php file using the code you had above – with a few minor name changes:
add_action( ‘wp_enqueue_scripts’, function() {
//load script
wp_enqueue_script( ‘frontend-posts’, get_stylesheet_directory_uri() . ‘/assets/frontend-post.js’, array(‘jquery’), ”, true );
//localize data for script
wp_localize_script( ‘frontend-posts’, ‘POST_SUBMITTER’, array(
‘root’ => esc_url_raw( rest_url() ),
‘nonce’ => wp_create_nonce( ‘wp_rest’ ),
‘success’ => __( ‘Thanks for your submission!’, ‘your-text-domain’ ),
‘failure’ => __( ‘Your submission could not be processed.’, ‘your-text-domain’ ),
‘current_user_id’ => get_current_user_id()
)
);
});
I’m using my own form as a template file.
when I go to my home page, I get Fatal error: Call to undefined function rest_url().
Why is that?
Are you using version 2 of the WP-API?
I am using wp rest api 1.2.3 to be exact.
my wp core version is 4.1.3
I’m also using multisite – don’t think that would have anything to do with it.
omg. just answered my own question. Downloading 2 now. Duh!!
OK, I’ve got this all to work where I can actually save a post via a front end form -which is great! Thank you!
I have another question: how do I now redirect the user to and edit page for that post on the frontend? I have the page template set up, but I’m not sure if I should do it via jquery or php and I can’t find anything online about it in regards to the wp api.
Any suggestions or direction?
This was a great help. Thank you!
Hi Scott,
Can the logic be used in an İonic app with WP-API?
BR
Hi,
Any pointers on how to extend your code to be used with a custom post type, especially its custom fields?
I reached the point where I can make it work with regular fields (title, body, etc) saved to the custom post, but not with a ‘price’ field for example in case I am working with a ‘product’ custom post type.
Thanks
This is a great article (based on this exact post) explaning how to use this code with Custom Post Types: https://wordpress.stackexchange.com/questions/262735/inserting-custom-post-meta-value-using-wp-rest-api
As a F.E.A.T.T. (front end all the things) fanatic, i’m also super excited at the adoption of the WP-API. This code was a great starting point to “see it all happen”.
Like Ziad commented above, I had to remove the `/` from `/wp/v2/posts/` in order for it to work. Any idea why the inconsistency for some of us?
Hello, i have been searching the web looking for how to do this but cant find a solution until i found this post
i need help with posting into my blog from another site, i have been trying the codes below but it is not working, please any assistance will be appreciated on ways to post into wp using the wp rest api
thanks
array (
‘ignore_errors’ => true,
‘method’ => ‘POST’,
‘header’ =>
array (
‘Authorization’ => ‘Basic ‘ . base64_encode( ‘user’ . ‘:’ . ‘pass’ ),
),
‘content’ =>
http_build_query( array (
‘title’ => ‘Hello World’,
‘content’ => ‘Hello. I am a test post. I was created by the API’,
‘tags’ => ‘tests’,
‘categories’ => ‘API’,
)),
),
);
$context = stream_context_create( $options );
$response = file_get_contents(
‘http://freeglobaljob.com/wp-json/posts/’,
false,
$context
);
$response = json_decode( $response );
?>
How to post tag and category?
I’ve same problem. Did you solved that?
I’m using jQuery AJAX and serializing data before send – for categories I use several fields with name=categories[] and with IDs of category as values. I do it programmatically. See below part of my code (on submittion before AJAX call):
for (var i = 0; i < selectedCategories.length; i++) {
var category = selectedCategories[i].id;
$('’).attr({
type: ‘hidden’,
id: ‘categories[‘ + i + ‘]’,
name: ‘categories[‘ + i + ‘]’,
value: category
}).appendTo(‘form’);
where selectedCategories – array of categories objects, where post will be added.
category – id of one selected category (provided by WP API).
The same approach works for tags.
I’ve spent time to figure it out – hope it will save smbs day 🙂
What is POST_SUBMITTER and what does it need to be? I am getting errors about it not being defined from console.
Thanks for you greet article. I want to make my posts editable from the front end using this wp-api. What is the right way to implement the edit-post form? How to pass the page id to the server ?
Any help will be appreciated.
I am having issues getting this to work. I am trying to set it up with the intention of customizing it for a custom post type. Any help is appreciated… Is it ok to have the form and the enque scripts in one php file and the .js in a seperate js folder? Thanks!
how to use this in hybird app?
This is a great article. I have it working a little differently but all is good. QUESTION: I am working with custom post types that has extra meta data. I want to be able to add some of this meta data to the front end. Some of the fields will have set values that I would like to pre-determine, but others I’d like the user to input.
Can I just add the form fields, the additional var id’s in the JS just like this example, and the register_rest_field info in the same plugin php file?
When I try to extend the response I get :
Fatal error: Call to undefined function register_rest_field()
idea ?
Excellent tutorial, how do you update a post which already exists?
Don’t worry I found out how, just add the post ID on the end of the URL ie. wp/v2/post/
Is there a way to do this outside of your WordPress install. I am trying to build a stand alone page that allows a user to create a post on a WordPress install. This page will be on a totally different server to the WP install. How could I adapt this code to work remotely?
Thanks!
did you find the solution? if so, please share it with me
Hi what kind of security would you suggest if I allow anyone to submit a post, ie asking none users to submit posts as drafts for approval later
Nice tutorial! i have a question: how can i add custom taxonomies and categories in that form ? Many thanks.
How to send a value for a custom meta box field ?
Thank you for this useful article.
I use a simple wp plugin to do it quickly from the front-end.
Any advice on how to handle a 403 forbidden error? It gives the additional message “Cookie nonce is invalid”. I’m fairly sure I’m sending the token correctly and have the cookies in my cookie jar.
Hello Josh,
First of all I would like to appreciate you on such a nice article.
I have a question. How can we add post meta while inserting a new post.
Great article. I had a question: what if I want non-logged in users to be able to create data only for a custom post. I have a custom post named OrderCakes with 5-7 data points which I want even non-logged in users to submit. How to achieve that with the rest api and ajax?
Is there a way to add featured image just as you do at the backend?