
Publish your iOS app to TestFlight (step by step)
Publish and Grow · Документация AppPresser
Publish your iOS app to TestFlight (step by step)
Эта статья ещё не переведена, поэтому показана на английском.
Your app journey: step 7 of 9, Publish to the stores. New here? Read Start here: build your app with AppPresser first.
What you'll do: Send your iOS app to TestFlight, Apple's free app for trying your app on a real iPhone before it is in the App Store, and install it on your phone.
Before you start
- Join the paid Apple Developer Program.
- Get your iOS signing files in place. The AppPresser team can set them up for you (Get your iOS app signed: certificates, profiles and the AppPresser setup request). Or you can make them yourself (Make your own iOS certificates and profiles (step by step)).
- Upload your app icon in Icon & Splash: a .png file, 1024 by 1024 pixels, with no transparent areas.
- Have a password manager ready to keep your passwords safe.
Step 1: Make an app-specific password
An app-specific password is a separate password Apple makes so AppPresser can send your app to Apple without knowing your real password.
- Go to account.apple.com and sign in.
- Open Sign-In and Security, then App-Specific Passwords.
- Click the plus (+), type a name you will recognize, for example "AppPresser", then click Create.
- Copy the password into your password manager. Apple shows it only once.
Step 2: Add your Apple ID and password in AppPresser
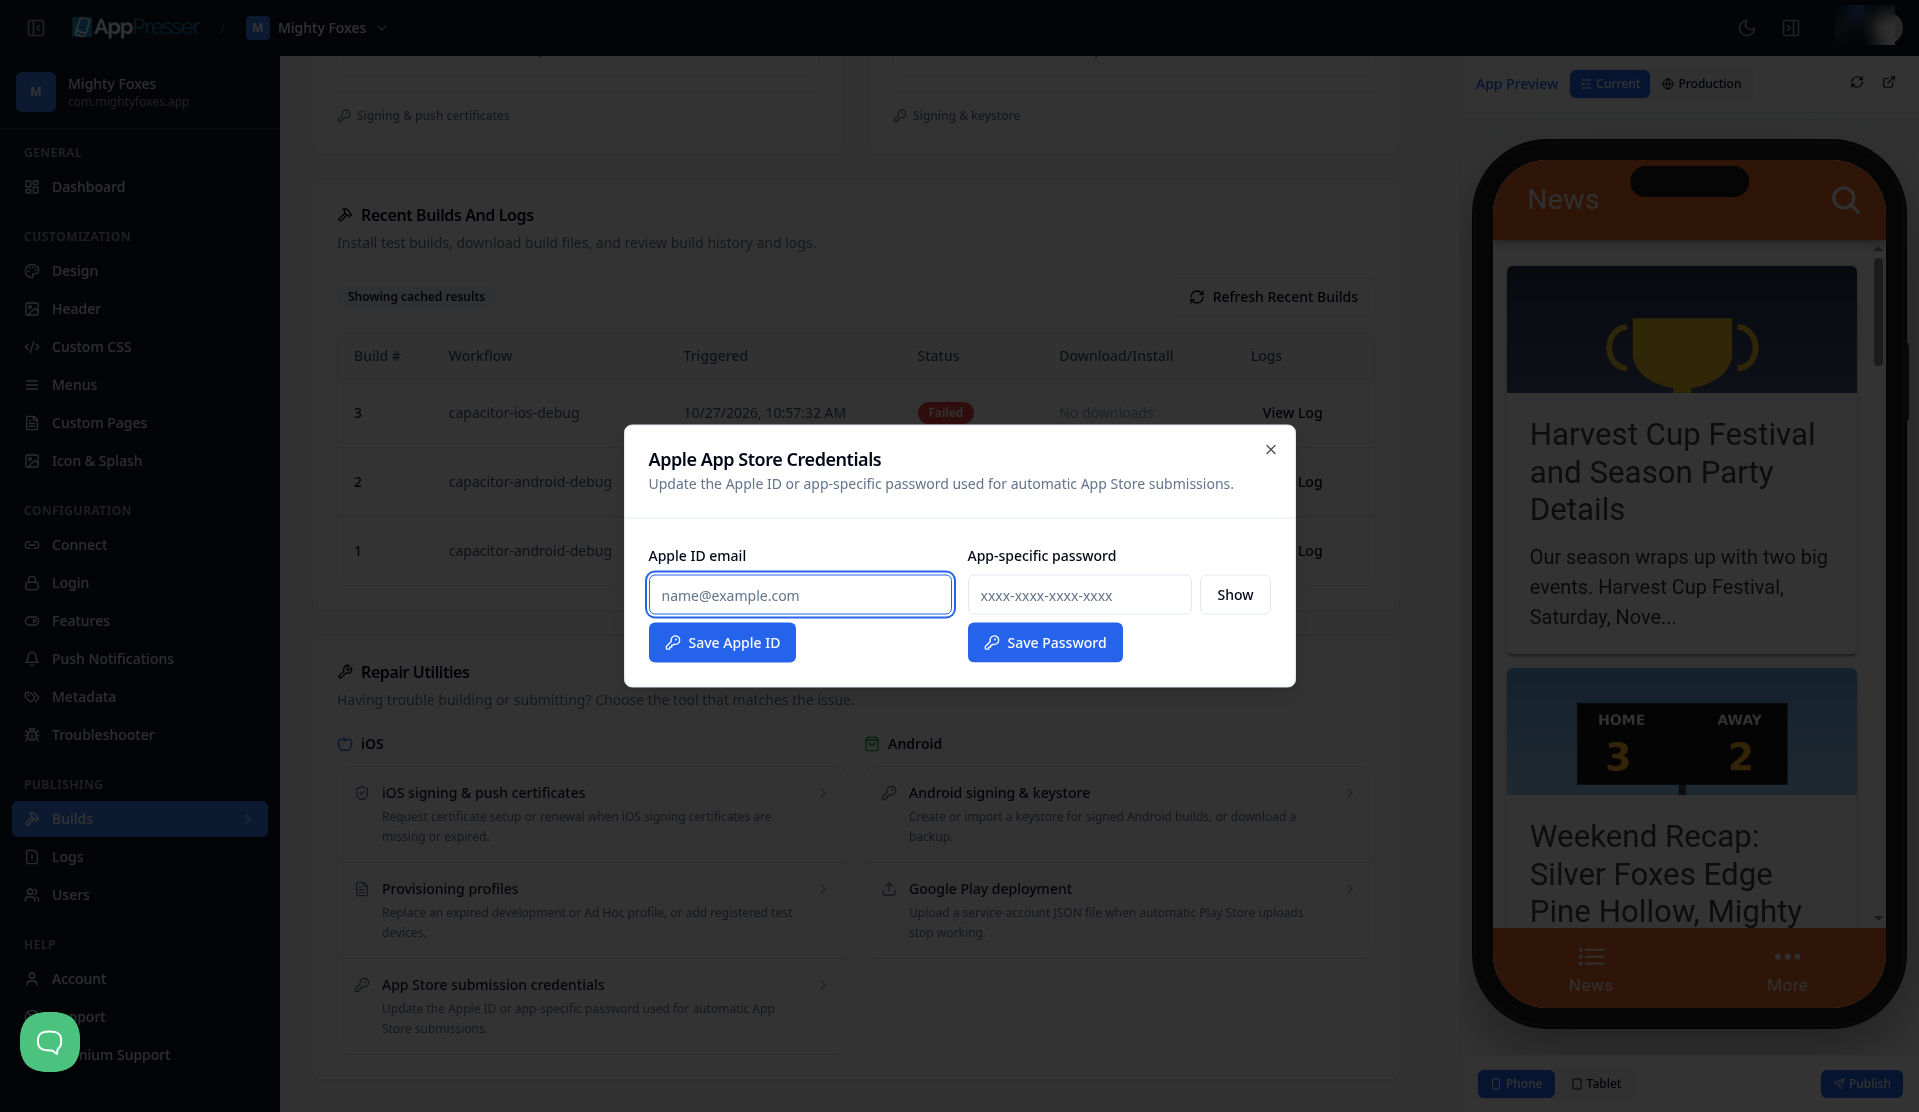
- In the left menu, under Publishing, click Builds, then scroll down to Repair Utilities.
- Under iOS, click App Store submission credentials.
- In Apple ID email, type the full email address you use to sign in to Apple, for example you@yourcompany.com (not a name), then click Save Apple ID.
- In App-specific password, paste your app-specific password, then click Save Password.
Each box has its own save button. Click both.
Step 3: Make your app in App Store Connect
App Store Connect is Apple's website for your apps. You do this one time for each app.
- Sign in at appstoreconnect.apple.com and click Apps.
- Click the plus (+) and choose New App.
- Check iOS, type your app's Name and choose a Primary Language.
- Pick your app's Bundle ID. It must match the Bundle ID on your AppPresser Dashboard.
- Type a SKU. This is any short code you choose, for example myexampleapp-ios.
- Under User Access, choose Full Access.
- Click Create.
- Open Business and check that the Free Apps agreement says Active. If your app or its in-app purchases cost money, the Paid Apps agreement must be Active too.
Step 4: Check your setup
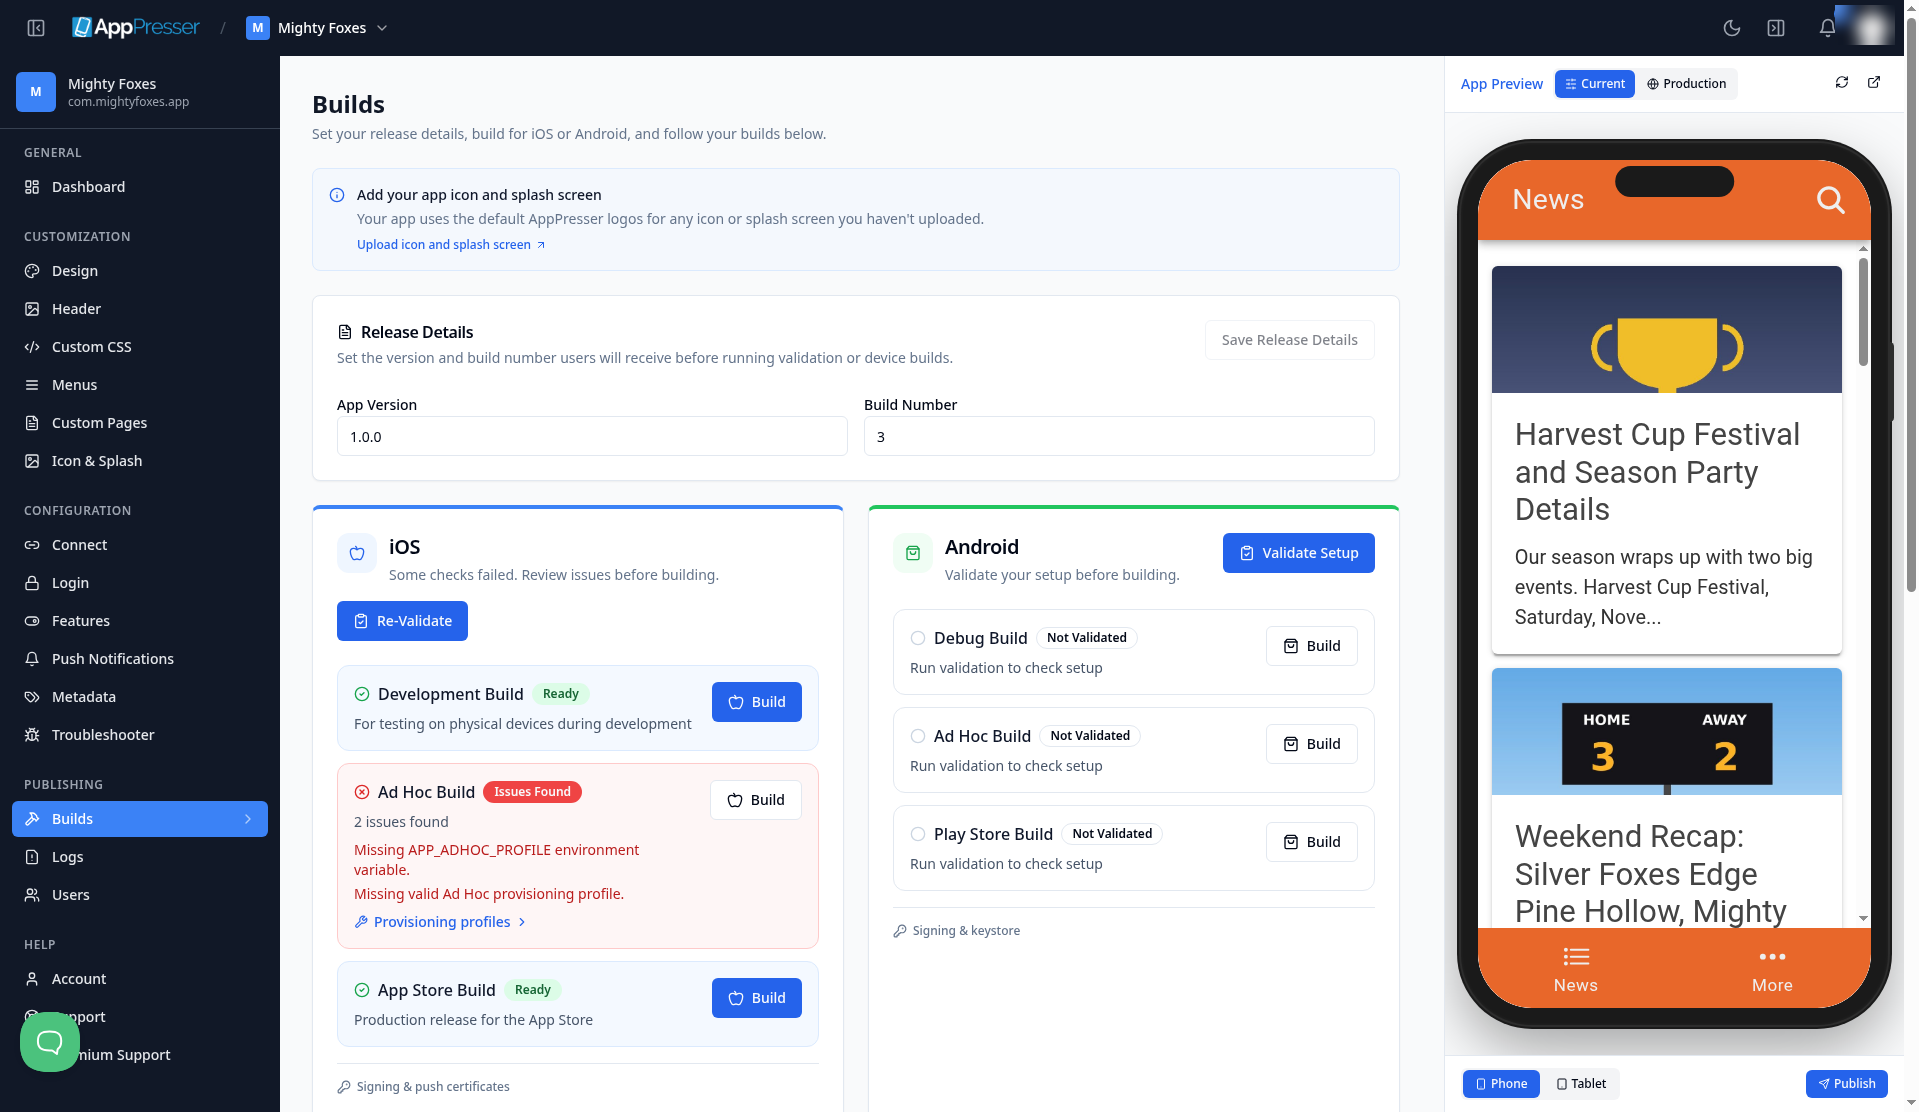
- In AppPresser, in the left menu, under Publishing, click Builds.
- On the iOS card, click Validate Setup or Re-Validate.
- Wait until App Store Build shows Ready.
Step 5: Start your App Store build
On the App Store Build row, click Build one time.
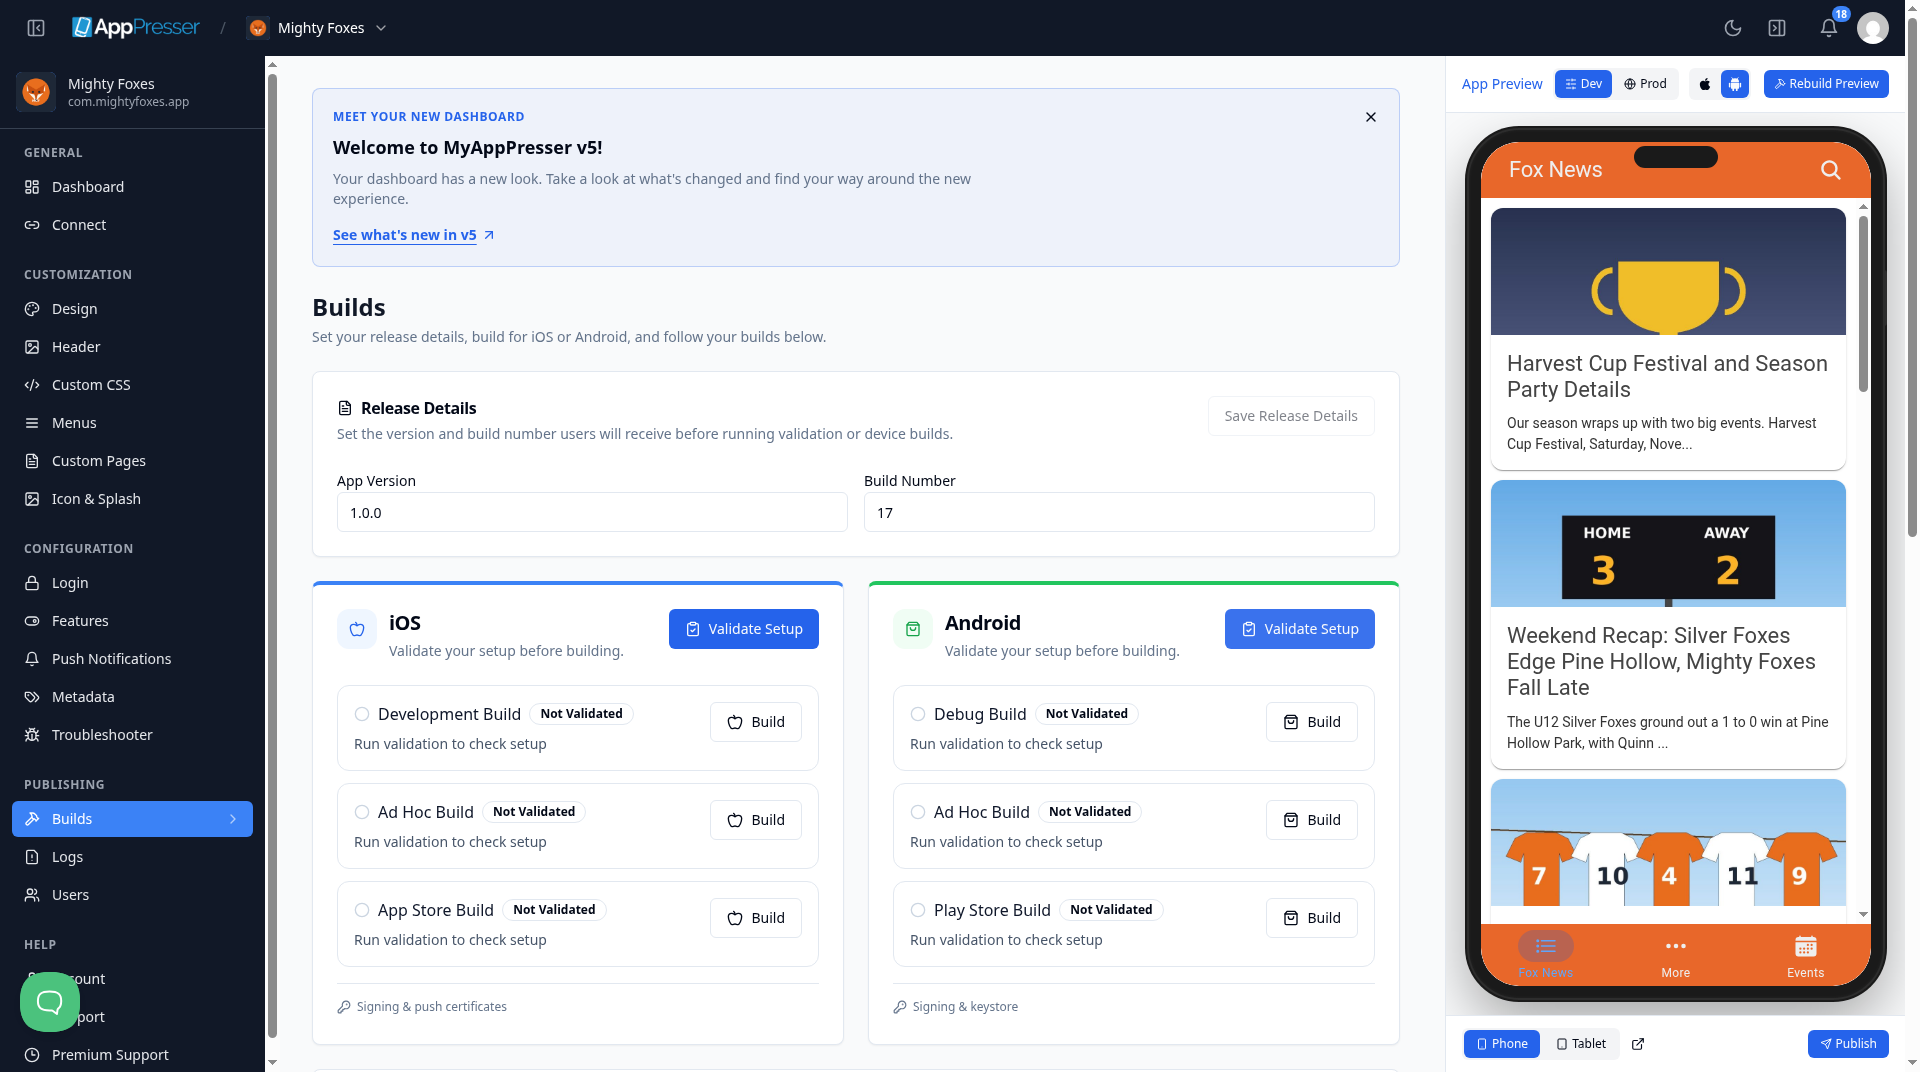
This example shows the Builds screen before validation, with every row marked Not Validated. Click Build after App Store Build shows Ready (Step 4).
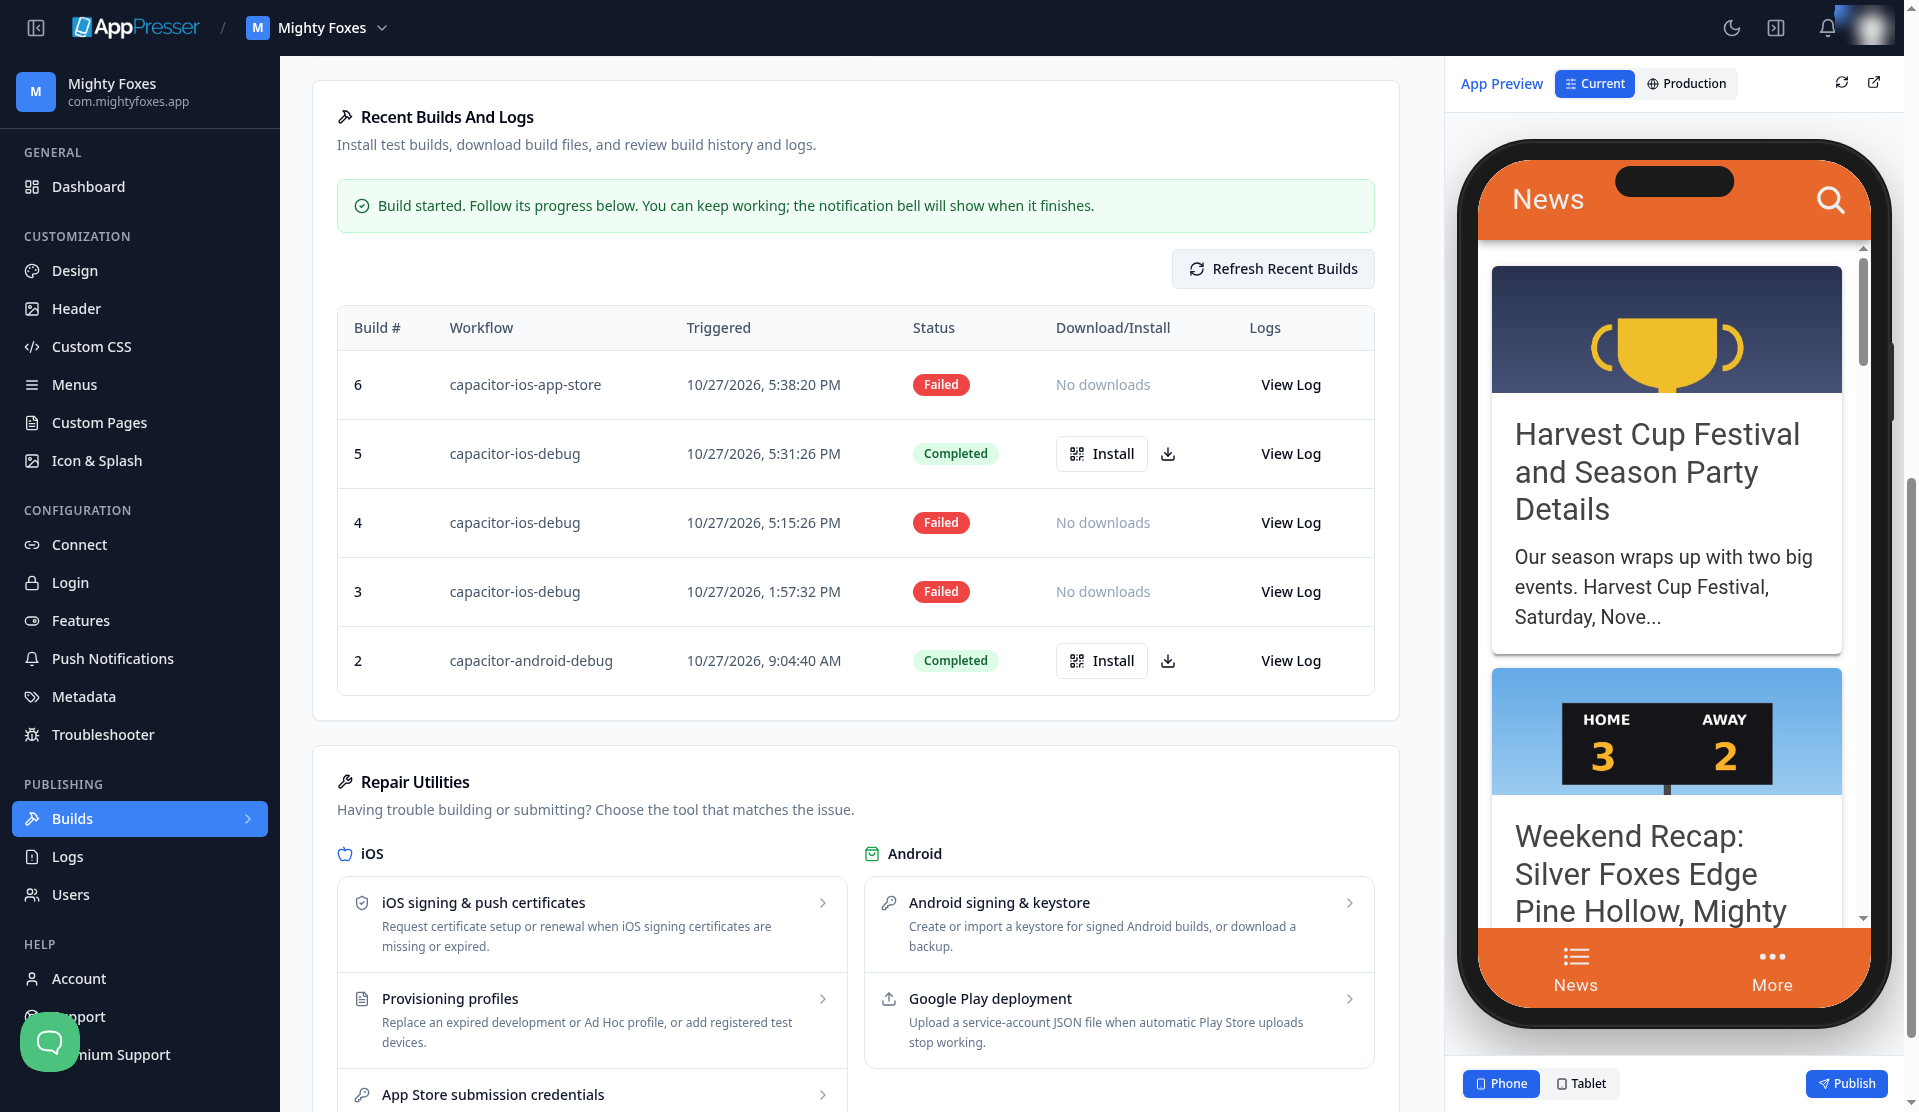
Scroll down to Recent Builds And Logs. Your build is at the top with the status In Progress.
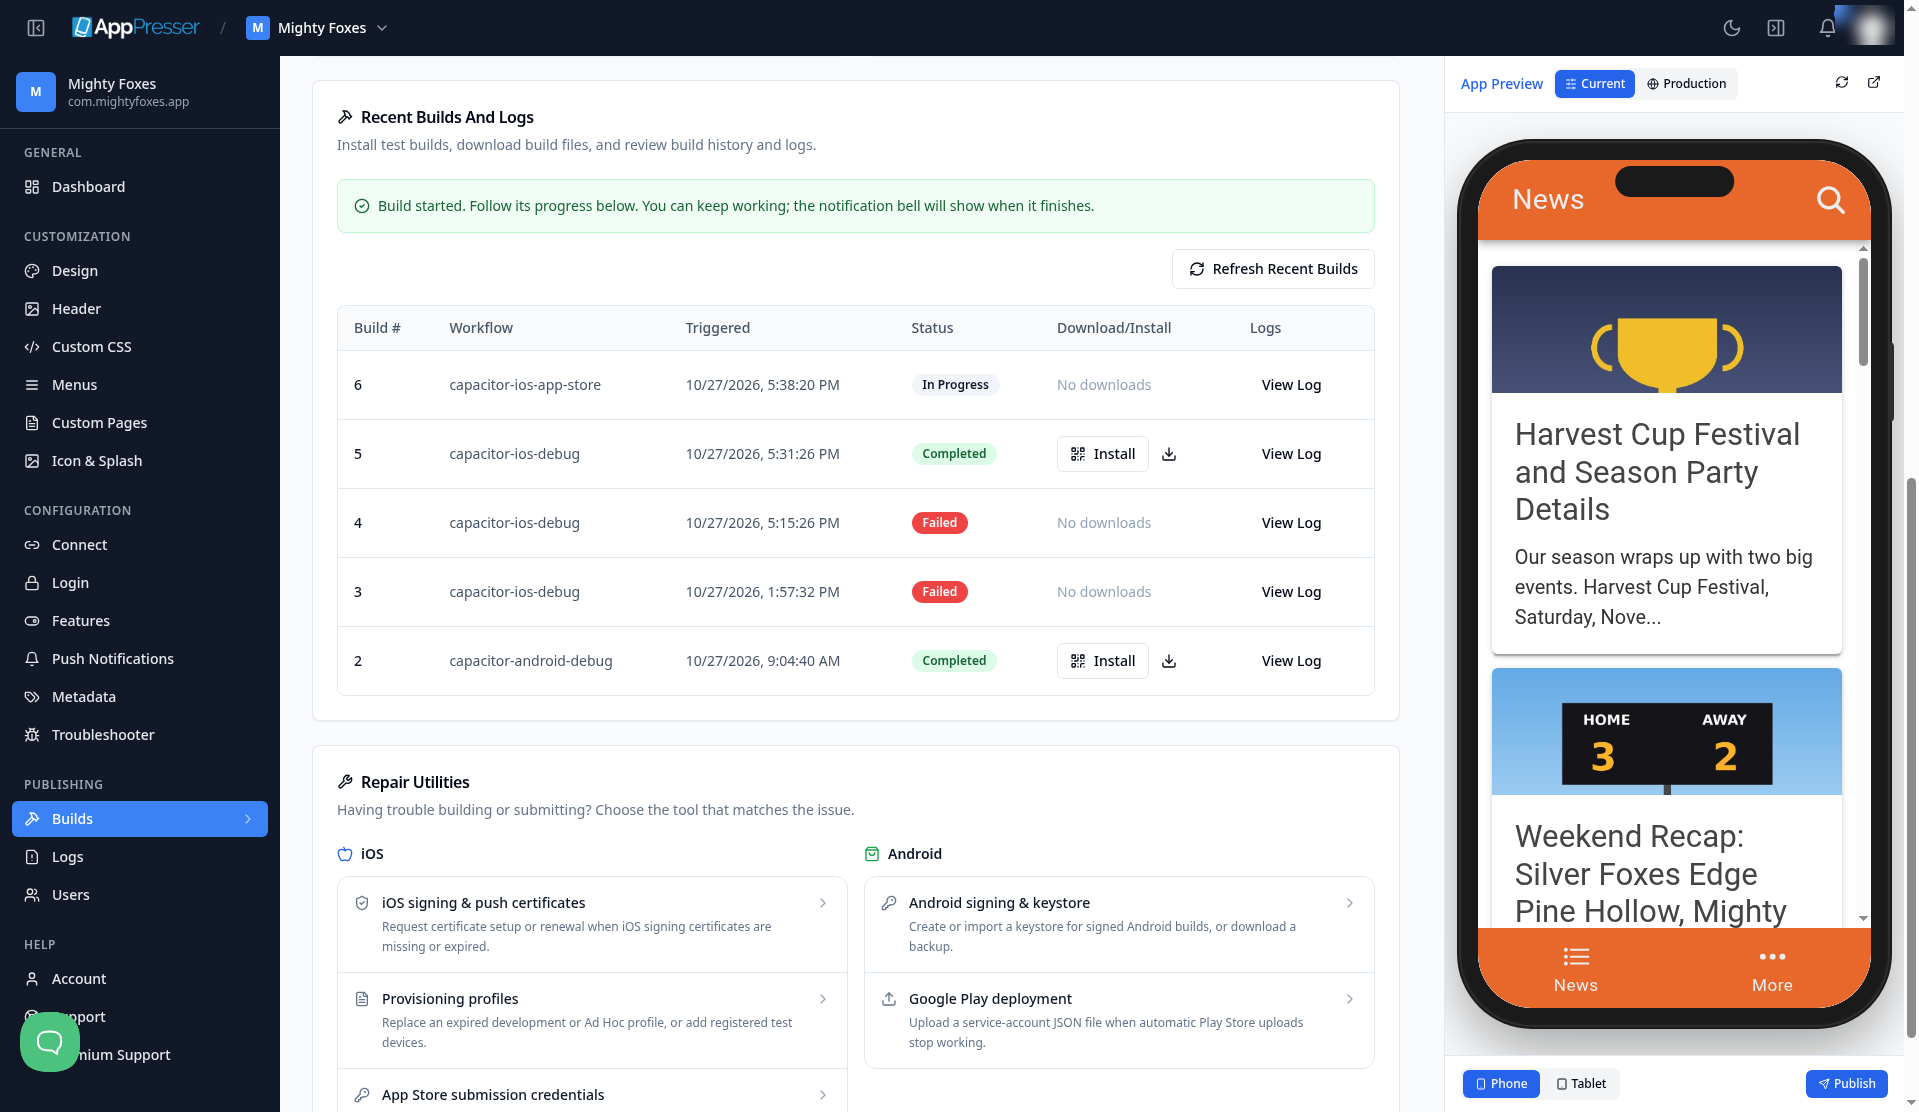
- Wait several minutes. The notification bell shows when the build finishes.
- Click Refresh Recent Builds to see the status. Completed means your build was sent to Apple. Failed means it was not.
- If the build failed, click View Log to see why.
Step 6: Wait for Apple
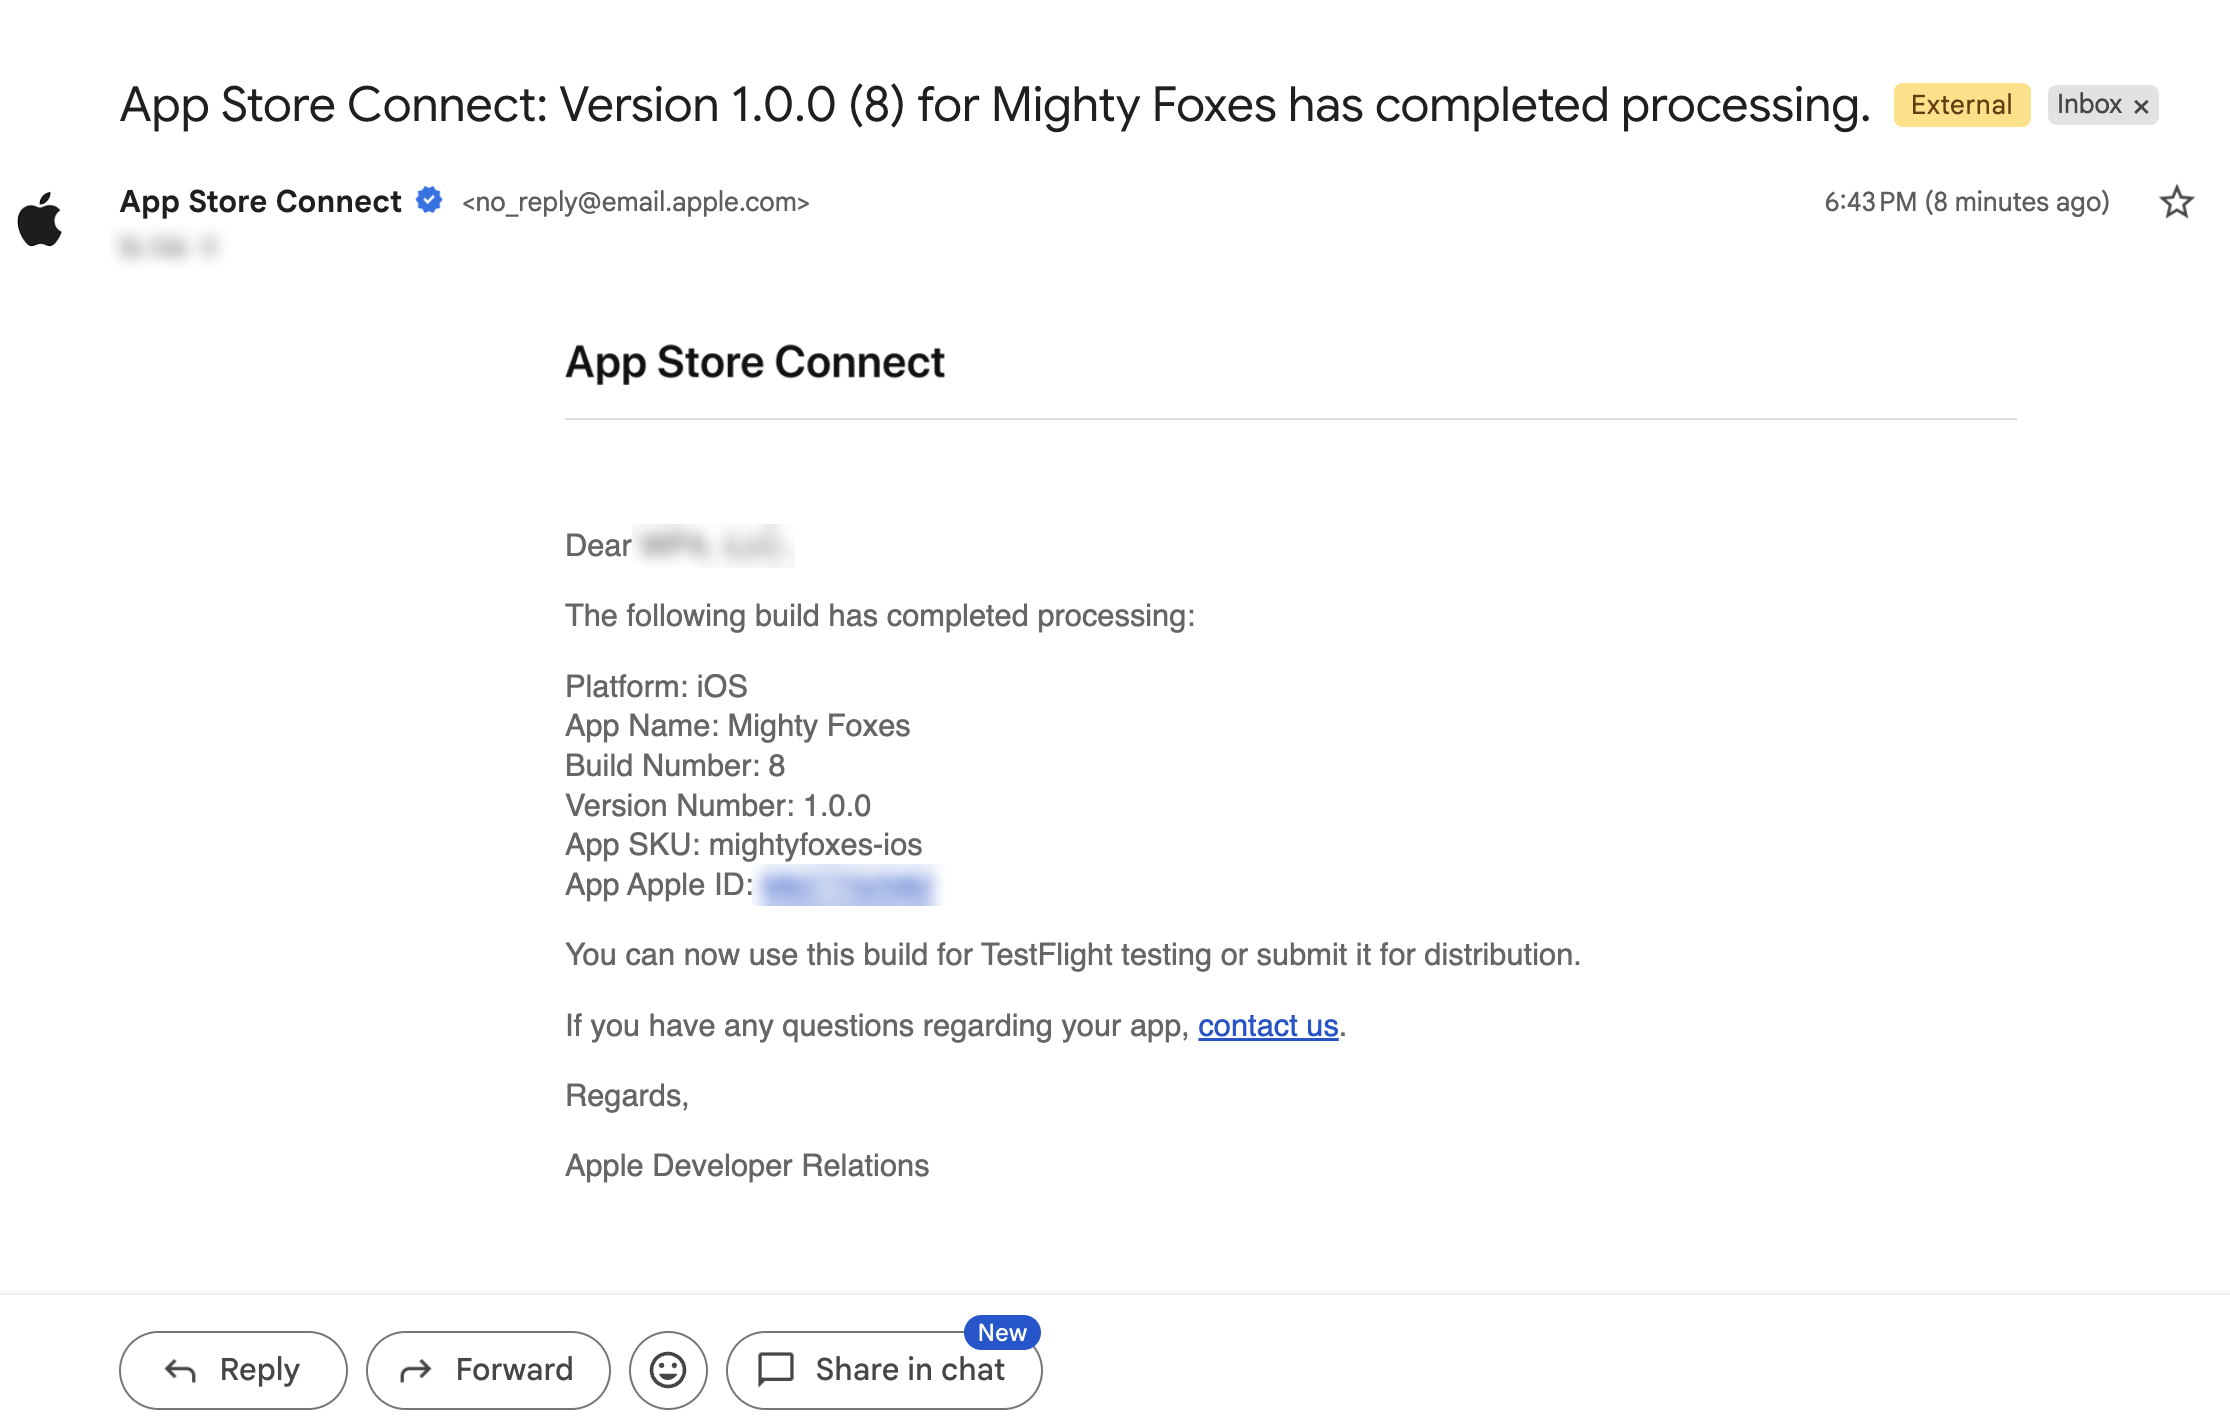
Apple checks your build. This often takes 5 to 30 minutes. Apple emails you when it is done.
Step 7: Add yourself as a tester
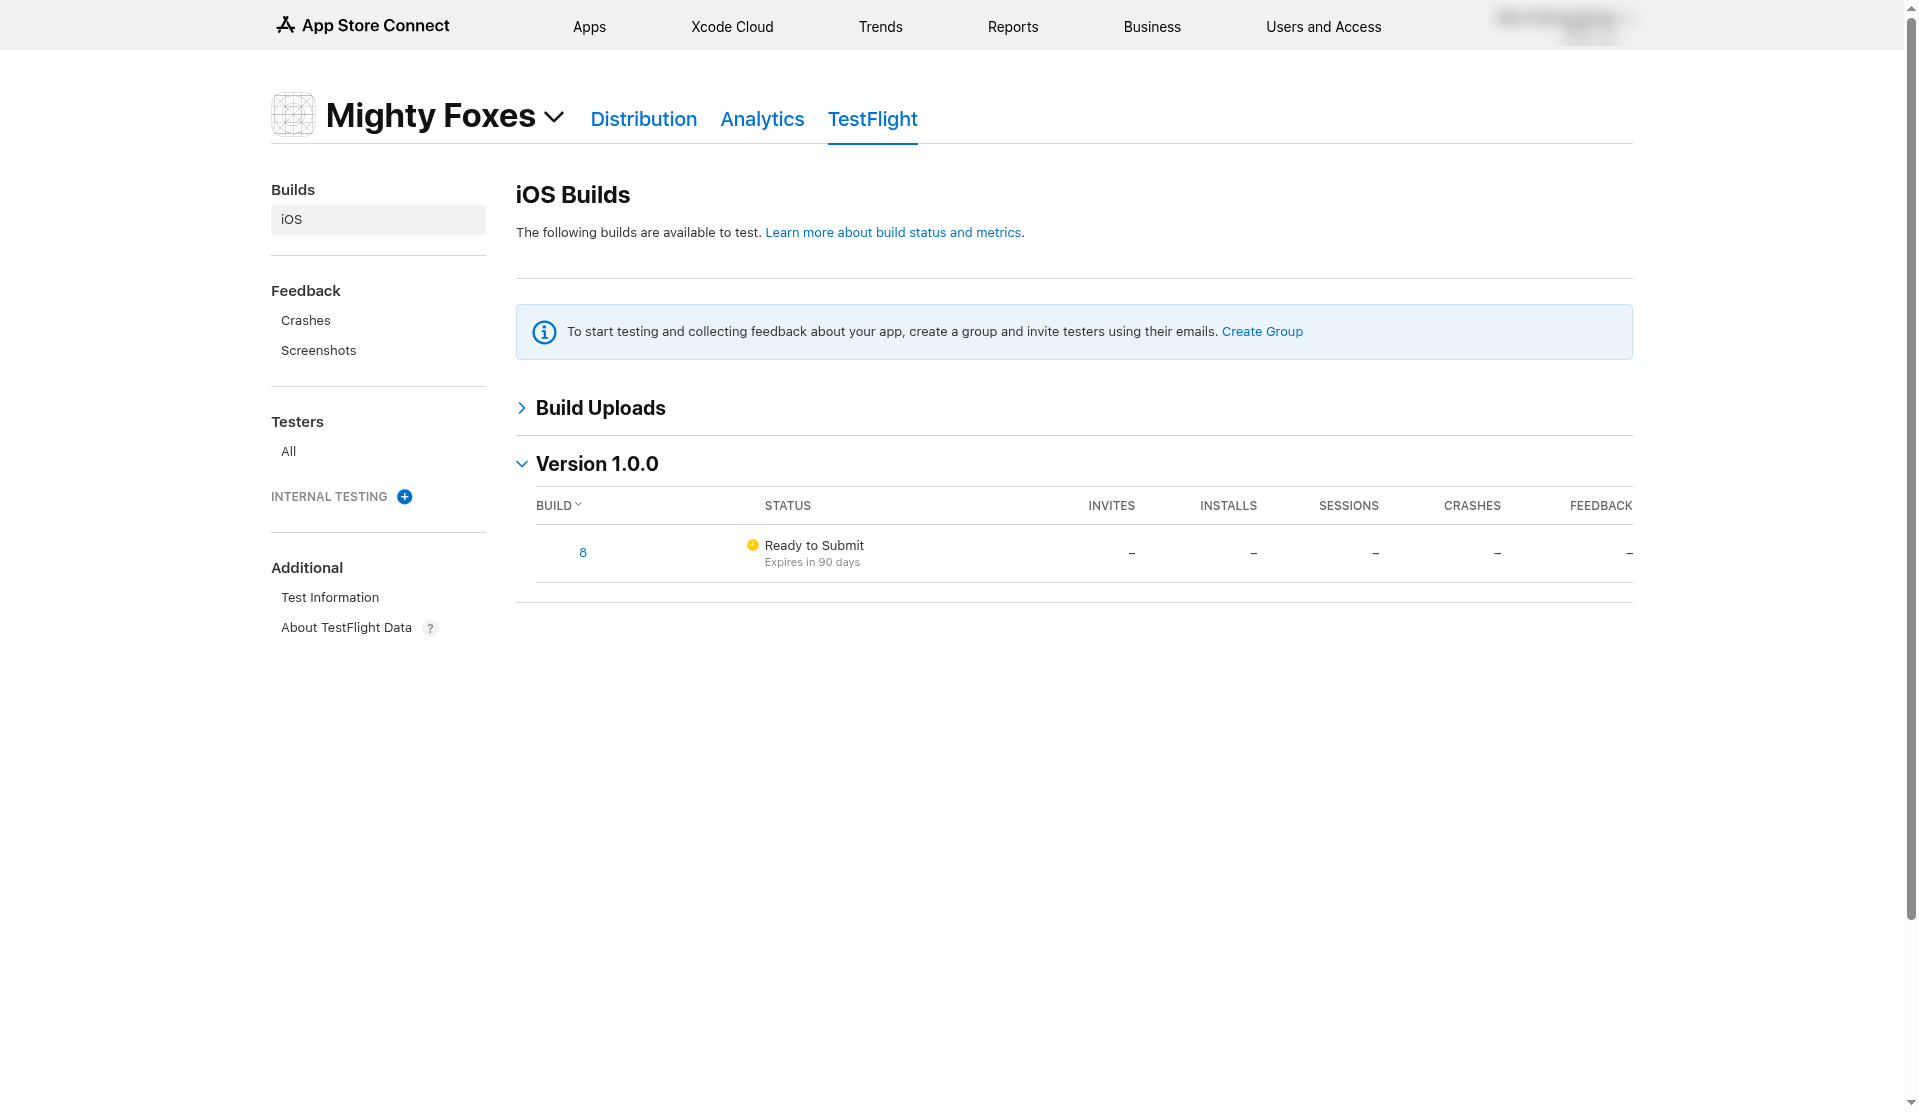
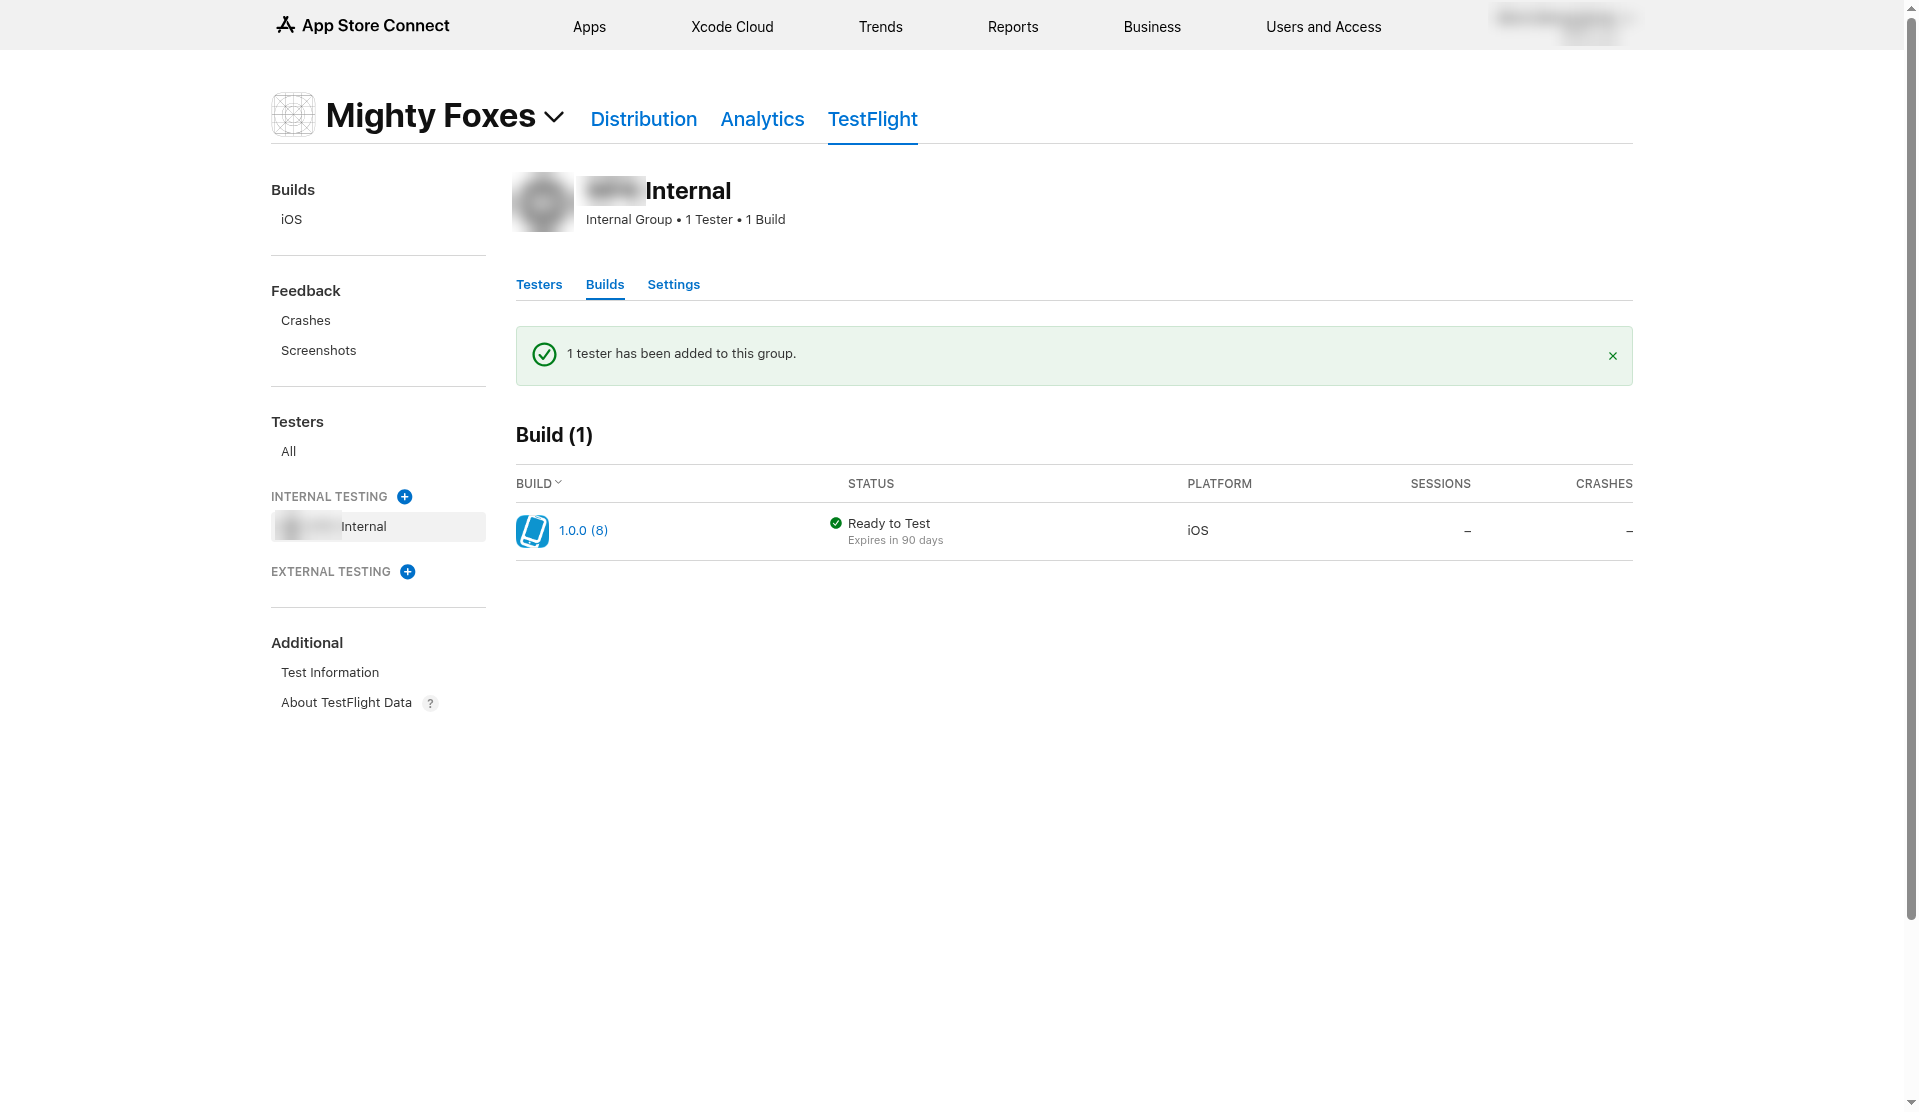
- In App Store Connect, click Apps, then your app, then TestFlight.
- Under iOS Builds, open your version and check that your build shows Ready to Submit.
If it says Missing Compliance, click Manage and answer Apple's questions about encryption.
- Next to Internal Testing, click the plus (+).
- Name the group, for example "Internal Testers", leave Enable automatic distribution on and click Create.
On the Testers tab, click the plus (+), check the people to invite and click Add.
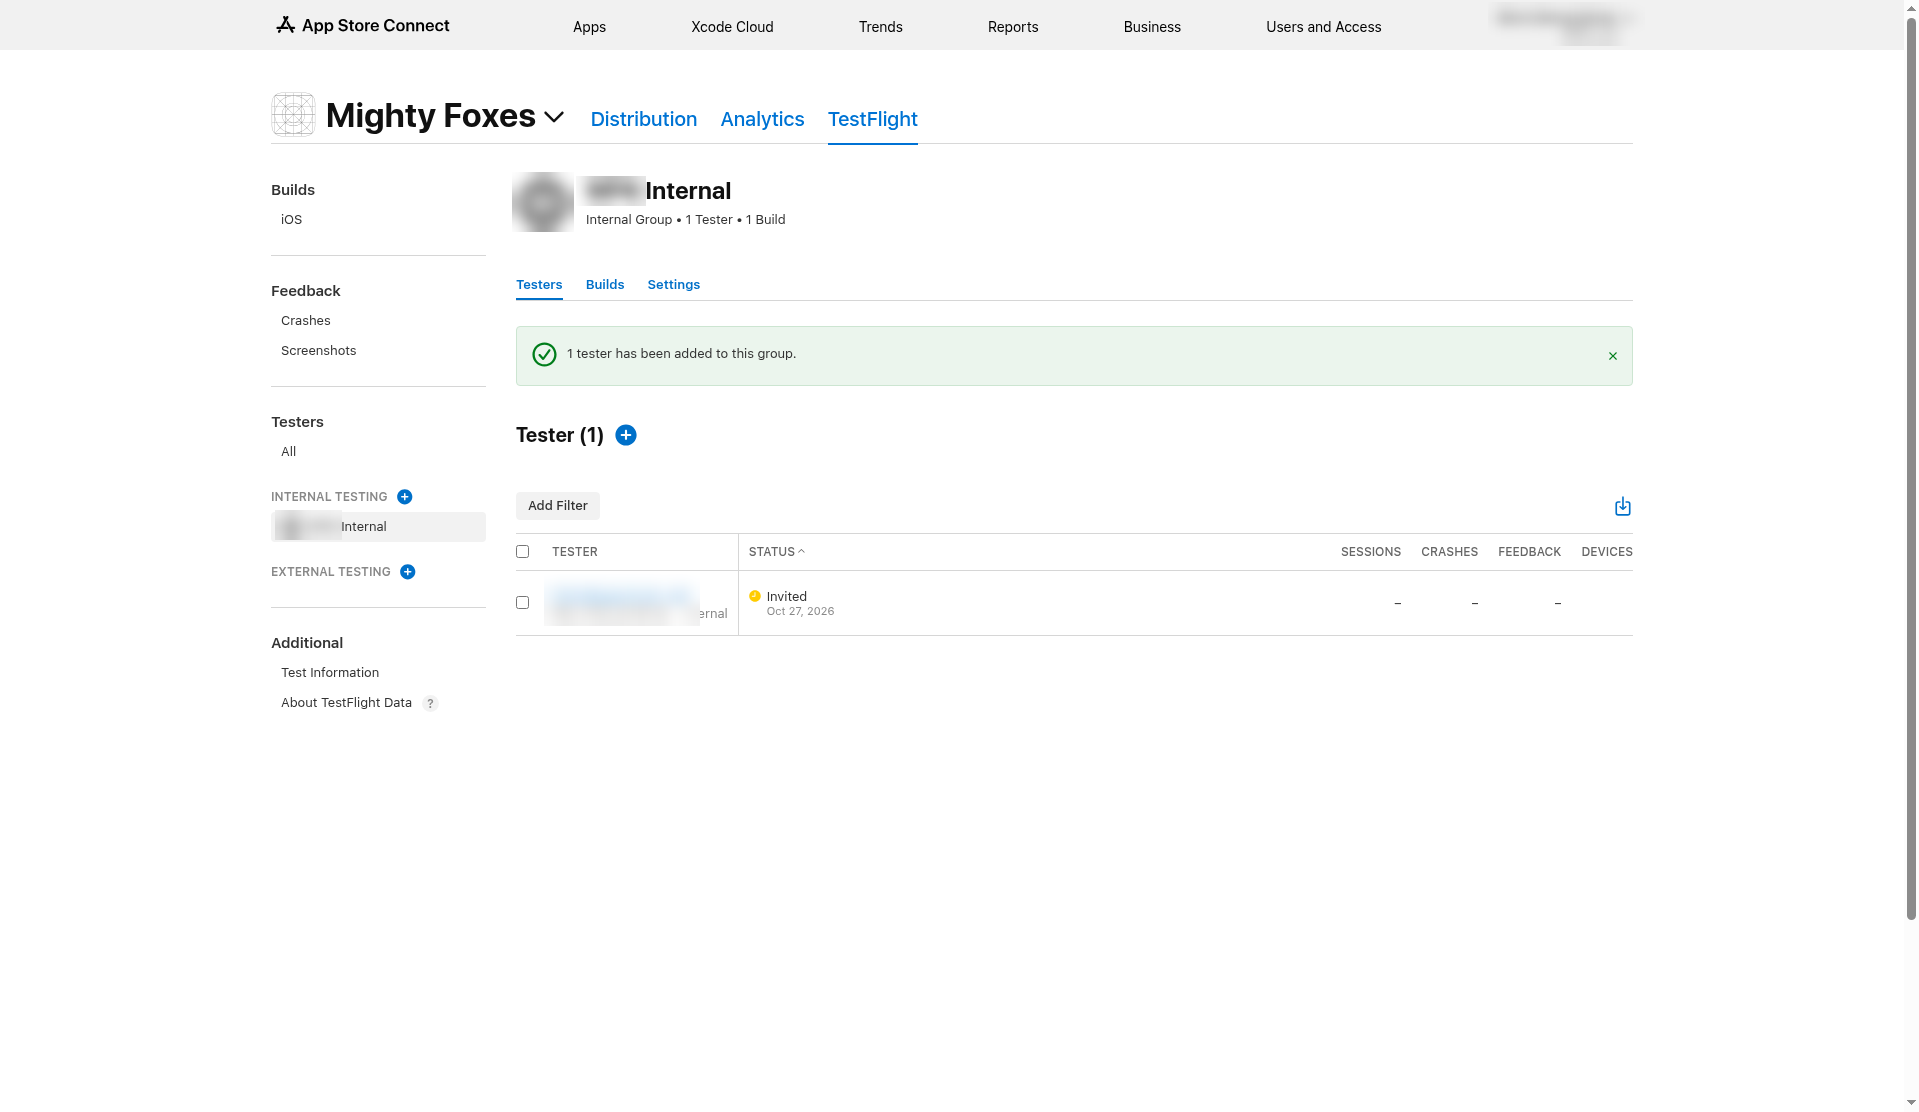
- Click the group's Builds tab and check that your build shows Ready to Test.
Step 8: Put the app on your iPhone
- On your iPhone, install the free TestFlight app from the App Store.
- Sign in to TestFlight with the same Apple account that got the invite.
- Open the invite email and tap View in TestFlight.
- Tap Install.
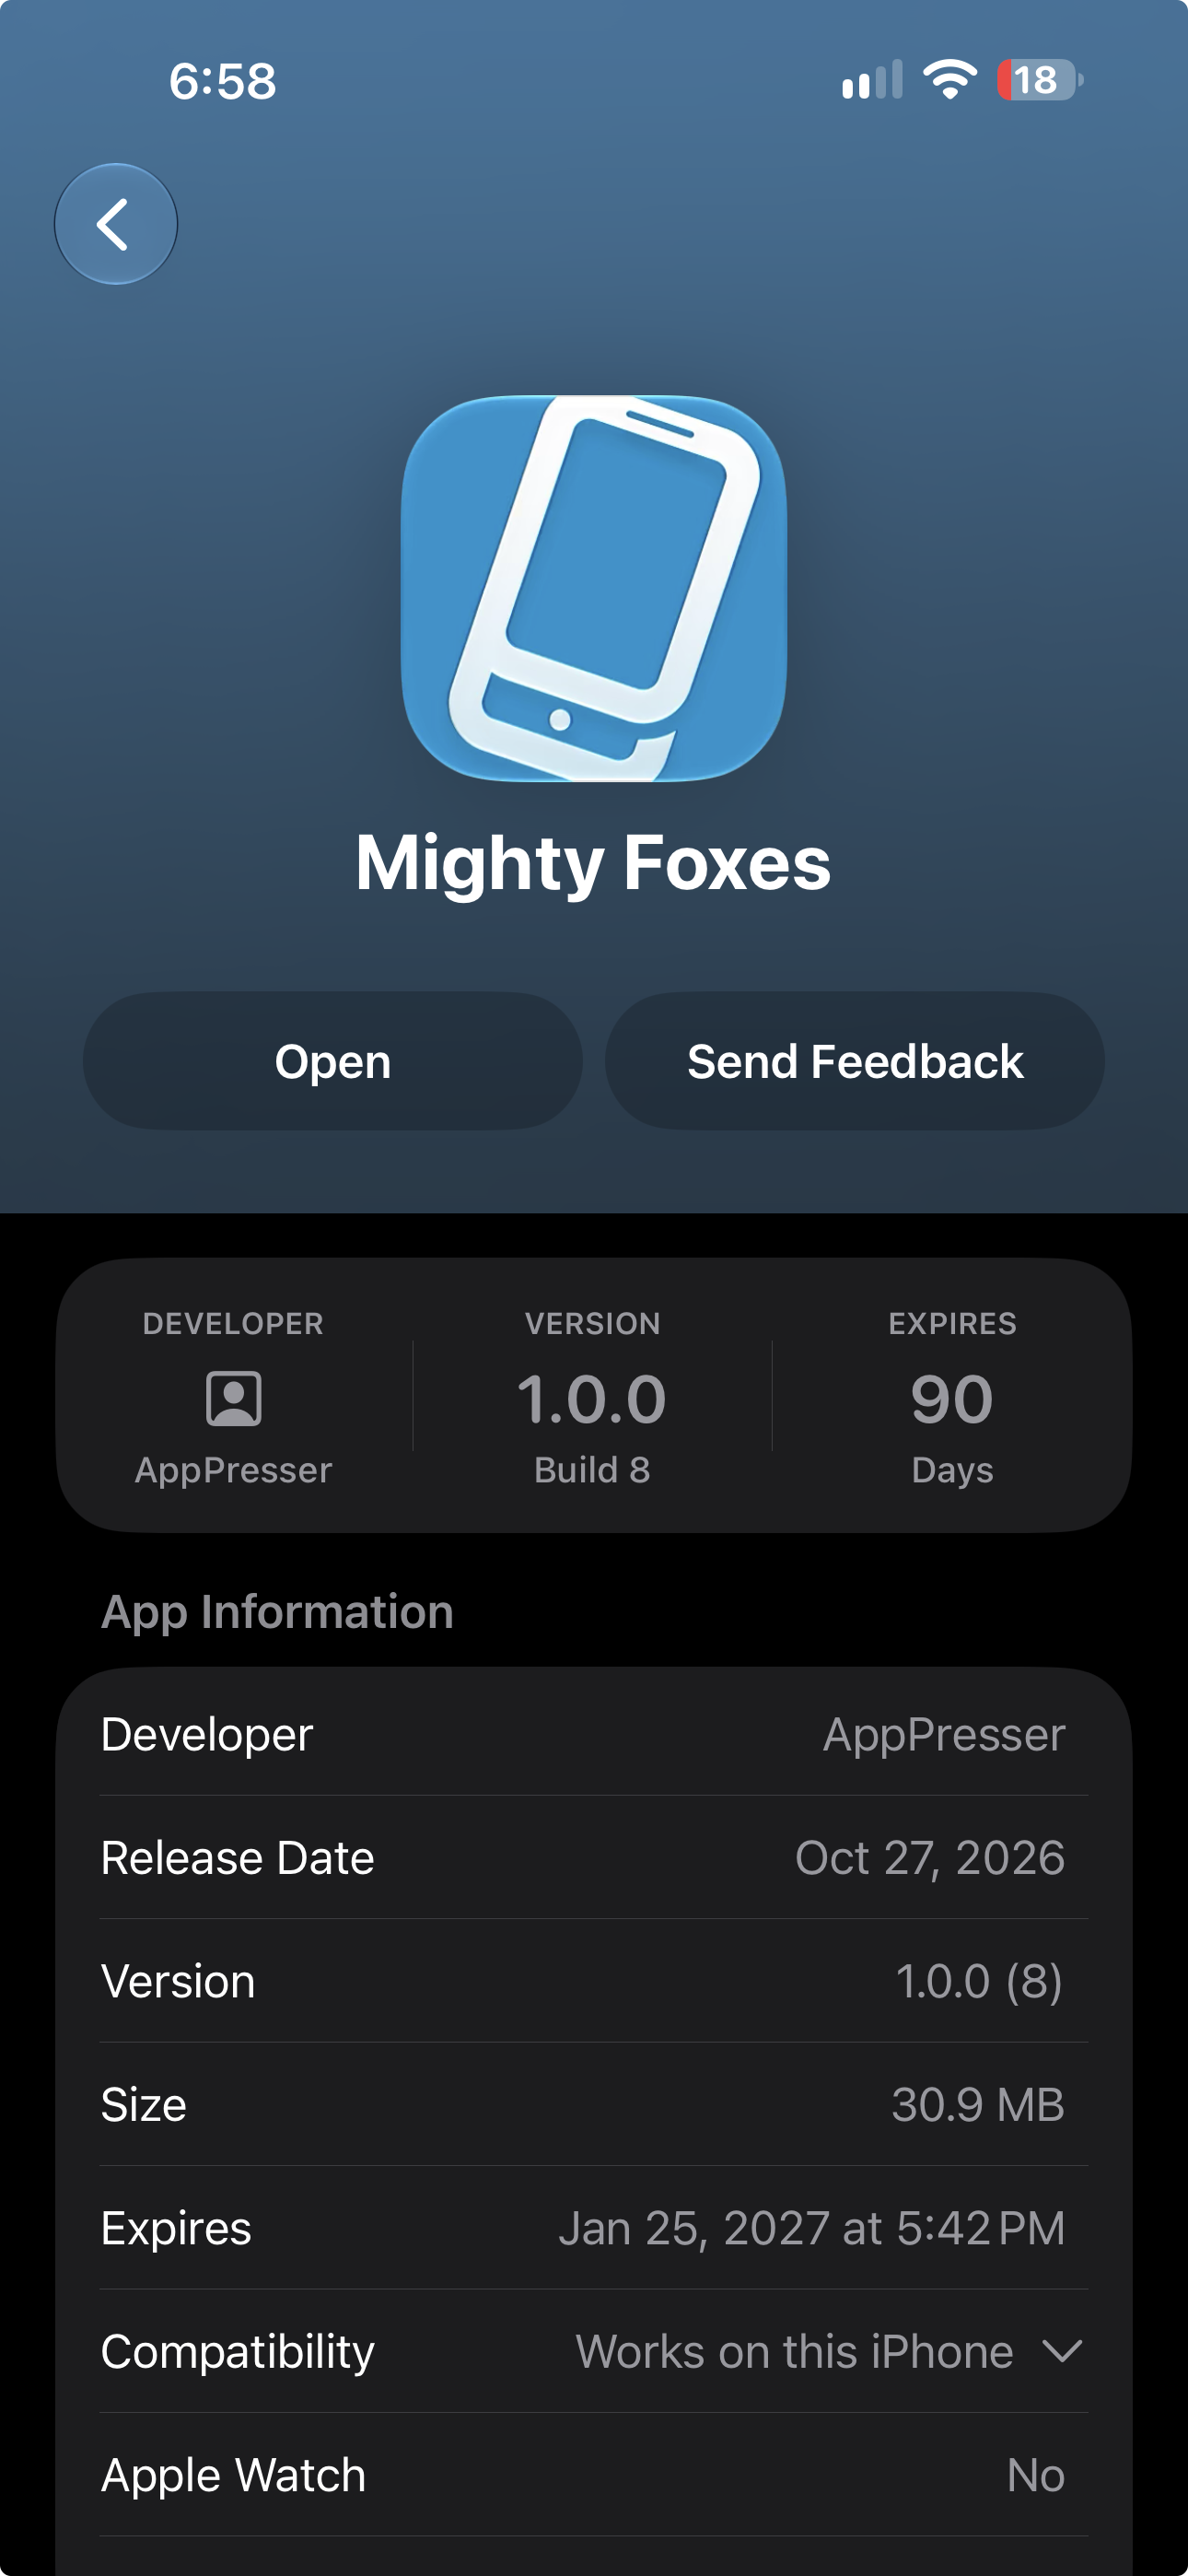
TestFlight builds stop working after 90 days. Make a new build before then.
If something goes wrong
Swipe sideways to see the rest of this table.
| What you see | What to do |
|---|---|
| Your Apple Account or password was entered incorrectly | Type your full Apple email in Apple ID email and save a new app-specific password. Click both save buttons. |
| Could not determine provider public id from Bundle ID | Make your app in App Store Connect (Step 3) with the same Bundle ID. |
| Your build is not in TestFlight | Wait for Apple's email. Check that you are a tester and signed in to TestFlight with the right Apple account. |
| The app shows the AppPresser icon, not yours | Upload your icon in Icon & Splash. Make a new App Store build. |
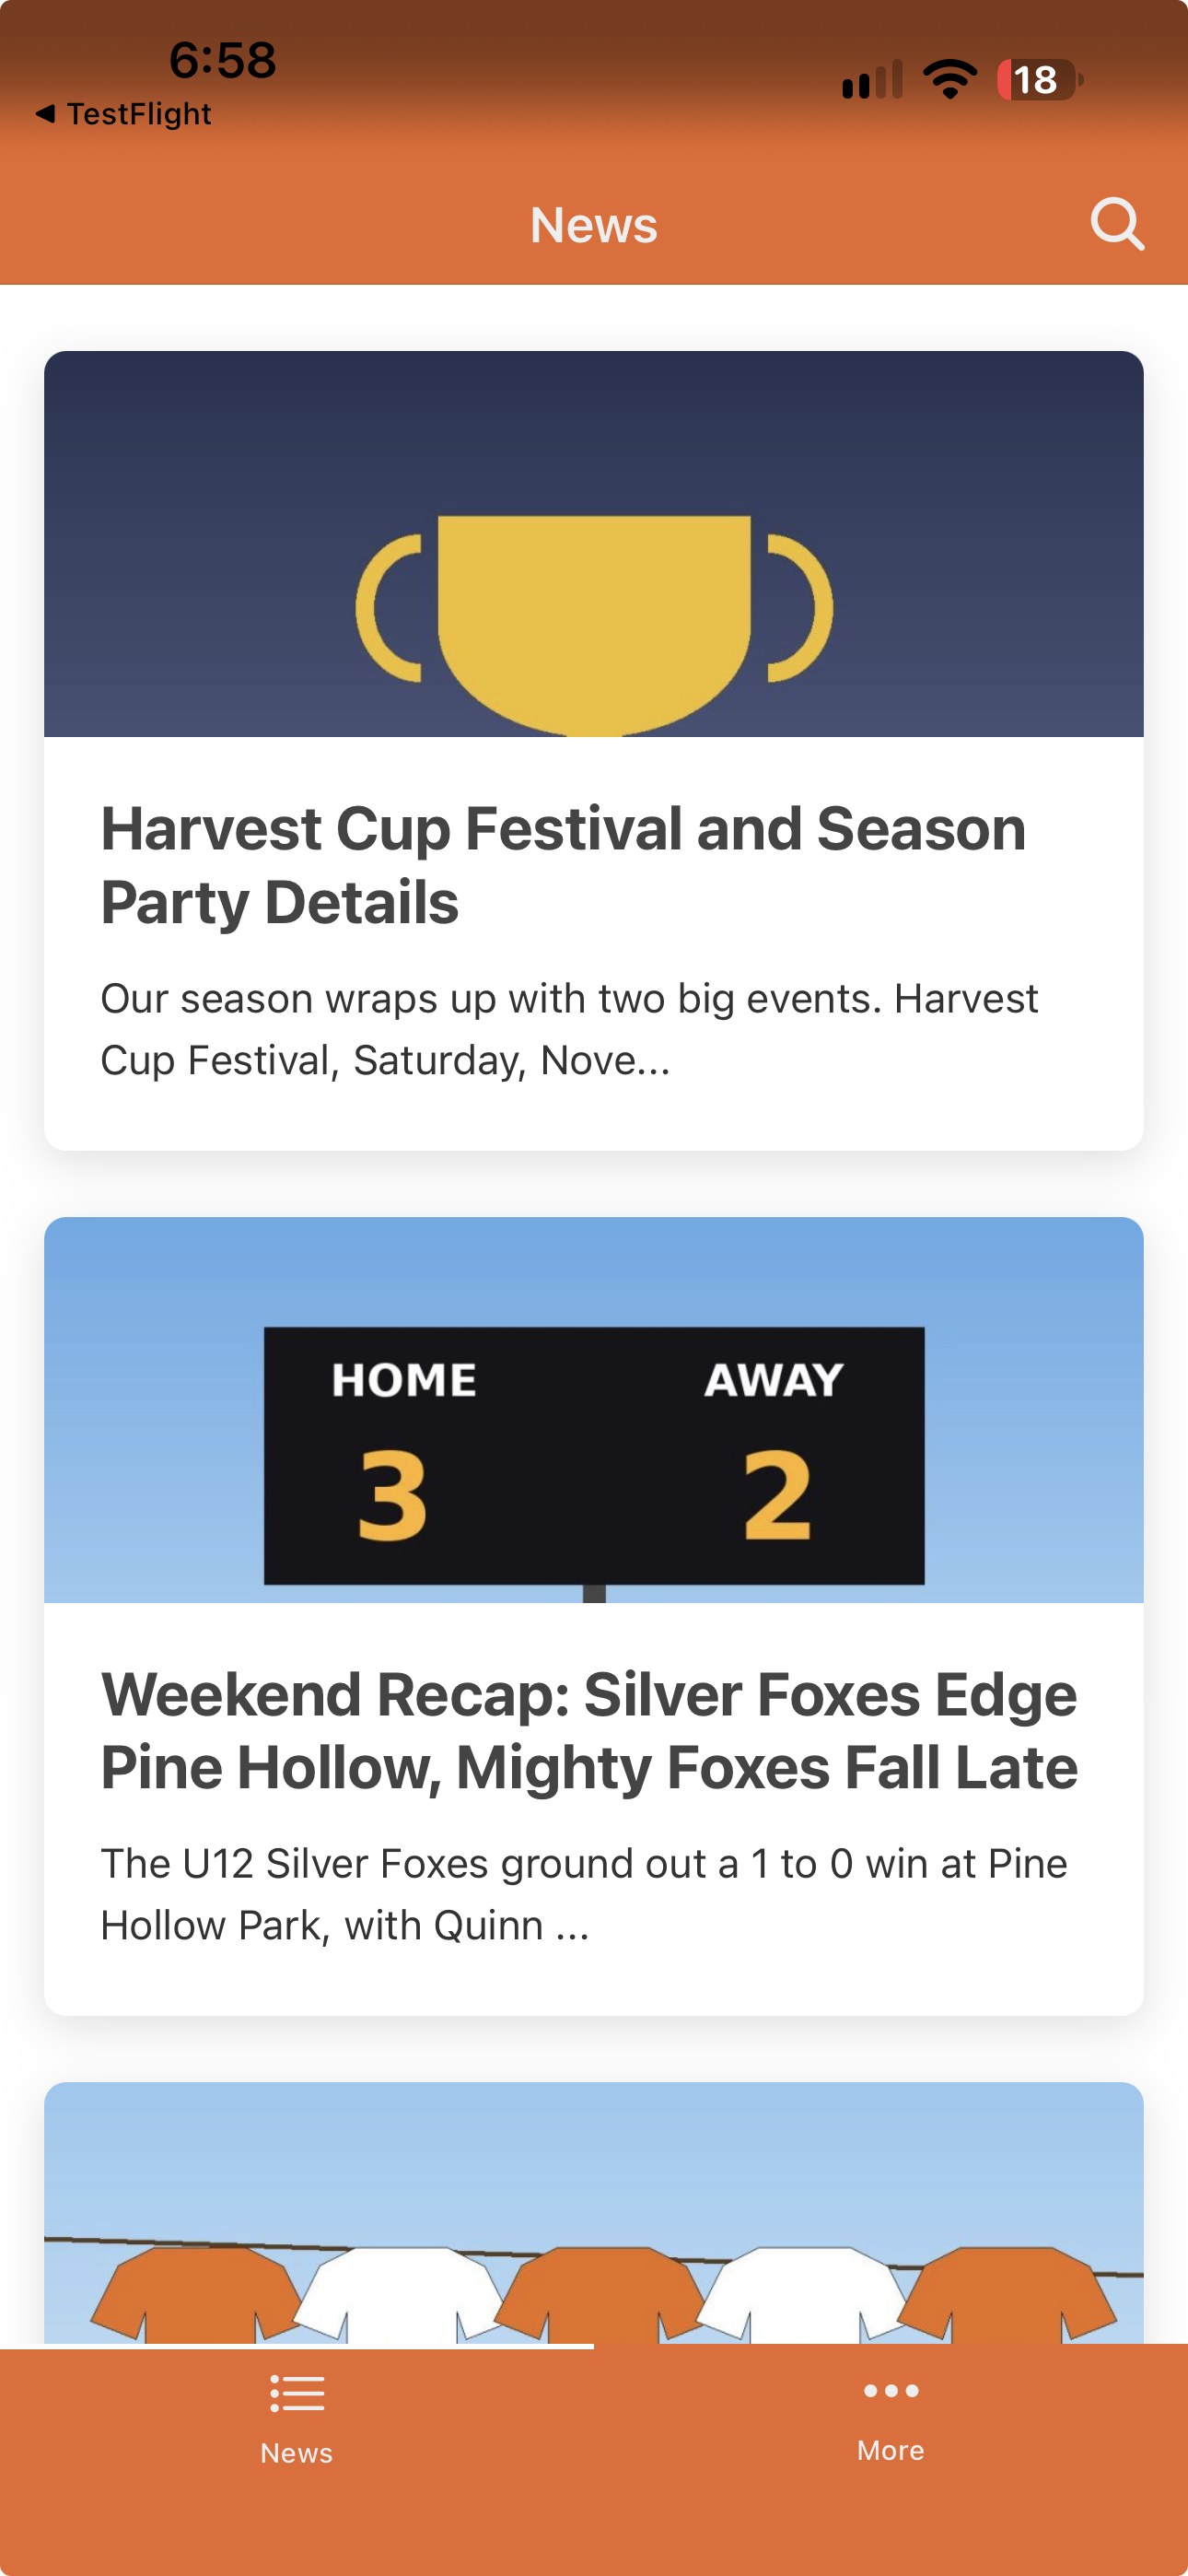
You're done when your app opens on your iPhone from TestFlight.
Next step
Publish your Android app to Google Play (step by step)
Related articles
Это было полезно?
Результаты обновляются по мере ввода. Нажмите «/», чтобы перейти к поиску.
Не нашли ответ?
Наша служба поддержки поможет с настройкой, сборками и вопросами о магазинах приложений.