
Essential Apps to Manage WordPress from your iPad

Gone are the days when a tablet or phone is a nice to have secondary device. Many people say they feel a bit panicked when they leave the house without their devices. While phones have earned their places in our workflows for email, messages, and even the odd call, for many tablets are still a bit on the fringe.
Only a few brave souls that have taken the iPad and pushed it into a capable laptop or desktop computer replacement. Today, I’m going to walk you through how I manage WordPress content and coding all from my iPad.
Ulysses
As with many people that do a bunch of writing, I have been on a long quest to find the perfect writing app and Ulysses always comes out on top for writers publishing to WordPress. From it’s brilliant export to the way it can import Word files, there isn’t anything better.
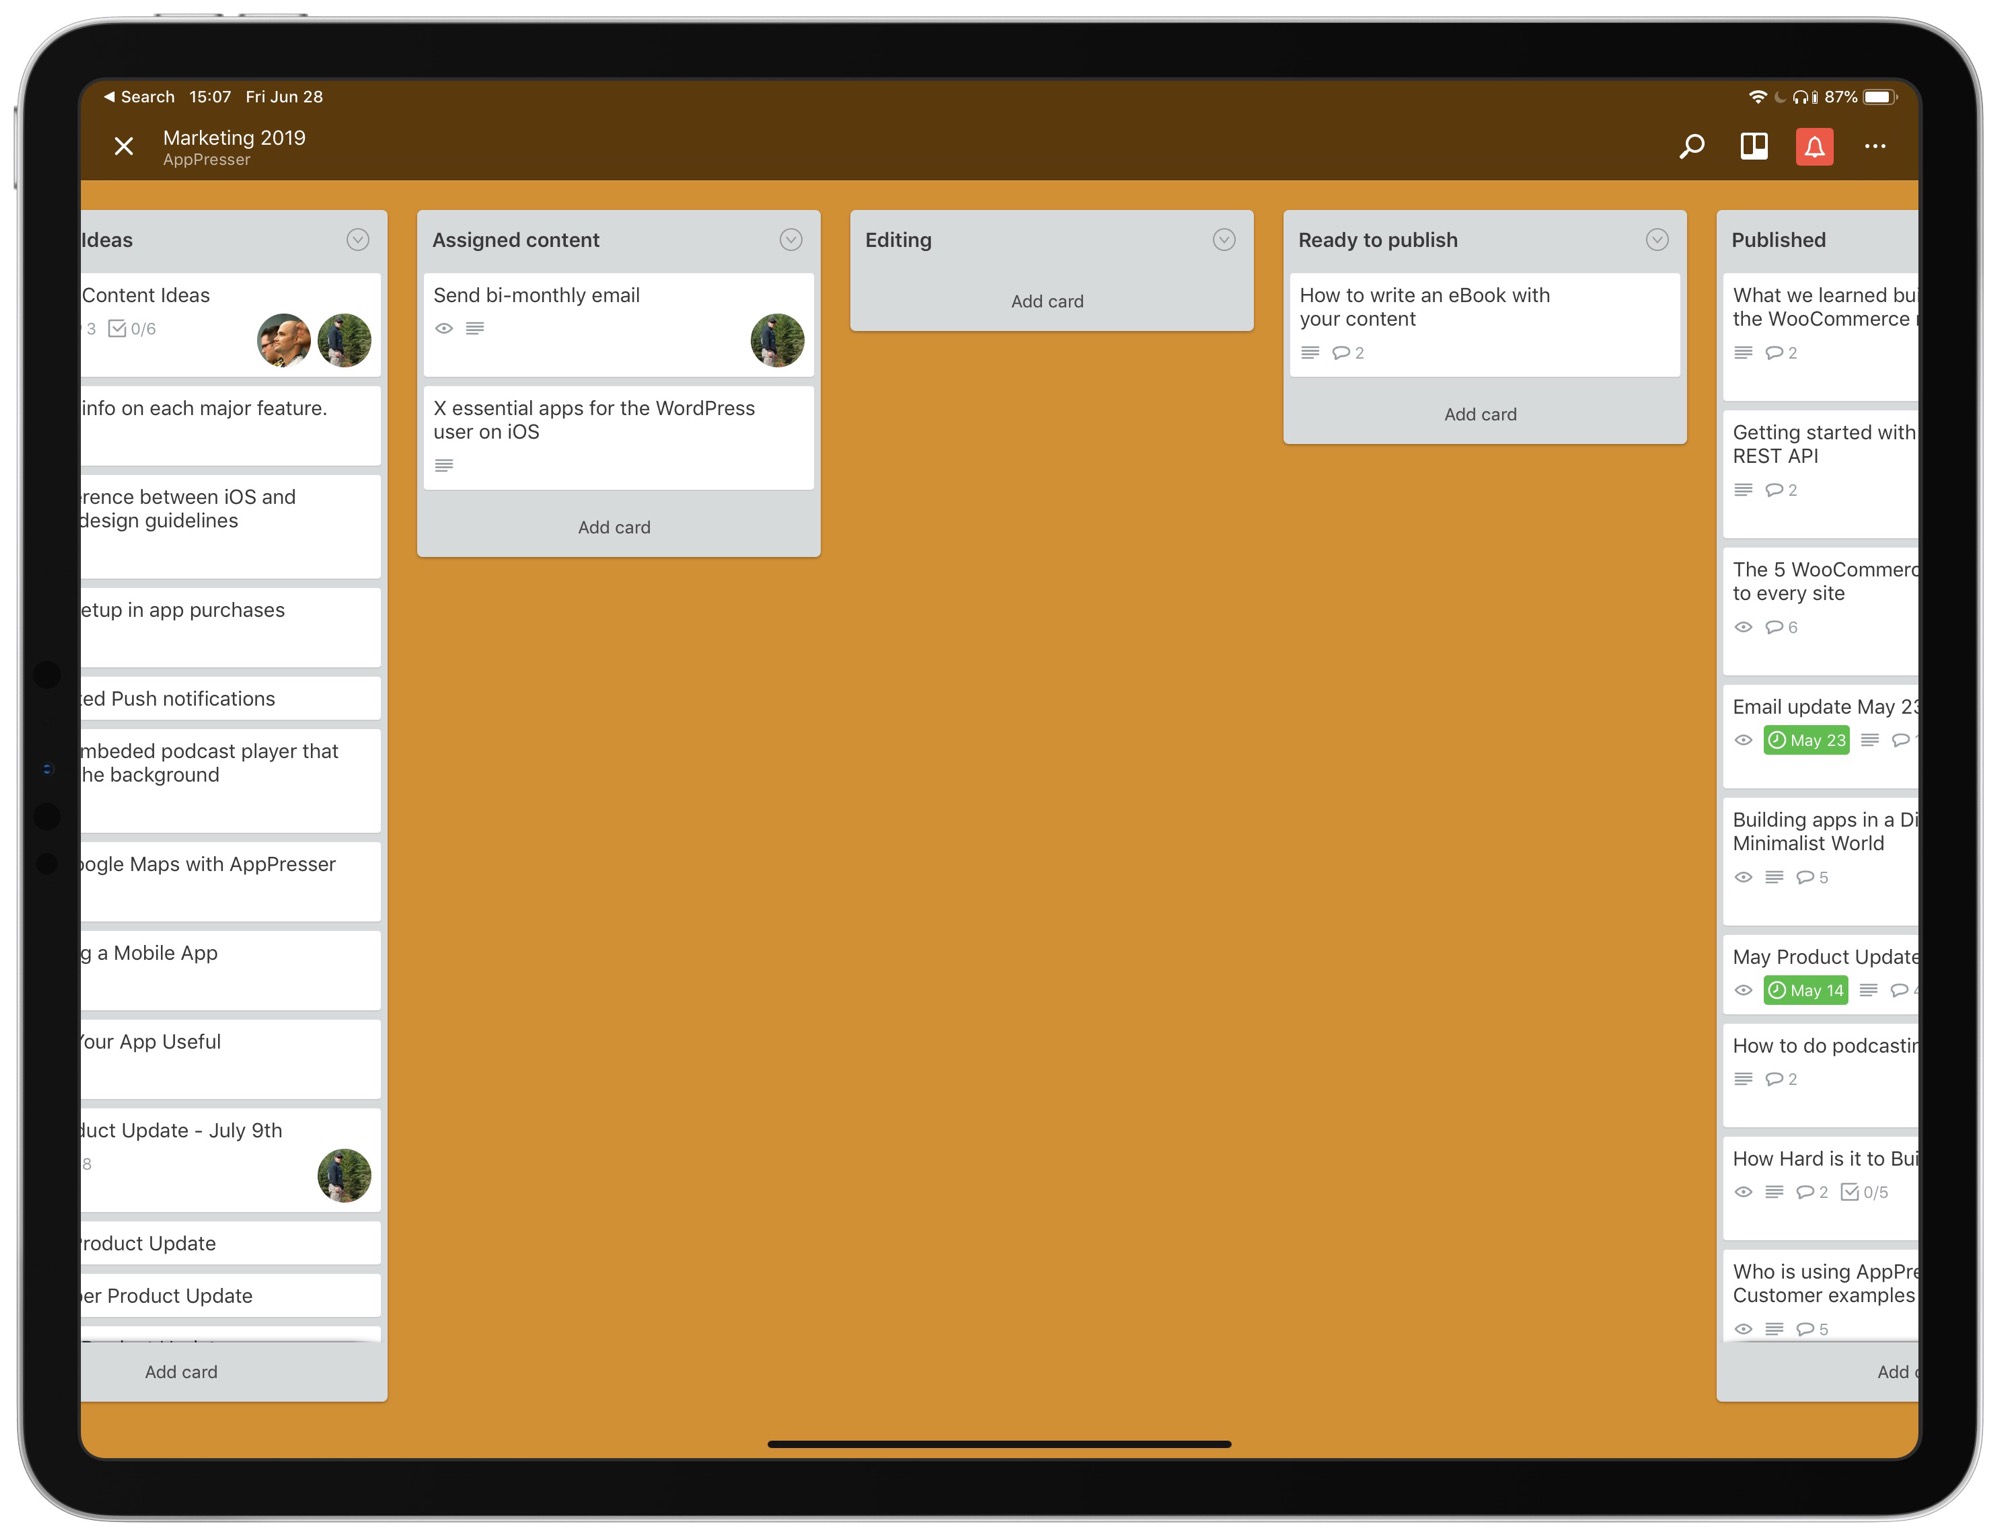
To understand how I use it let me give you break down of our content flow at AppPresser. Scott and I have a board of ideas in Trello that we move from Idea to Writing to Editing. When they’re ready for editing they end up in Google Docs where we trade reading and critiquing what has been written. Once we’re happy with an article it’s up to me to take that article, move it into WordPress and get it ready for publishing.
The best way to take content out of Google Docs and pass it to WordPress on an iPad is to use the Share and Export menu to send a Word Document to Ulysses.
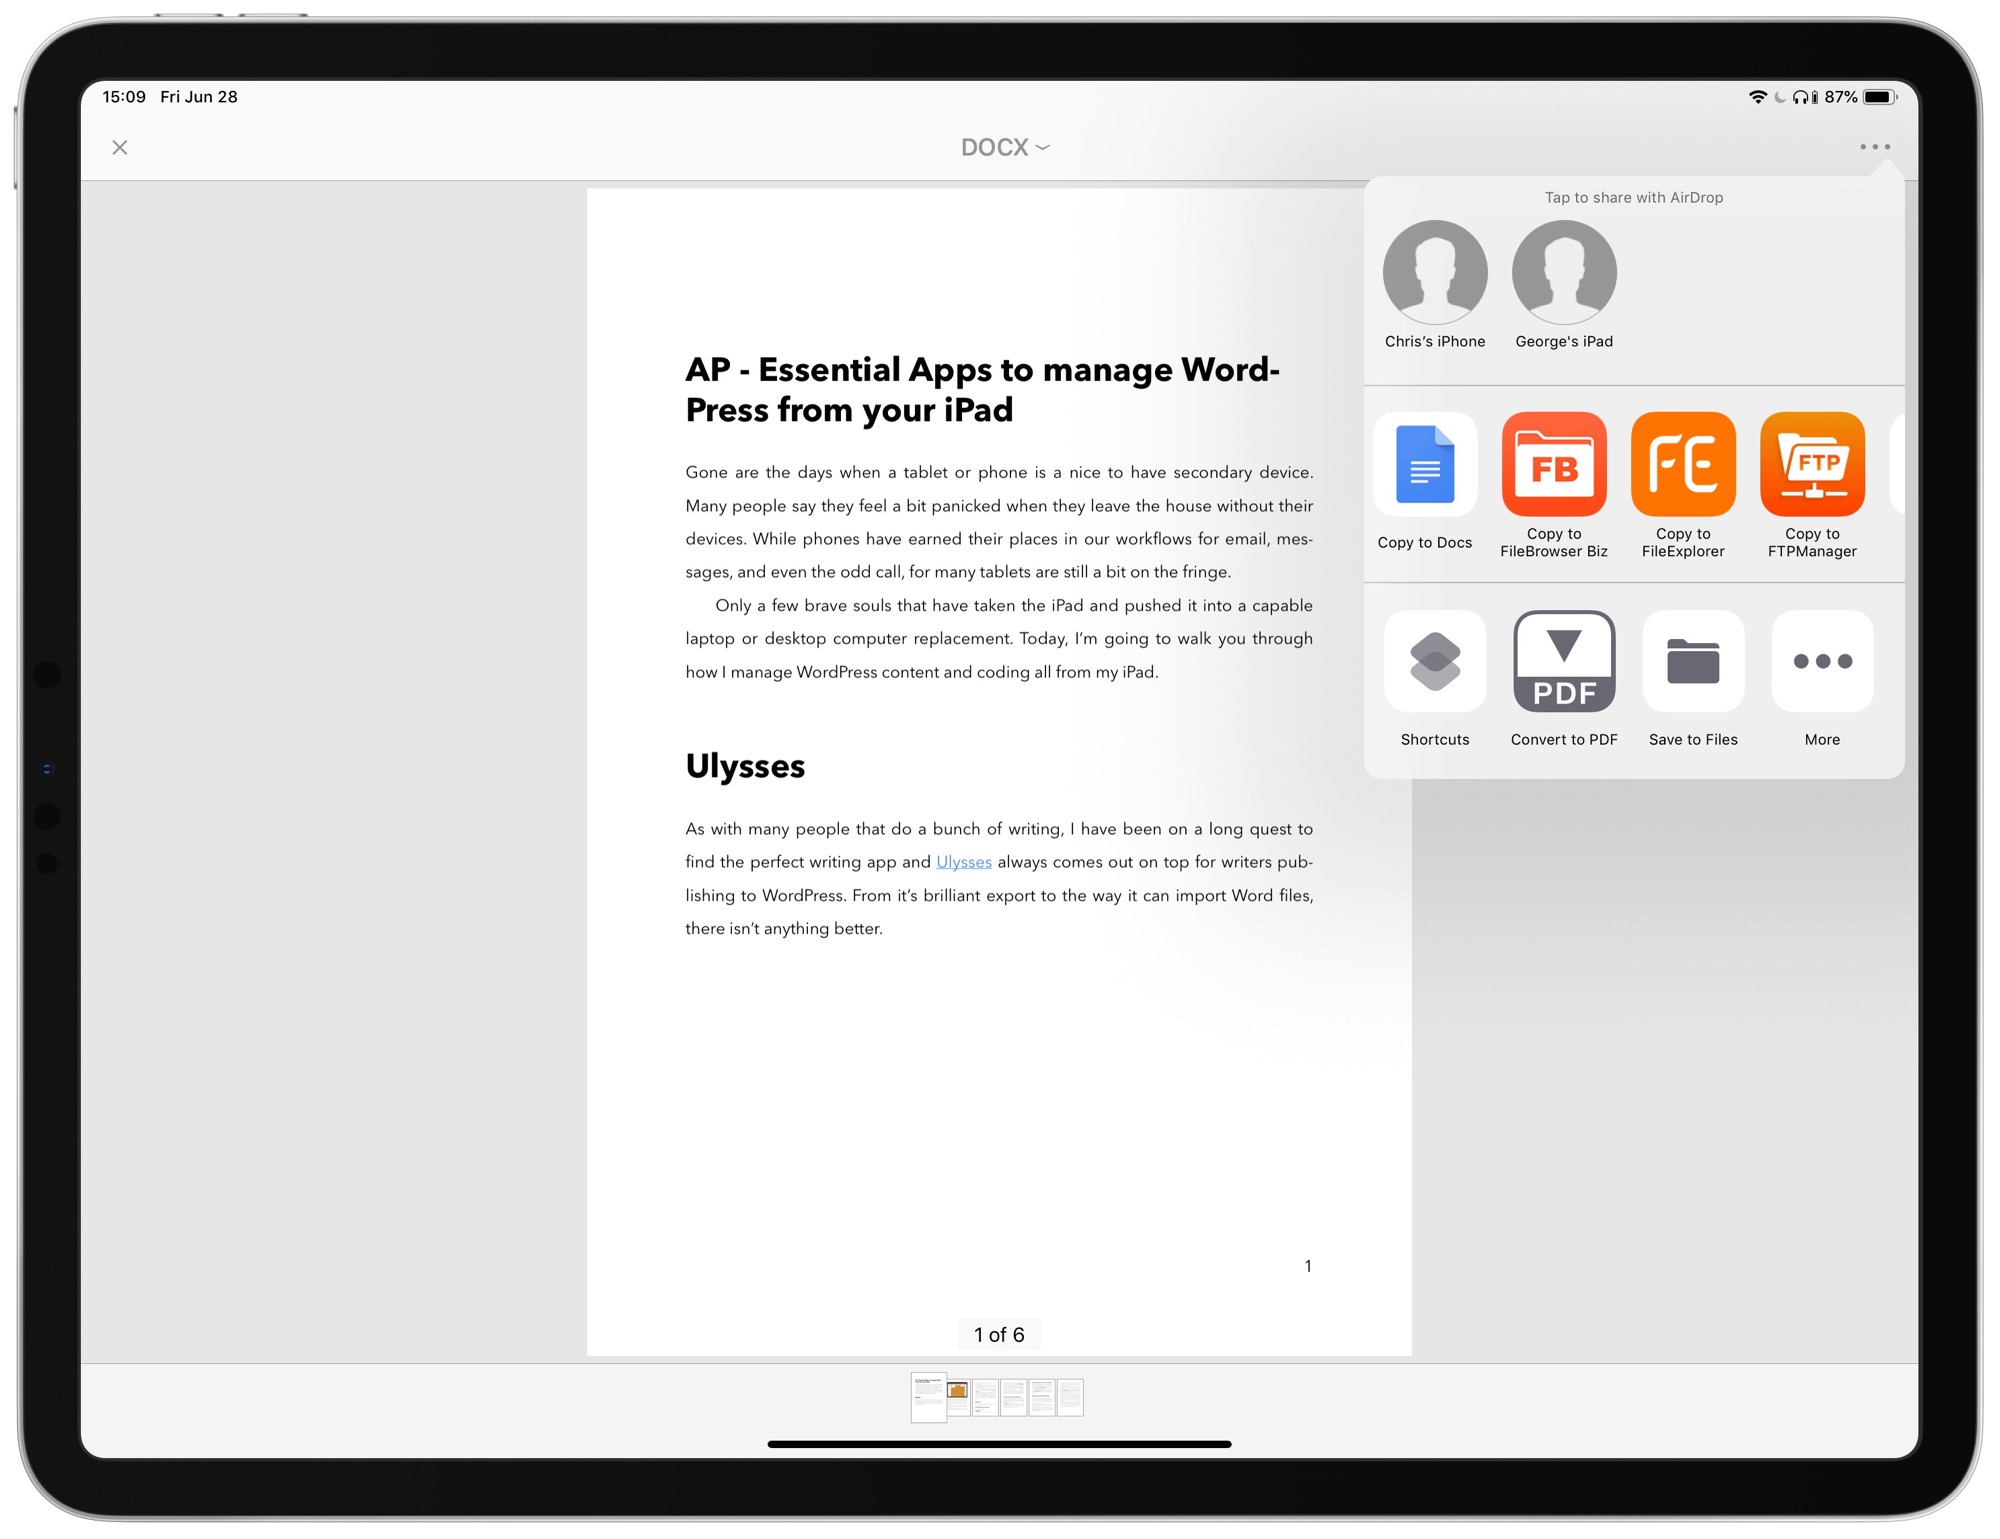
Ulysses will import all the content and images, though it does miss headings so you have to format those manually. I also use this time with Ulysses to make sure that our links have proper title tags associated and to add ALT tags to our images so that they’re accessible.
Next I use the built in WordPress export in Ulysses to send the post to AppPresser using their WordPress 5 format, which means you’re going to get something that’s compatible with Gutenberg.
The final step is to validate that everything looks as expected in WordPress. Ulysses doesn’t allow image alignment, so I’ll float any images to the side that need it in the post or update any code blocks that need proper blocks for Syntax Highlighter Evolved.
The biggest drawback to using Ulysses for this is that to be able to embed images you need to keep your documents in their proprietary iCloud location. Currently other editors like Byword or iA Writer can’t access those files, so you’re stuck with Ulysses as your editor on Mac or iOS. If you choose to use Dropbox to sync your files in Ulysses you loose the ability to add images directly to posts but you can open and edit them from any writing application that supports Markdown or Plain Text.
Shortcuts
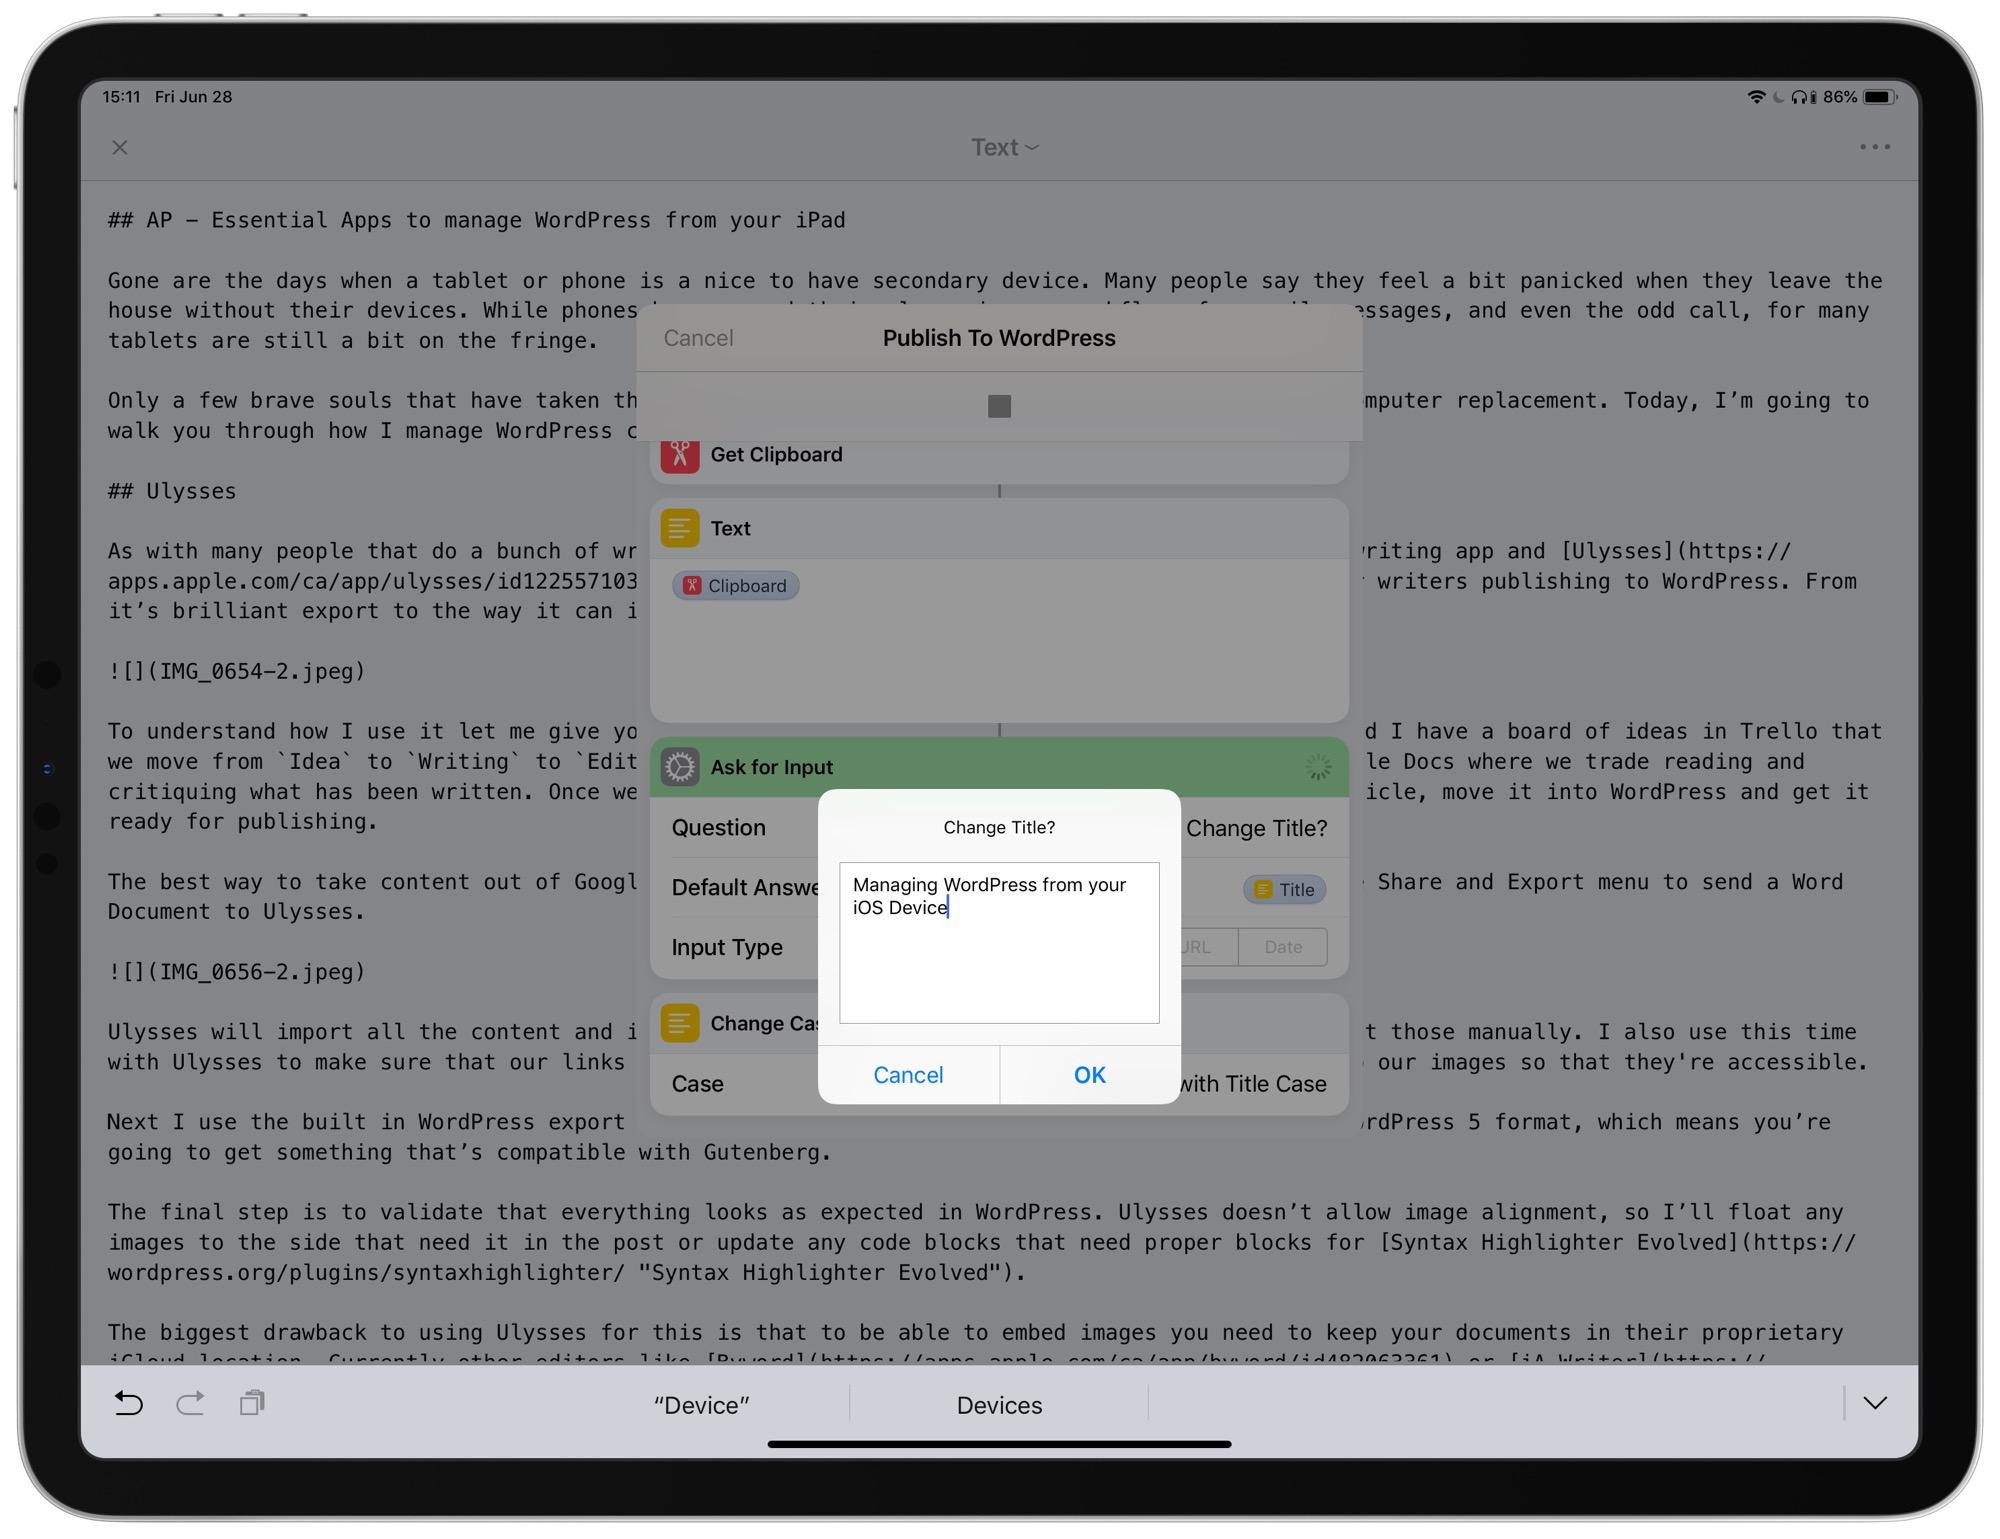
I also heavily use Shortcuts1 in my writing and image editing workflow to get content into WordPress from iOS. Let’s look at a few of the Shortcuts I use.
Publishing Markdown to WordPress
I’ve clearly found some shortcomings in Ulysses, so I also have another way to publish to WordPress sites, but this requires that you have Jetpack’s Markdown addon setup. This method of publishing to WordPress does not support Gutenberg either, it’s for plain text Markdown people and is what I use on my personal site.
To start, you can use any Markdown editor on iOS that you want. I like Byword or iA Writer, but feel free to choose your poison. Then you’ll need this Shortcut so download it and add it to your Shortcuts library.
Now all you need to do is add your WordPress account and then share your Markdown file via Shortcuts and follow the prompts. This Shortcut assumes two types of posts. One a linked post, and two a regular post where it will prompt you for a featured image. It will also use the built in Shortcut to make your blog title use Title Case.
Resizing Images for Blog Posts with Shortcuts
When it comes to getting images formatted properly for online viewing I haven’t found anything better than what Shortcuts can provide. Yes, you can squeeze a few more bytes out of an image by processing them specifically in something like Affinity Photo, but it’s going to take far longer.
This shortcut takes any horizontal image and shrinks it to no wider than 2500px and reduces the image quality so that it’s a safe for web size. It also produces a second image no wider than 800px with -email appeneded to the end so that I have an email suitable for sending to readers via email.
Adding Apple Frames to Screenshots with Shortcuts
Another thing you’ll notice about this post is that there are “frames” on every screenshot that make it look like it’s wrapped in the iPad Pro they were taken on. I don’t do this by hand because that would take way too long. Instead I use Shortcuts, specifically this great one created by Frederico Viticci, to do it automatically for any Apple Device that I could take a screenshot on.
In fact, a number of the Shortcuts I’ve shown you today started as something from the MacStories Shortcuts Gallery. If you’re interested in diving deeper with automating your workflow with your iPad, then you really need to take a deeper look at that gallery.
Coding on your Site from an iPad
The final aspect of taking care of your site to address is the code that runs it, and yes that too can be handled from an iOS device in a few methods. The easiest and most familiar way to non-developers will be using Coda over an sFTP connection. To do this, set up your site with Coda and then log into it and start editing the code.
I’m sure many hardcore developers are cringing at this idea because it’s ‘cowboy coding’ and I agree. While I occasionally use Coda to edit some code it’s more often an FTP client in my workflow.
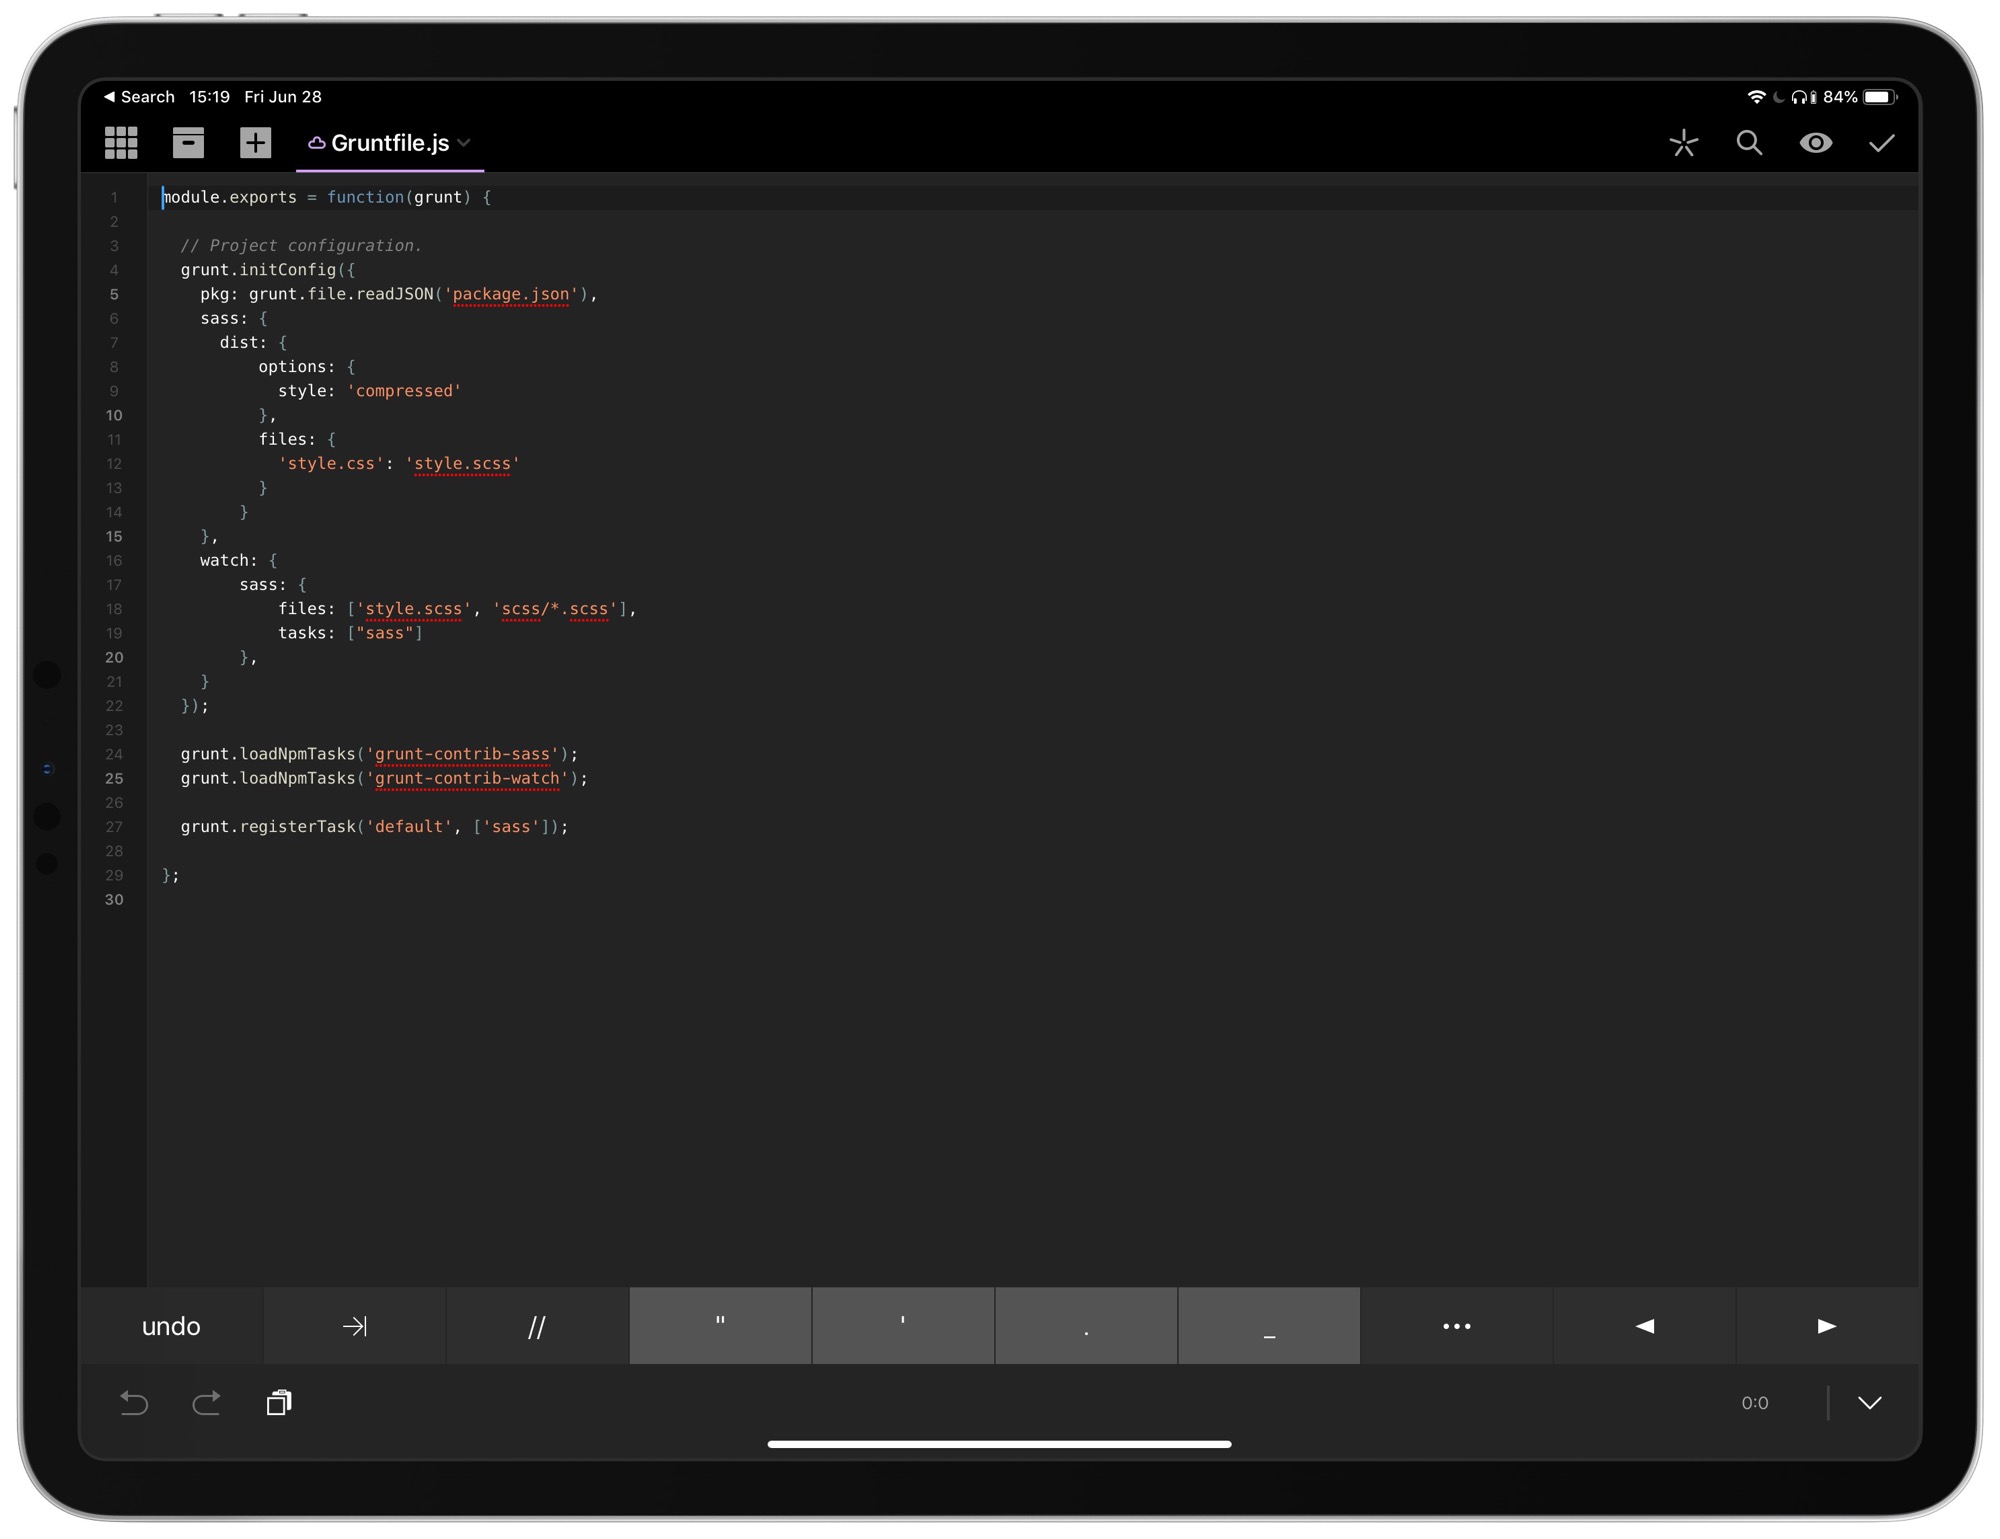
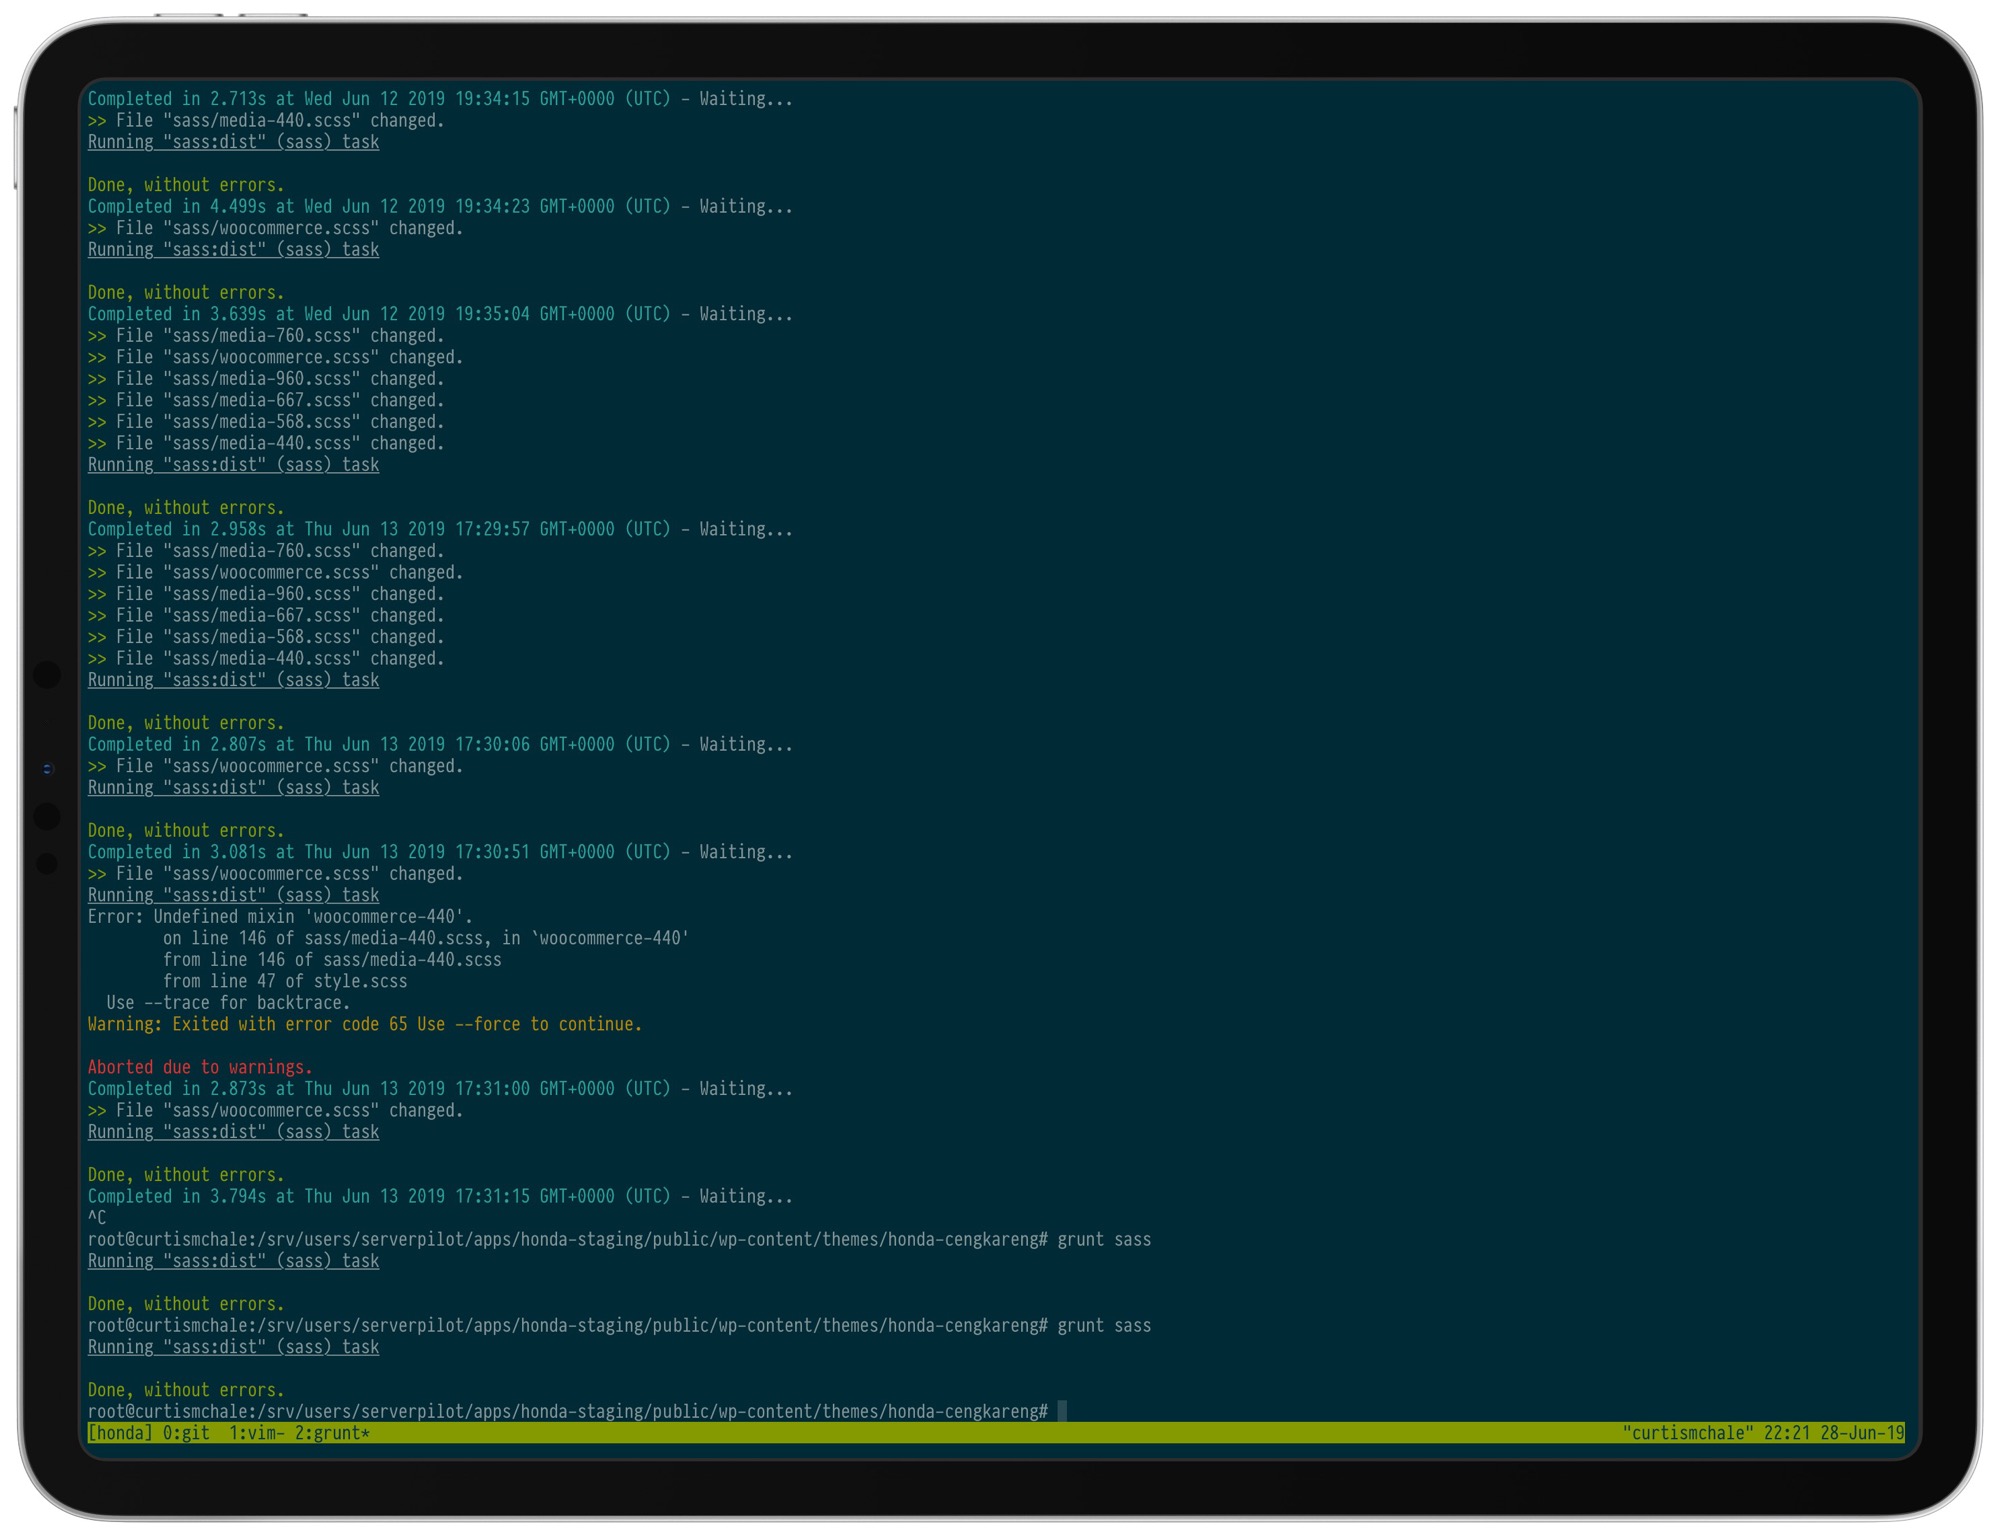
For those that want to really dive deep into editing WordPress sites with an iPad you’re going to need to be familiar with Vim and the terminal. By using Blink Shell, tmux, and mosh I’ve turned my iPad into a full-time development machine capable of developing full client sites.
The basic setup has Blink as my interface to a VPS which is where I host my client staging sites. On this server I setup tmux and mosh. tmux is a terminal multiplexer, which means it let’s you use a single connection to a server as if it were many different connections to the server.
I’ll often have grunt running in one terminal, and vim in another, while Git is managed from a third terminal window. All of these interfaces to my server are handled my a single connection to my VPS in Blink. To go deep with tmux you’ll need to dig into the tmux commands, but stick with it because once you’ve learned them the commands open up so much power in your developement workflow.
The final piece of this workflow that I haven’t talked about is Mosh, and it’s possibly the least interesting. Mosh is similar to SSH in that it allows you to connect to your server with Blink or another terminal application. It’s different in that the protocols that Mosh uses are more robust for devices with cellular connections. That means it drops less, or it picks up the connection when you come back to it later.
When I started using my iPad as a development platform, SSH was almost unuseable unless I was at home but with Mosh added, it became as stable at Starbucks as it was at home.
I admit that there are some things that take a bit of extra work, but I could say the same thing about dealing with my WordPress sites from macOS now. A number of times a week when I’m on macOS I reach for my iPad to get something done and share the result back to my iPad. By taking a look at the workflows above, you can use your iPad to manage your WordPress site effectively.
- And Shortcuts will be built in to the operating system starting with iPadOS and iOS 13. ↩