Connect Your Ionic 2+ App to WordPress Using the WP-API
*Updated for Ionic 3.2.1 on 5/17/17
In this tutorial, we will walk you through the process of creating an Ionic 2 app that pulls in WordPress posts and other content using the WP-API.
We’ll also look at how to handle custom post types and other content using the same method we’ll use here. Once you know how to pull in posts, you can easily do the same for users, media, products, events, and lots more.
Here’s a link to the finished project files.
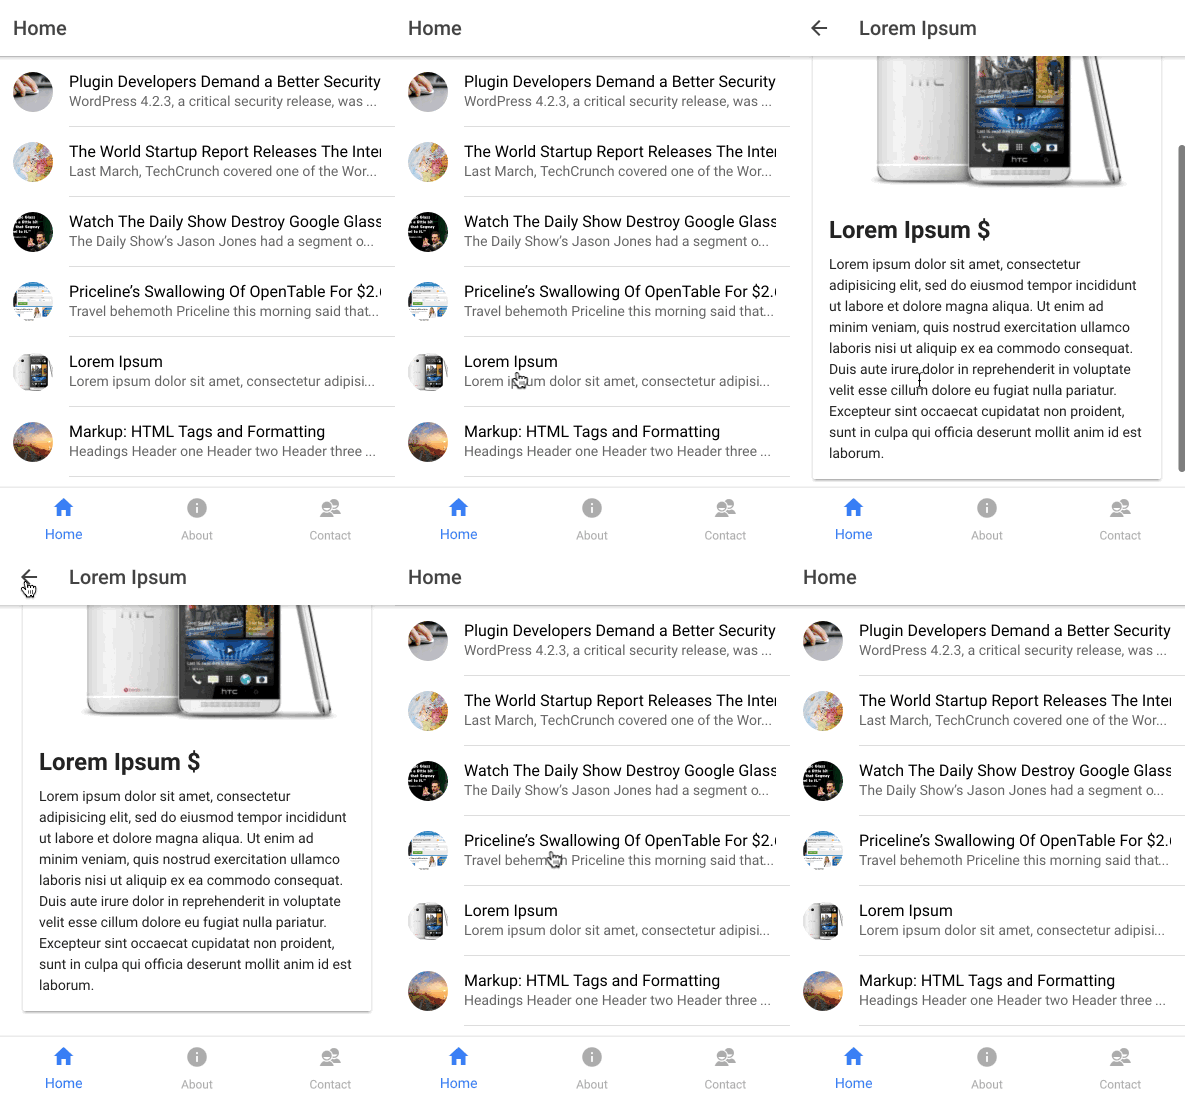
First, let’s create a new Ionic 2 project.
If you don’t have the Ionic 2 cli tools installed already, you’ll need to do that first.
sudo npm install -g ionic
ionic start myTabs tabs --v2
Let’s fire up our live preview:
cd myTabs
npm run serve
This gives us a nice tabbed starter app, now let’s work on pulling in WordPress content.
You’ll need a WordPress site with the WP-API (v2) active. If you are using WordPress 4.7+, you don’t need to do anything. For WordPress 4.6 and below, you will need to install and activate this plugin. You should be able to visit http://yoursite.com/wp-json/wp/v2/posts and see json data there.
We’ll be pulling in the json data you see there, and using that to display our posts. Next, let’s dive into our app files.
Ionic 2 is built on Angular 2, and uses Typescript and ES6. These are all just fancy libraries built on top of Javascript. If you are not familiar with them, I’d suggest you review this post on Angular 2 and Typescript first.
We’ll be working in the myTabs/app folder, you can ignore everything else for now. If you have the live preview open in a browser window using ‘ionic serve’, any time you make a change to a file and save, the app will reload with your changes. Pretty cool!
We are going to overwrite the home tab with our post list, and then add a post details page. The first thing we’ll do is create our html markup in home.html. Delete what’s there and add this:
<ion-header>
  <ion-navbar>
    <ion-title>Home</ion-title>
  </ion-navbar>
</ion-header>

<ion-content class="home">
  <ion-list>
    <button ion-item *ngFor="let item of items" (click)="itemTapped($event, item)">
    <h2 [innerHTML]="item.title.rendered"></h2>
    <p [innerHTML]="item.excerpt.rendered"></p>
    </button>
  </ion-list>
</ion-content>
That creates the ion-list that will display our post titles and excerpts. Now we need to get our data from our site.
Switch over to home.ts, and delete what’s there. Paste in this:
import { Component } from '@angular/core';
import {Http} from '@angular/http';
import 'rxjs/add/operator/map';

@Component({
  templateUrl: 'home.html'
})
export class HomePage {
	url: string = 'http://www.wp4.dev/wp-json/wp/v2/posts';
	items: any;

	constructor( private http: Http ) {}

	ionViewDidEnter() {
		this.http.get( this.url )
	    .map(res => res.json())
	    .subscribe(data => {
	      // we've got back the raw data, now generate the core schedule data
	      // and save the data for later reference
	      this.items = data;
	    });
	}
}
You’ll need to change the url to your website that has the WP-API plugin active.
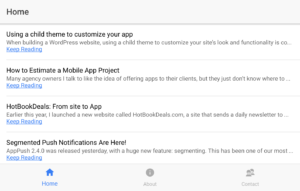 You should now be able to see your posts in the app.
It may look like a lot, but all we really did here was add an http call to get the posts.
At the top of the file, we imported Http and rxjs, which are required for our http call to get the posts. We defined the url and items variables at the top of the class for usage later. Nothing fancy here. Next, we added in Http to our constructor so we can use it in our class as this.http.
Finally, we added a standard http call that returns JSON data, that would be our posts. We put it in the ionViewDidEnter function so that it’s called every time we go to this page.
Now that we have our posts, we need to be able to click the post, and see the full content. Let’s add a post detail page.
We can easily do this with Ionic’s cli command ionic g page. First, press cmd c to stop the ionic preview. Next, run:
ionic g page PostDetail
This will create a new folder, .ts, .scss, and .html page called post-detail. (Note: If you run in to an error with the ionic g page creation, you can simply create the folder and files manually. Make sure to also import this page into the home page)
Run ionic serve again to fire the live preview back up.
Go into post-detail.html and paste in this code:
<ion-header>

  <ion-navbar>
    <ion-title>{{selectedItem.title.rendered}}</ion-title>
  </ion-navbar>

</ion-header>

<ion-content padding>
 <div *ngIf="selectedItem" class="selection">
    <h2 [innerHTML]="selectedItem.title.rendered"></h2>
    <div [innerHTML]="selectedItem.content.rendered"></div>
 </div>
</ion-content>
That will handle displaying the title and content for our post, which we get when we click a post on our post list page. The selectedItem variable contains the information about the post we want to display.
Next, go into post-detail.ts and paste in this code:
import {NavController, NavParams} from 'ionic-angular';
import {Component} from '@angular/core';

@Component({
  templateUrl: 'post-detail.html'
})
export class PostDetail {
  selectedItem: any;

  constructor(private nav: NavController, navParams: NavParams) {
    // If we navigated to this page, we will have an item available as a nav param
    this.selectedItem = navParams.get('item');
  }

}
The only thing we are doing here is getting the information about our post, which is sent through using NavParams. Think of it like this: we click “Post 1” in our post list page, “Post 1” and all of it’s details get sent through to our detail page, and we store that as selectedItem.
The next thing we need to do is go back to our home.ts file and connect the detail page. Copy over your home.ts file with this:
import { Component } from '@angular/core';
import {PostDetail} from '../post-detail/post-detail';
import { NavController, NavParams } from 'ionic-angular';
import {Http} from '@angular/http';
import 'rxjs/add/operator/map';

@Component({
  templateUrl: 'home.html'
})
export class HomePage {
	url: string = 'http://www.wp4.dev/wp-json/wp/v2/posts';
	items: any;

	constructor(public navCtrl: NavController, private http: Http, private nav: NavController ) {
	}

	ionViewDidEnter() {

		this.http.get( this.url )
	    .map(res => res.json())
	    .subscribe(data => {
	      // we've got back the raw data, now generate the core schedule data
	      // and save the data for later reference
	      this.items = data;
	    });
	}

	itemTapped(event, item) {
		this.nav.push(PostDetail, {
		  item: item
		});
	}
}
(Make sure to add your own api url)
The only thing we did here is to import the PostDetail page, and add our itemTapped function. That handles sending through the post info when an item is clicked.
Finally, we need to add our PostDetail page to our app module. Go to src/app/app.module.ts, and copy it over with this:
import { NgModule, ErrorHandler } from '@angular/core';
import { IonicApp, IonicModule, IonicErrorHandler } from 'ionic-angular';
import { BrowserModule } from '@angular/platform-browser';
import { MyApp } from './app.component';
import { AboutPage } from '../pages/about/about';
import { ContactPage } from '../pages/contact/contact';
import { HomePage } from '../pages/home/home';
import { TabsPage } from '../pages/tabs/tabs';
import { PostDetail } from '../pages/post-detail/post-detail';
import { HttpModule } from '@angular/http';
import { SplashScreen } from '@ionic-native/splash-screen';
import { StatusBar } from '@ionic-native/status-bar';

@NgModule({
  declarations: [
    MyApp,
    AboutPage,
    ContactPage,
    HomePage,
    TabsPage,
    PostDetail
  ],
  imports: [
    BrowserModule,
    HttpModule,
    IonicModule.forRoot(MyApp)
  ],
  bootstrap: [IonicApp],
  entryComponents: [
    MyApp,
    AboutPage,
    ContactPage,
    HomePage,
    TabsPage,
    PostDetail
  ],
  providers: [
  {provide: ErrorHandler, useClass: IonicErrorHandler},
  SplashScreen,
  StatusBar
  ]
})
export class AppModule {}
You should now be able to run ionic serve in the terminal, and click on a post item and view the detail page with the full content. Very cool!
Going Further
Now that you have the basic concept of pulling in data from the WP-API, you can take this a lot further. Pull in products from WooCommerce, an events custom post type, a list of site users, media, and lots more.
Custom post types
To pull in a custom post type instead of a normal post, you need to do 2 things:
First, add your custom post type to the WP-API (CPTs are hidden from the API by default). We’ll use WooCommerce products as an example. Add this code to a custom plugin on your WordPress site:
<?php
/**
* Add REST API support to an already registered post type
* http://v2.wp-api.org/extending/custom-content-types/
* Access this post type at yoursite.com/wp-json/wp/v2/post_type_name
*/
add_action( 'init', 'appp_post_type_rest_support', 999 );

function appp_post_type_rest_support() {

	global $wp_post_types;

	//be sure to set this to the name of your post type!
	$post_type_name = 'product';
	if( isset( $wp_post_types[ $post_type_name ] ) ) {
		$wp_post_types[$post_type_name]->show_in_rest = true;
		$wp_post_types[$post_type_name]->rest_base = $post_type_name;
		$wp_post_types[$post_type_name]->rest_controller_class = 'WP_REST_Posts_Controller';
	}

}
Make sure that plugin is active on your site, and visit http://yoursite.com/wp-json/wp/v2/product just to make sure. You should see your products there in the JSON data.
To pull this into your app, just change the url in your HomePage class to http://yoursite.com/wp-json/wp/v2/product. Voila! You can do the same with any post type.
You may notice that you don’t get the item price, image, or other product data on your detail page. That’s because it’s all using post meta, which is also hidden from the API by default. let’s look at how to add that.
Post Meta
Post meta does not appear in the WP-API by default, so you need to manually add each post meta item you want access to in your app.
For example, we want the WooCommerce item price to appear in the API so we can display that in our app. To do that, we need to add the price to the API response.
Put this code in a custom plugin on your WordPress site:
<?php
/**
* Add post meta to a response
* http://v2.wp-api.org/extending/modifying/
* This example adds price to a woocommerce product. Meta key is _price, and corresponding api field will also be _price.
*/
add_action( 'rest_api_init', 'appp_register_post_meta' );
function appp_register_post_meta() {
    register_rest_field( 'product', // any post type registered with API
        '_price', // this needs to match meta key
        array(
            'get_callback'    => 'appp_get_meta',
            'update_callback' => null,
            'schema'          => null,
        )
    );
}

/**
 * Get the value of a meta field field
 *
 * @param array $object Details of current post.
 * @param string $field_name Name of field.
 * @param WP_REST_Request $request Current request
 *
 * @return mixed
 */
function appp_get_meta( $object, $field_name, $request ) {
    return get_post_meta( $object[ 'id' ], $field_name, true );
}
With that plugin active, you should be able to visit http://yoursite.com/wp-json/wp/v2/product and see a field for _price on each item. Next, let’s add that to our post detail page in our app.
In post-detail.html you can add {{selectedItem._price}} anywhere to display the price. I’m going to use a card because it has a nice layout:
<ion-card>

	<ion-card-header><b>{{selectedItem.title.rendered}}</b> ${{selectedItem._price}}</ion-card-header>

	<ion-item>
	 <div [innerHTML]="selectedItem.content.rendered"></div>
	</ion-item>

</ion-card>
There is still a lot of data missing, such as images, product info, etc. This all needs to be added to the API and then to your template the same way we did with price.
Now that you know how to add a custom post type and custom meta to your app, you can do the same with almost anything. If you are having trouble finding what post meta keys you need, check out this post.
Featured images
Right now we have no images in our posts, so let’s add some.
By default, the WP-API gives you a media ID for featured images. This requires you to make a separate HTTP request to get the image for each post, which won’t work for our app. Let’s add featured image urls to the post response.
Add this code to a custom plugin on your site:
<?php
/**
* Add featured image urls to post response
* Default is to show media ID, but then you have to do another http request to get the image for an app. This allows you to just use the url.
* Sample usage would be post.featured_image_urls.thumbnail
*/
add_action( 'rest_api_init', 'appp_add_featured_urls' );
function appp_add_featured_urls() {
	register_rest_field( array( 'post', 'product' ),
	    'featured_image_urls',
	    array(
	        'get_callback'    => 'appp_featured_images',
	        'update_callback' => null,
            'schema'          => null,
	    )
	);
}

function appp_featured_images( $post ) {

    $featured_id = get_post_thumbnail_id( $post['id'] );

	$sizes = wp_get_attachment_metadata( $featured_id );

	$size_data = new stdClass();

	if ( ! empty( $sizes['sizes'] ) ) {

		foreach ( $sizes['sizes'] as $key => $size ) {
			// Use the same method image_downsize() does
			$image_src = wp_get_attachment_image_src( $featured_id, $key );

			if ( ! $image_src ) {
				continue;
			}

			$size_data->$key = $image_src[0];

		}

	}

	return $size_data;

}
Now in your post-detail.html template, use this code:
<ion-card>

	<img *ngIf="selectedItem.featured_image_urls.medium" [src]="selectedItem.featured_image_urls.medium" class="featured-image" />

	<ion-card-content>
		<ion-card-title>
		  <b>{{selectedItem.title.rendered}} ${{selectedItem._price}}</b>
		</ion-card-title>
		<p [innerHTML]="selectedItem.content.rendered"></p>
	</ion-card-content>

</ion-card>
In home.html, you can add featured images by replacing your ion-list code with this:
<ion-list>
  <button ion-item *ngFor="let item of items" (click)="itemTapped($event, item)">
  <ion-avatar item-left>
    <img *ngIf="item.featured_image_urls && item.featured_image_urls.thumbnail" [src]="item.featured_image_urls.thumbnail">
  </ion-avatar>
  <h2 [innerHTML]="item.title.rendered"></h2>
  <p [innerHTML]="item.excerpt.rendered"></p>
  </button>
</ion-list>
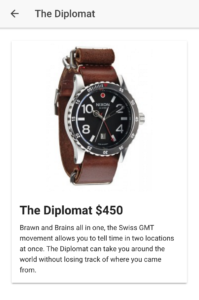
You’ll notice we are getting the image with selectedItem.featured_image_urls.size. You can change that to any size, but make sure to check that it exists first using *ngIf. Now have an image, a price, and some content, and it’s starting to look pretty good.
I also added a little bit of css in post-detail.scss:
.post-detail {
	.featured-image {
	    max-height: 300px;
	    height: auto;
	    width: auto;
	    display: block;
	    margin: 0 auto;
	}
}
Don’t forget to go to app.core.scss and add include this to our imports:
@import "../pages/post-detail/post-detail";
Infinite Scroll
No list would be complete without infinite scroll, so let’s add that as the final touch to our app.
In home.html, add this right below the closing tag:
<ion-infinite-scroll (ionInfinite)="loadMore($event)">
 <ion-infinite-scroll-content></ion-infinite-scroll-content>
</ion-infinite-scroll>
That will call our loadMore() when the user scrolls to the bottom of the page.
In home.ts, copy over your code with this:
import { Component } from '@angular/core';
import {PostDetail} from '../post-detail/post-detail';
import { NavController, NavParams } from 'ionic-angular';
import {Http} from '@angular/http';
import 'rxjs/add/operator/map';

@Component({
  templateUrl: 'build/pages/home/home.html'
})
export class HomePage {
	url: string = 'http://www.wp4.dev/wp-json/wp/v2/posts';
	items: any;
	page: any;

	constructor(public navCtrl: NavController, private http: Http, private nav: NavController ) {
	}

	ionViewDidEnter() {

		this.page = '1';

		this.loadPosts( this.page ).then( data => {
			console.log('Posts loaded', data);
			this.items = data;
		});
	}

	loadPosts( page ) {

		if( !page ) {
	      let page = '1';
	    }

		return new Promise(resolve => {

			this.http.get( this.url + '?page=' + page )
		    .map(res => res.json())
		    .subscribe(data => {
		      // we've got back the raw data, now generate the core schedule data
		      // and save the data for later reference
		      resolve( data );
		    });

		});
	}

	itemTapped(event, item) {
		this.nav.push(PostDetail, {
		  item: item
		});
	}

	loadMore(infiniteScroll) {

	    this.page++;

	    this.loadPosts( this.page ).then( items => {
	      // Loads posts from WordPress API
	      let length = items["length"];

	      if( length === 0 ) {
	        infiniteScroll.complete();
	        return;
	      }

	      for (var i = length - 1; i >= 0; i--) {
	        this.items.push( items[i] );
	      }

	      infiniteScroll.complete();
	    });
	}
}
I’ve made a lot of changes here:
- Add a promise to our http request, and move it to a separate loadPosts function. It now accepts a paging argument.
- Add our loadMore() function that is fired when the user scrolls to the bottom of the page. This function gets more posts and appends them to the existing posts.
You now have a post list with infinite scroll. The final thing I’d do is move our loadPosts() function to a provider, but that’s a topic for another day.
Where to go from here
Now that you know how to manipulate the WP-API and add custom data to your app, you can get almost anything from WordPress. Posts, pages, custom post types, custom meta, and more.
Keep in mind that to support custom WordPress plugins in your app is not as simple as what we did here. We are basically reading WordPress content, but posting data to WordPress (such as a form or a product purchase) is much more complex.
Ionic 2 allows you to use the same codebase for a (progressive) web app, or submit to the app stores. If you are interested in learning more about Ionic 2 + WordPress, keep your eyes on AppPresser in the coming months.

Great post!
How do I get data from plugins like The Events Calendar in WP REST API?
Thanks!
Hi Renato, you’d have to find the data you want to expose, and then add that to the rest response. If you look at the post meta section of this article, that’s how it works, you’d just have to find the specific meta (or other data) and use that. You’d want to consult their documentation to figure out what post meta keys you need.
excellent tutorial, you will have a link or system data ionic2 and wp login with api rest? I not find it anywhere an example of this. thank you very much !
Thank you! excellent tutorial 🙂 I already implemented to my project 🙂
Are you going to update your tutorial for now, because few things changed and I am not able to reproduce your tutorial in Ionic 2 RC3?
Just updated for Ionic RC3, please delete the old files and try again, it should be working.
Great tutorial.
How can I connect to woocommerce api with aouth?
Hi Idaves,
Just wondering if you got the woocommerce api authorized with oauth.
Thanks.
Hi,
Great tutorial.
I’ve just started building an app with Ionic with this tutorial.
how can i get updated post from my wordpress site in the app using refresher ?
Thanks
Hi, I was able to add you code to your site. Yet, when I try to run the app and select a post it doesn’t show the full posts. Where do you think the problem might be?
nice tutorial,
But ios the list post doesn’t show .. why?
in android n serve normal?
so thanks
I have the same problem, could someone please help?
Hi, this is a really great tutorial and easy to follow even for a beginner like me. I am totally new to ionic 2 and angular, basically everything am learning as i do. Currently my app is successfully showing posts from my WordPress blog when i do ionic serve in browser, however, its just blank when I do a build and run it on a real device, the posts are not being displayed and am not getting any error, what could be the problem? May I also know how to get category names using category ids returned by the wp rest api?
Amazing tutorial, and would be better if we add “infiniteScroll.enable(false);” inside “loadMore(infiniteScroll)” > “if( length === 0 )”
Hi, this is a really great tutorial and easy to follow even for a beginner like me. I am totally new to ionic 2 and angular, Currently my app is successfully showing posts from my WordPress blog. But I want to display post by category. For that i have used this .
url: string = ‘http://www.mysitename.com/wp-json/wp/v2/posts?categories[]=2’;
items: any;
page: any;
But this is not working in my app. It is not showing any post. If i removed ” ?categories[]=2″ then it show all the post of my blog. Where do you think the problem might be?.
One more thing how can i get post date & author name.
That should work if you remove the brackets: http://www.mysitename.com/wp-json/wp/v2/posts?categories=2
Other parameters like author can be found here: http://v2.wp-api.org/reference/posts/
Any pointers on how to embed an iframe through the api? On the app end, it gets spit out as plain text, which I get is a good thing for security purposes. But if I want to embed a Google map or Youtube video, it’s not helpful. I’ve looked at and tried to implement the ng-bind-html method, but it’s not doing anything. Is that Angular 1.x only? Not finding much of use through searches..
Thank you for your time!
Hi Andrew, you need to use bypassSecurityTrustHtml on the content to render iframes.
Thank you!
Hi Scott,
Another question:
I have fields in my wordpress post screen that are for numbers. They show correctly in the rest api feed, but when they’re processed by the app, they come out as NaN. So, in wordpress when I enter 60 for what should show in {{selectedItem.minutes}} or {{selectedItem.year}} , the values don’t make it through. I looked it up and found “angular.isNumber(value);” but I’m not sure how to implement it (learning angularjs as I go…)
Any pointers would be appreciated.
Figured it out. My field name used dashes instead of underscores. Live and learn.
What file in the plugin will I modify for Featured images? I tried and it did not work
I can’t for the life of me to get this to work. (Can’t even get the basic first step/HTTP call to work) (Keep in mind.. new to most of this, outside of HTML/CSS)
Using:
Node v6.10.2
NPM: 3.10.10
Ionic Framework Version: 3.0.0
Ionic CLI: 2.2.2
Ionic APP Lib Version: 2.2.1
(All from me running the default installs)
The biggest changes I could see from this tutorial and now.. were changes in the dependencies. Namely Angular 2 to Angular 4. Unfortunately, I’m at a loss as to how to adjust. 🙁
Looks really cool though, and look forward to start utilizing some APIs soon. Appreciate the awesome stuff you’re doing with WP Scott – look forward to seeing how things move forward.
I keep getting this error (home.ts)
Runtime Error
Uncaught (in promise): Error: No provider for Http! Error at g
Import HttpModule into “app/app.module.ts”
import { HttpModule } from ‘@angular/http’;
@NgModule({
imports: [
BrowserModule,
IonicModule.forRoot(MyApp),
HttpModule
],
declarations: [ AppComponent ],
bootstrap: [ AppComponent ]
})
export class AppModule { }
I feel like this is the fix, but I can’t make it work 🙁
Hey all, just updated the files for Ionic 3.2.1.
Hi. It does not work, it gives me some errors, help please! Thank you.
Runtime Error
Uncaught (in promise): Error: No provider for Http! Error: No provider for Http! At injectionError (http: // localhost: 8100 / build / main.js: 1509: 86) at noProviderError at http: // localhost: 8100 / build / main.js: 1547: 12 at ReflectiveInjector _._ throwOrNull (http: // localhost: /localhost:8100/build/main.js:3048:19) at ReflectiveInjector _._ getByKeyDefault (http: // localhost: 8100 / build / main.js: 3087:25) at ReflectiveInjector _._ getByKey (http: // localhost: 8100 /build/main.js:3019:25) at ReflectiveInjector_.get (http: // localhost: 8100 / build / main.js: 2888: 21) at AppModuleInjector.NgModuleInjector.get (http: // localhost: 8100 / build /main.js:3835:52) at resolveDep (http: // localhost: 8100 / build / main.js: 11295: 45) at createClass (http: // localhost: 8100 / build / main.js: 11148: 35 ) At createDirectiveInstance (http: // localhost: 8100 / build / main.js: 10979:37)
Solved:
import { HttpModule } from ‘@angular/http’;
….
imports:[…, HttpModule],..
Good catch! Files have been updated, thanks.
Hello Scott
thanks for answering.
Now I want to show the content of a page (http: // my-site / wp-json / wp / v2 / pages / 151), but I can not show it.
This is my file, I appreciate your help:
———— contact.ts ————
import { Component } from ‘@angular/core’;
import { NavController, NavParams } from ‘ionic-angular’;
import {Http} from ‘@angular/http’;
import ‘rxjs/add/operator/map’;
@Component({
templateUrl: ‘contact.html’
})
export class ContactPage {
url: string = “http://mi-site/wp-json/wp/v2/pages/151”;
item: any;
constructor(private nav: NavController, navParams: NavParams) {
}
}
—————— contact.ts ——————-
Contacto
——————————————–
I appreciate your help, I’m a beginner.
regards
Contacto
Nice tutorial, thanks very much ! It worked straight out of the bag even when i switched to my own site for posts, unfortunately i can’t seem to get it to work for any custom post type. I pasted in your function into my functions.php and changed the post type to “listing” as per my requirement. My site seems to output the son fine in the browser, but when i try to pull it into the App template i get the following error “Runtime Error : undefined is not an object (evaluating ‘v.context.$implicit.excerpt.rendered’)”
Any assistance would be greatly appreciated if you have a moment.
My demo site/API is here http://competa.life/wp-json/wp/v2/listing
Hi, it looks good in the browser, but when building the app on Android does not show posts, any suggestions?
Thank you
Not working for me. Getting following error:
Typescript Error
Cannot find module ‘../pages/post-detail/post-detail’.
Just a heads up, line 8 for the php code that adds a new API field should use the function register_rest_field(), not register_api_field(). Also, you can use the Code Snippets plugin to add the PHP to your site.
Updated, thanks 🙂
Hi Scott!!!
Thanks for the great – I mean awesome tut on wordpress rest api integration in ionic 2!!! Do you perhaps have a video for this tutorial because I really do not know where to put that code. I created a custom functions.php in /public_html/wp-content/themes/myTheme and yet for the custom post types you mentioned that I should “Add this code to a custom plugin on your WordPress site:” after which for the post Meta and featured image you mentioned that I should “Put this code in a custom plugin on your WordPress site:”. Do I keep editing this functions.php file or do I create 3 new php files? If so, where do I pretty please stick them?
It will work in a theme functions.php file, just remember that it will stop working if you deactivate that theme. A plugin is better, if you need help I’d recommend this series: https://pippinsplugins.com/series/writing-your-first-wordpress-plugins-basic-to-advanced/
Awesome!!! This is exciting!!! Let me get down to it.
Awesome tutorial. How to add social sharing for post-details and preloading effect for home??
Hi, You fixed this??
I have the same problem…
Great tutorial.
I am having trouble in the code after i updated wordpress to 4.8.1
in previous versions on using infinite scroll everything worked great. i used to get any array [] for the link http://www.example.com/wp-json/wp/v2/posts?page=2 when page 2 didn’t have any posts.
now in version 4.8.1 on accessing http://www.example.com/wp-json/wp/v2/posts?page=2 i get this response ”
{
code: “rest_post_invalid_page_number”,
message: “The page number requested is larger than the number of pages available.”,
data: {
status: 400
}
}
”
when page 2 don’t have any posts. this make infinite scrolling continue without stopping.
How do i stop infinite scroll when page 2 doesn’t have any posts?
thanks
I am also getting the above error. But How do we hide the infinitescroll?
Great tutorial Sir.
How do I make wp login in my Ionic 2 app?
How do scroll down to load more post by page parameter