
An Introduction to Ionic 2, Typescript, and the WP-API
Keeping up with modern Javascript these days is harder than following the love lives of the Kardashians.
Being a front-end developer is a constantly evolving job, with the framework du jour changing every other month. Writing Javascript is no longer just writing Javascript, it’s learning to use command line compilers like Grunt and Webpack, code hinting tools like Typescript, and current-browser-incompatible specs like ES6.
It requires a lot of learning, but that’s part of the fun.
I recently started diving into these new technologies, and I thought I’d give you a little 101 session. I’m not going to do a super-technical deep dive, just something to get your wheels turning.
We’ll look at Angular 2, Typescript and ES6, all in the context of building an app with Ionic 2. Just for kicks, we’ll create a page that pulls in some posts from the WP-API.
I’d recommend installing a starter app for Ionic 2 using Typescript so you can have some code to look at. Their getting started docs should get you up and running in less than 5 minutes.
First let’s go over some of the new stuff Javascript developers need to be familiar with to work with a modern framework like Angular 2.
Typescript

You’re going to see Typescript a lot more in Javascript, so it’s important to know what it is.
You can read all the technically-precise definitions on their site, here’s my impression after using it for a few weeks.
Typescript is a Javascript add-on that gives you better code hinting in your editor, and better error messages when you compile your code. I’m sure it does a lot more than that, but that’s all I’ve noticed so far.
Typescript is not required, and it is only for your benefit in development. The front-end of your app does not use Typescript, it is a development tool.
Building an app using Typescript requires you to take some extra steps, like giving your Javascript files a .ts extension, adding type definitions like (myvar: string), and compiling.
The important thing here is that you don’t have to become a Typescript expert, but you should have a basic level of understanding. If you really don’t want to use Typescript, Ionic 2 allows you to use normal Javascript.
ES6
ES6 is the next iteration of Javascript. It is not a new framework, but an evolution of the Javascript language itself.
It has some cool new features like classes, arrow functions, and variable scoping. One of the biggest changes I’ve seen is writing object oriented Javascript using classes. Both ReactJS and Angular 2 make use of this, and it’s definitely something you’ll have to be familiar with.
I really like the class based approach, and having written OOP in PHP it wasn’t too hard to pick up.
Other features commonly in use are easier to get used to, like using let instead of var, and () => {} instead of function(){}. There are lots of other cool new things that I won’t go into here.
ES6 is not currently compatible with all browsers, so if we write ES6 we need a compiler like Grunt to turn it into ES5 for us.
Angular 2
Everybody in the WordPress community is talking about ReactJS these days, but Angular 2 is awesome.
It has many of the benefits of ReactJS, with the added bonus of being an all-in-one package. Ionic 2 is built with Angular 2, so of course I had to try it out.
My first impression is that it’s great, but not easy to learn. (I also didn’t think Angular 1 was easy, and to be fair I wouldn’t say ReactJS is easy either.)
Part of the problem is that you have this new framework, plus ES6 and Typescript mixed in, and you have to learn all 3 at the same time. I have a really good grasp on Angular 1 and I don’t feel it’s helped me at all with learning Angular 2.
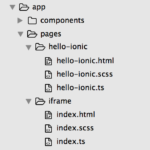
One thing that really stands out about Angular 2 is your project structure. You have one folder for each view, with a Typescript (or Javascript) file, an HTML file, and optionally a Saas file.
These files get imported into your main app file. Imports are a huge part of Angular 2, your files will be littered with imports.
Keeping all of your files organized like this can be tremendously beneficial for large apps. For a small app with only a few pages, it’s a bit of overkill. But hey, it’s never a bad thing to learn this type of code organization, if you don’t need it now, you will someday.
Ok enough talk, let’s look at some code!
Ionic 2 Example App
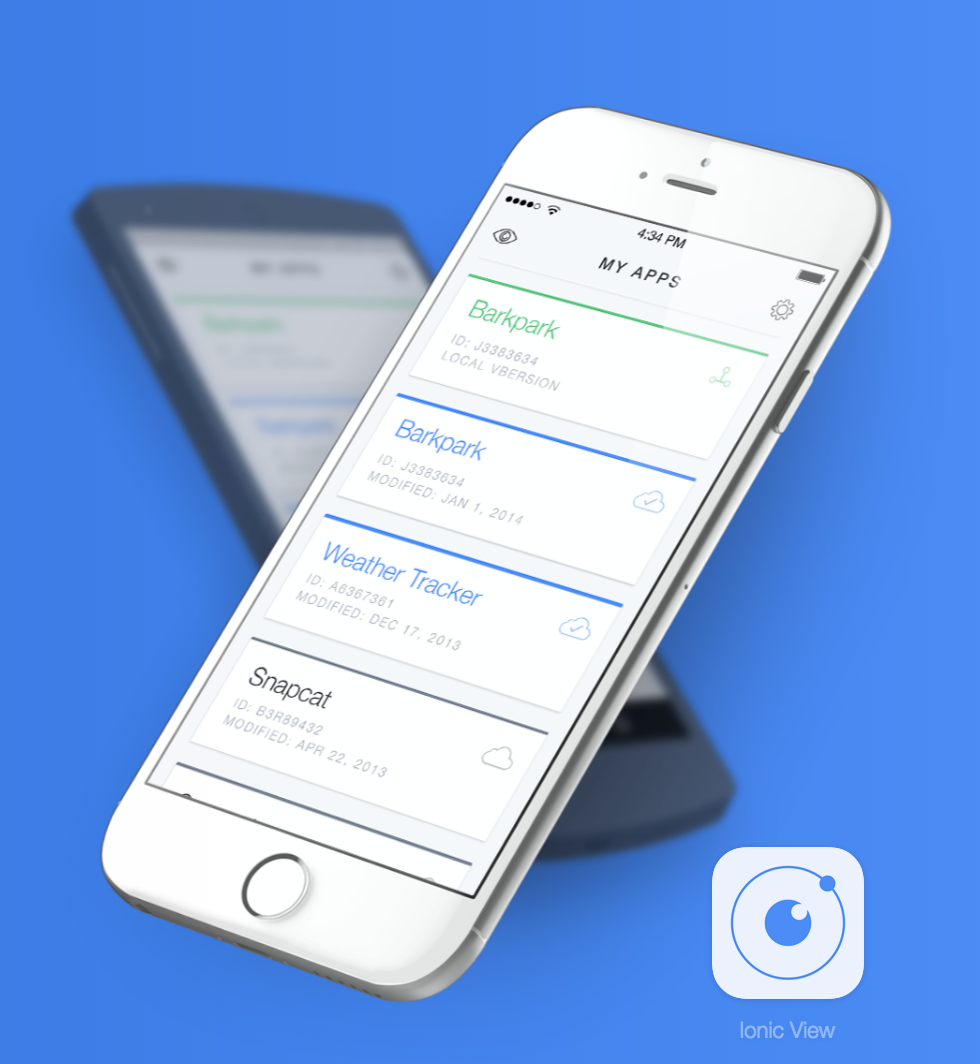
Let’s fire up a starter app for Ionic 2, then add a page that pulls in posts from the WP-API. Your app will look something like this:
To generate your Ionic 2 project, follow the instructions here. At the time of this writing, it looks like this:
npm install -g ionic@beta

ionic start MyIonic2Project tutorial --v2

cd MyIonic2Project

ionic serve
Now that you have generated an Ionic 2 Typescript project, let’s create a new page.
New Page
Since your pages now require a folder and multiple files, it’s a pain to create one manually every time. Ionic has a solution for that! In the command line, you can run:
ionic g page wpApi
That will create a boilerplate page for you, with the folder, .ts, .scss, and .html files.
You can delete the .scss file, we won’t be using that. Open the wp-api.ts file, and you should see something like this:
import {Component} from '@angular/core';
import {NavController} from 'ionic-angular';

/*
  Generated class for the WpApiPage page.

  See http://ionicframework.com/docs/v2/components/#navigation for more info on Ionic pages and navigation.
*/
@Component({
  templateUrl: 'build/pages/wp-api/wp-api.html',
})
export class WpApiPage {
  constructor(public nav: NavController) {}
}
At the top we have imports for any classes we will use in this file.
Below we have our @Component decorator. This looks weird at first, but it’s basically just a place to add meta data for our class.
At the bottom you see the WpApiPage class, this is where our ES6 classes come in. If you aren’t familiar with OOP then this may take some getting used to.
Inside of our constructor you’ll see ‘public nav: NavController.’ This is a dependency, and since we declared it as ‘public nav’ we can use this.nav.whatever().
Let’s add a simple method to our class so you can see how it works.
export class WpApiPage {
  constructor(public nav: NavController) {
	this.doStuff();
  }
  doStuff() {
	alert('Ok I will!');
  }
}
Here we added a doStuff() method, and fired it off immediately when our class is loaded. You’ll notice we use ‘this’ a lot, it just means we are referring to something inside of our class.
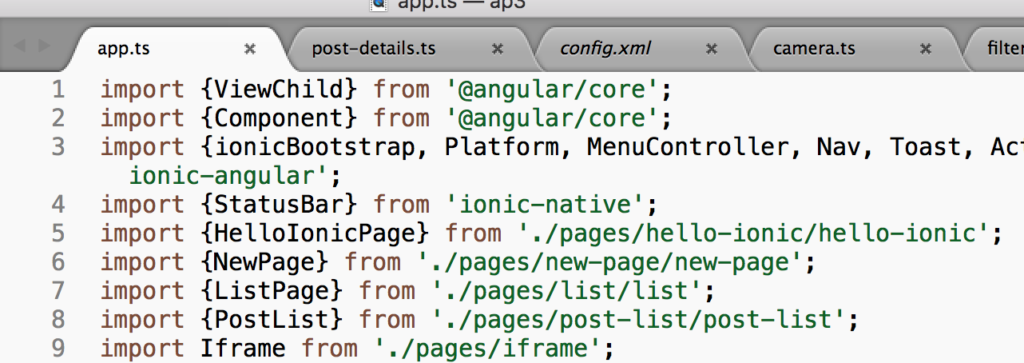
Adding the page to your navigation
To add this page to your app, you need to import this class into your app.ts file, then add it to your menu or make it the project root. Check out this tutorial for help with that. That might look like this:
...
import {WpApiPage} from './pages/wp-api/wp-api';
...

class MyApp {
  ...

  constructor(app, platform, menu) {
    ...

    // make WpApiPage the root (or first) page
    this.rootPage = WpApiPage;
  }

  ...
}
If you load up this page, you should see that alert.
Now that we have a simple page setup, let’s pull in some posts from the WP-API. (I deleted the doStuff() method for simplicity in the code examples below)
Fetching Posts from the WP-API
First install and activate the WP-API plugin on a WordPress website that has at least one post.
You should be able to visit yoursite.com/wp-json/wp/v2/posts and see JSON data there.
Next we need to get the posts using the Angular http service. At the top of wp-api.ts, we need to import Http and map:
import {Http} from '@angular/http';
import 'rxjs/add/operator/map';
Next, in our constructor we have to inject the Http service we just imported:
export class WpApiPage {
  constructor(public nav: NavController, public http: Http) {}
}
Next let’s add a getPosts method along with a boilerplate http request:
export class WpApiPage {

constructor(public nav: NavController, public http: Http) {
  this.getPosts();
}

getPosts() {

	this.http.get(this.url)
	    .map(res => res.json())
	    .subscribe(data => {
	      // When the request is complete, we'll get our data here
	      this.data = data;
	      console.log(data);
	    });
}

}
You’ll see in our getPosts() method that we have this.url and this.data. Any time you are using variables like that, we have to make sure they are defined. We do that at the top of our class:
export class WpApiPage {

	data: any = null;
	url: string = 'http://yoursite.com/wp-json/wp/v2/posts';

	...
We are giving each variable a type (any, string, number, etc) and a default value. This helps Typescript give us better error messages. For example if we define this.url as an array, it will tell us we can’t do that.
Here’s what the entire wp-api.ts file should look like now:
import {Component} from '@angular/core';
import {NavController} from 'ionic-angular';
import {Http} from '@angular/http';
import 'rxjs/add/operator/map';

/*
  Generated class for the WpApiPage page.

  See http://ionicframework.com/docs/v2/components/#navigation for more info on Ionic pages and navigation.
*/
@Component({
  templateUrl: 'build/pages/wp-api/wp-api.html',
})
export class WpApiPage {

	data: any = null;
	url: string = 'http://reactordev.com/apv2/wp-json/wp/v2/posts';

	constructor(public nav: NavController, public http: Http) {
		this.getPosts();
	}

	getPosts() {

		this.http.get(this.url)
		    .map(res => res.json())
		    .subscribe(data => {
		      // we've got back the raw data
		      this.data = data;
		      console.log(data);
		    });
	}
}
Now that we are successfully grabbing our post data, we need to output it into our template.
Displaying Our Posts
Open wp-api.html. There isn’t much there, so we need to add a list to display our posts. Replace your ion-content tag with this:
<ion-content class="wp-api">
  <ion-list>
    <button ion-item *ngFor="let post of data" [innerHTML]="post.title.rendered">
    </button>
  </ion-list>
</ion-content>
This is a standard ion-list, with an Angular for loop. It will iterate over our posts, based on what’s in this.data from wp-api.ts.
If you visit this page now, you should see a list of posts.
Adding Our Post Detail View
If you click on a post, nothing happens. We want to be able to click each post and view the full post content in a new view, with a page transition.
To do that, we need to create a new page.
ionic g page singlePost
Open single-post.ts. The only thing we are going to do here is grab our post through the NavParams object. Here’s the whole file:
import {Component} from '@angular/core';
import {NavController, NavParams} from 'ionic-angular';

/*
  Generated class for the SinglePostPage page.
*/
@Component({
  templateUrl: 'build/pages/single-post/single-post.html',
})
export class SinglePostPage {
  selectedItem: any;

  constructor(private nav: NavController, navParams: NavParams) {
    // If we navigated to this page, we will have a post available as a nav param
    this.selectedItem = navParams.get('post');
  }
}
Next, open single-post.html. We need to display our post content there, so replace your ion-content tag with this:
<ion-content>
	<div *ngIf="selectedItem" class="selection">
		<h2 [innerHTML]="selectedItem.title.rendered"></h2>
		<div [innerHTML]="selectedItem.content.rendered"></div>
	</div>
</ion-content>
Ok that takes care of our single post page, but now we need to link to it from our post list page.
Open wp-api.html, and let’s tell it to do something when we click on a post. In Angular 2, we write inline click events with (click) instead of onclick. We’ll call a method called itemTapped(), which we will create next.
<ion-content class="wp-api">
  <ion-list>
    <button ion-item *ngFor="let post of data" (click)="itemTapped($event, post)" [innerHTML]="post.title.rendered">
    </button>
  </ion-list>
</ion-content>
Let’s create that itemTapped method now. Open wp-api.ts, and add this at the end of our WpApiPage class.
itemTapped(event, post) {
	this.nav.push(SinglePostPage, {
	  post: post
	});
}
Since we are referencing our SinglePostPage class, we need to import it at the top of wp-api.ts. Here’s what the whole wp-api.ts file should look like now:
import {Component} from '@angular/core';
import {NavController} from 'ionic-angular';
import {Http} from '@angular/http';
import 'rxjs/add/operator/map';
import {SinglePostPage} from '../single-post/single-post';

/*
  Generated class for the WpApiPage page.
*/
@Component({
  templateUrl: 'build/pages/wp-api/wp-api.html',
})
export class WpApiPage {

	data: any = null;
	url: string = 'http://yoursite.com/wp-json/wp/v2/posts';

	constructor(public nav: NavController, public http: Http) {
		this.getPosts();
	}

	getPosts() {

		this.http.get(this.url)
		    .map(res => res.json())
		    .subscribe(data => {
		      // we've got back the raw data
		      this.data = data;
		      console.log(data);
		    });
	}

	itemTapped(event, post) {
		this.nav.push(SinglePostPage, {
		  post: post
		});
	}
}
That’s it! Now if you navigate to your post list page and click on a post, you should see the single post view.
Of course there’s a lot more we can do, but this tutorial is pretty long already. If you want more, I’d recommend checking out the Ionic 2 documentation, and their example conference app.
Ionic + WordPress
Want to integrate WordPress with your Ionic app? We have the tools you need for login, camera, WP-API, and more. Get the plugins and code samples you need.
Enter your name and email if you're interested in learning more =>
Thanks for this very nice tutorial !
However, when I try to see the detailed view, it does not switch to the single-post view.
This is the error I get in the console :
Did I miss something ? Yet I don’t think I mistyped anything…
(BTW, is the $event parameter required in itemTapped ? It seems not necessary to me)
Ok, I got what was preventing the script from working !
In single-post.ts, I was not importing NavParams. It’s just a bit confusing that the error seems to appear in wp-api.html instead of single-post but this is one of the drawbacks of Angular/ionic “magic”…
Thanks again for that great introduction !
Glad you got it working Fred, thanks for sharing!
Excellent tutorial! Great introduction to WP-API using Ionic 2.
Awesome! thank you.