
HotBookDeals: From site to App

NOTE: The content in this post is related to AppPresser 2 only. For AppPresser 3, please check out this post
Post Author: John Hawkins
Earlier this year, I launched a new website called HotBookDeals.com, a site that sends a daily newsletter to members informing them of free and discounted ebooks in their selected categories. After launch, I started to think about how cool it would be to make the same information available to users through an app.
The HotBookDeals app launched in the iOS App Store last week, and almost immediately I had several friends ask me how I did it. Since I don’t like explaining the same process to multiple people one at a time, I knew this was a perfect opportunity put together a post that shows, step-by-step, the process of turning a website into an App using AppPresser.
Why Use AppPresser?
This is another question that got asked a bunch. Why AppPresser? Why not just build a native mobile app? Here are just a few reasons:
- I don’t need to learn a new programming language
- I can use WordPress to manage my content
- I can use WordPress plugins to add functionality
- I can make design, functionality and content changes to the app without having to go through the approval process each time
Any one of those would be reason enough to use AppPresser.
Setup and Configuration
AppPresser is a suite of WordPress plugins and a theme. So, the steps to get started aren’t much different than you’re already used to with any WordPress plugins and theme. Start by downloading the plugins and theme from your AppPresser account and install them on your WordPress site. You will want to activate the main AppPresser plugin along with any extensions you plan to use. The one key difference is that when you install the theme, you DO NOT want to activate it.
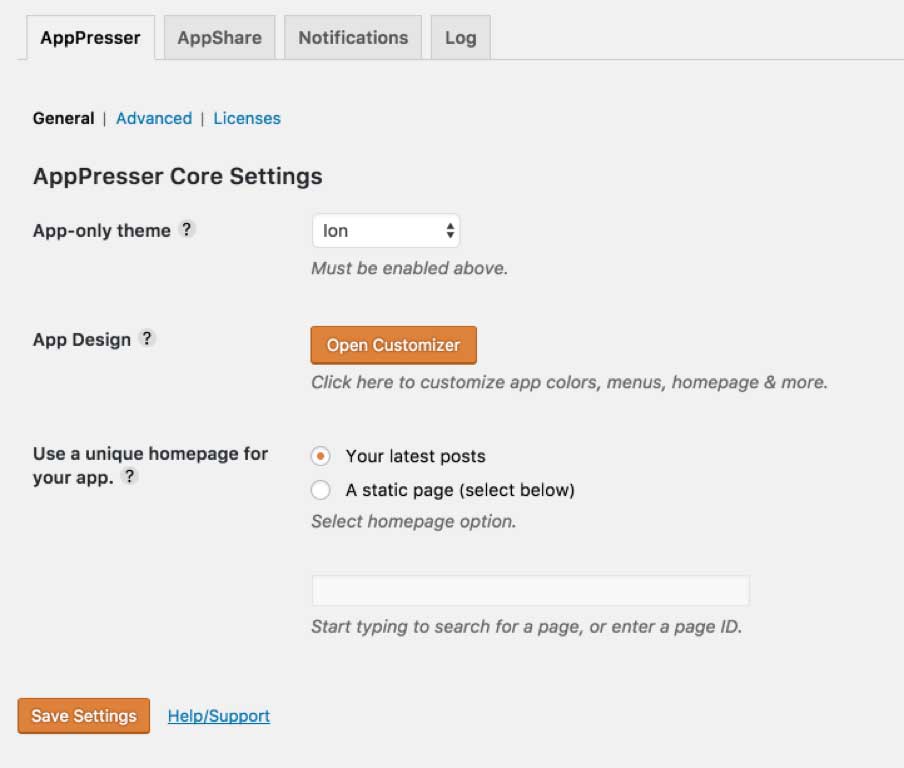 On the AppPresser Settings page, there are two settings you’ll want to set. The first is the App-only theme. From the dropdown, select the Ion theme. This setting is what tells AppPresser which theme you want to use for your App, even though it’s not the active theme on your site.
The next important setting is picking which content you want to display on the main page of the app. In my case, I selected the Latest Post option. It’s important to remember that these settings will not affect what visitors to your main will see.
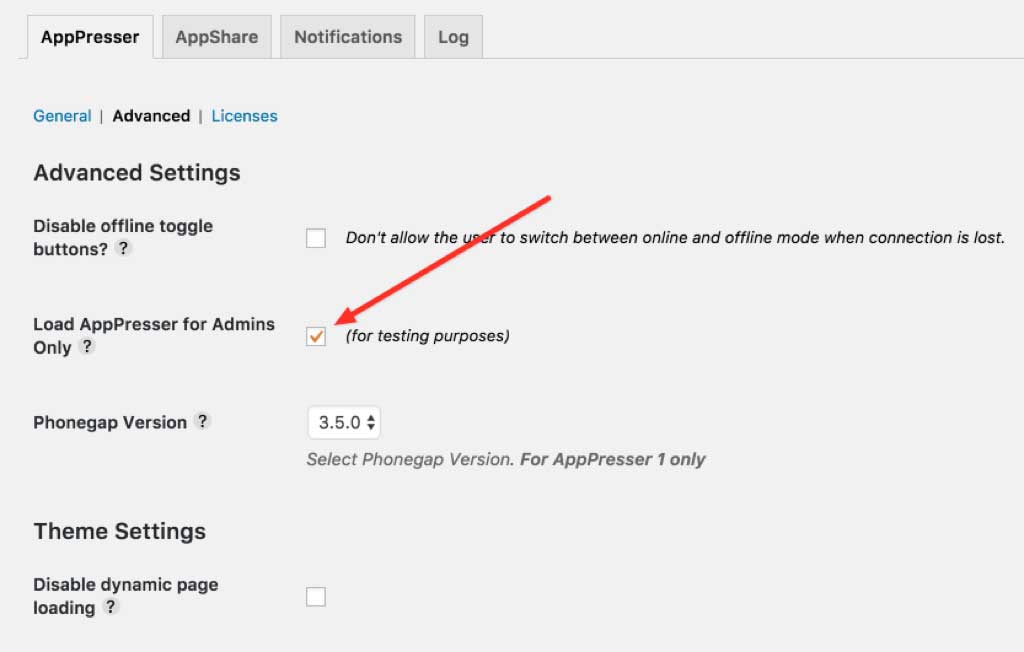
After saving these settings, jump over to the Advanced settings tab and check the box that says “Load AppPresser for Admins only.” This lets you, as a logged in admin, visit the home page of your site and get a preview of what the app will look like. Anybody else who visits your website will see the normal website.
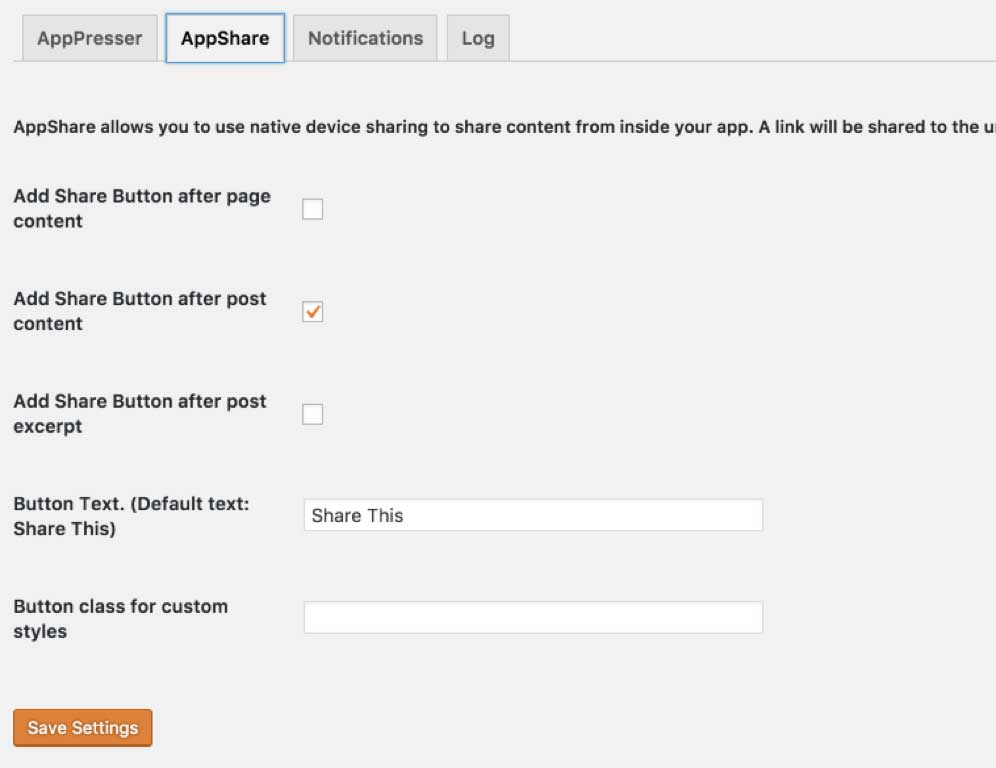
The two extensions I’m using, AppPusher and AppShare, both have their own settings pages. With AppShare, you can choose where you want the sharing options to display in your app.

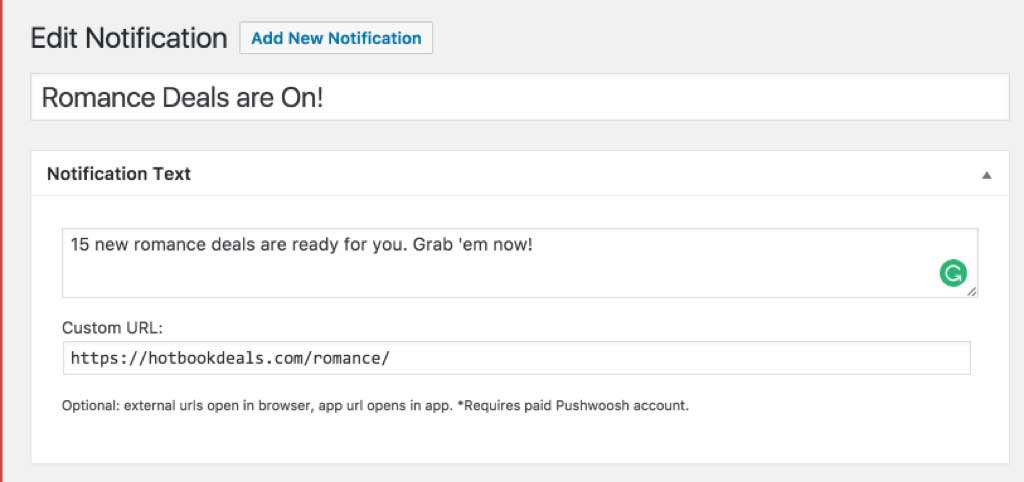
For push notifications, you need to sign up for an account with pushwoosh.com and get an API code and token. Once those are in place you can choose to have push notifications go out to your users when new content is added to different areas of the site. For example, posts, pages or any custom post type you choose. You may notice in the screenshot, I’ve chosen to not have any notifications sent automatically. The AppPusher plugin gives you the opportunity to send notifications to your users from a form on your dashboard whenever you like. For me, this is exactly what I need.
Customizing the App
Now that the tools are in place and configured, it’s time to make the app look the way we want. On the AppPresser settings page, click the “Open Customizer” button to bring you to the WordPress customizer screen with a preview of your app.
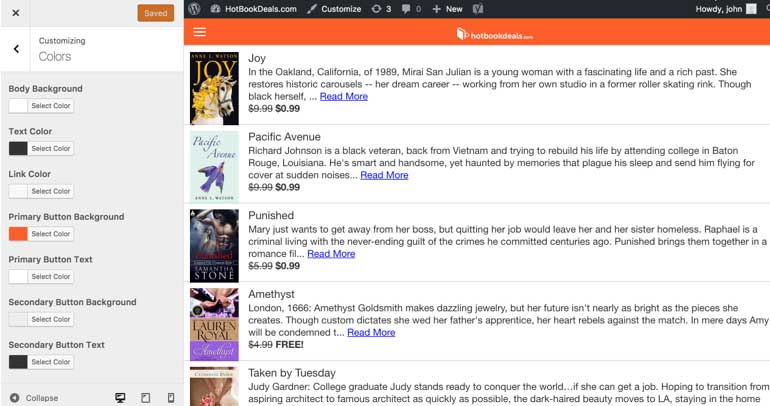
The color tab gives you the ability to change the colors for a bunch of elements of your app; header, background, and a whole lot of text elements.
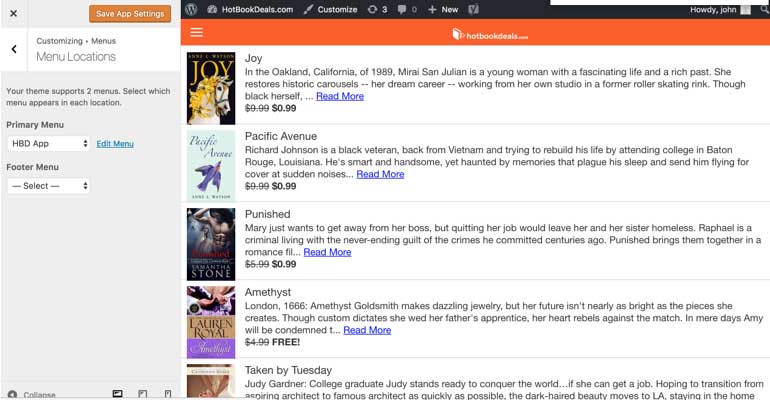
The menu I have on the website is different from the menu I want to display in the app. I started by going to the WordPress menus page and creating a new menu that would be used inside the app. This makes it really easy to have content on your site that is specific to the app that you may not want/need on your site. Once I had my app menu built the way I wanted, I simply chose it from the dropdown.
![]()
On the site identity tab, you can set things like the site title and tagline. It’s important to point out that the items with the red asterisk WILL affect your standard website and not just your app. So tread lightly. But, if you want to replace the text in the header of your app it’s easy to do.
Deeper Customizations
Here where I made my biggest mistake in the build process and ended up costing myself a number of hours of time. So, before you make the same mistake, let me save you a bunch of time…
MAKE A CHILD THEME RIGHT NOW!
For HotBookDeals, there were a few function and design changes I wanted to make to the look of my app that went beyond the customizer. I wanted to customize the layout of the posts to include the regular and discounted prices for the books. To do that, I needed to modify the page templates.
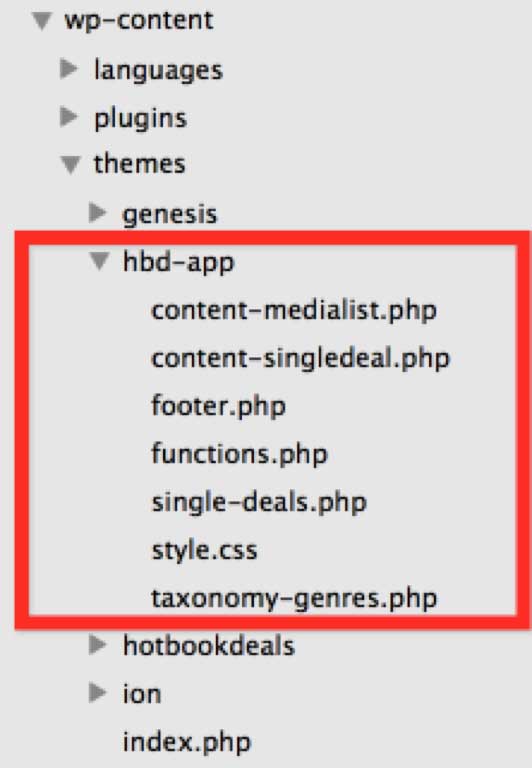
As with any child theme, it doesn’t have to be overly complicated. As you can see from my screenshot, I created 7 files for my child theme. But to look at any of them, you’ll see that I made very small tweaks here and there. But by having everything built in a child theme, I get two main benefits; when the Ion theme gets updated, I can upgrade it without overwriting my changes, and since the Ion theme minifies much of its code, I don’t need to spend any time setting it up to compile when making my changes.
Previewing the App
AppPresser gives you two ways to preview your app. On the AppPresser settings page, on the Advanced tab, there’s a checkbox for “Load AppPresser for Admins Only.” This lets you, as a logged in admin, see a preview of what the app will look like in your browser. This doesn’t let you test things like the native functionality, but it’s a quick way to see how things look. I used this a lot during the build process.
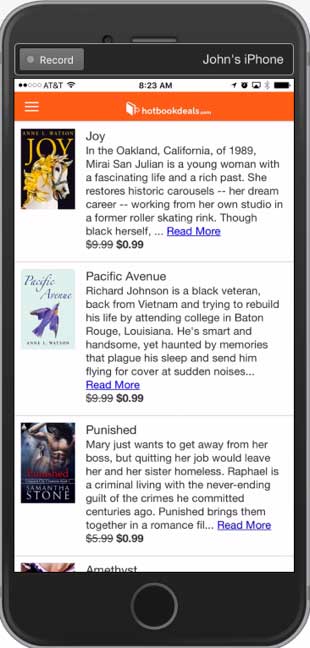
When I was nearing completion and wanted to test functionality, I turned to the AppPresser Preview app. It’s a free app in the iOS store that lets you preview the app and test it out right on your phone or tablet.
Prepping to Release
Once I felt my app was ready to release, I wanted to get it submitted to the App store immediately. I was in for a bit of a surprise as there were still a number of things to work on that had nothing to do with building the app.
The iOS submission process takes some time. Actually, it’s not even just the submission process, but the steps needed to even be able to submit your app for review are many. Some of those steps are worthy of a blog post all by themselves. Rather than turning this post into a novel, I’m going to provide a quick list of the steps with links to where you can get additional information for each as needed.
- Graphics and Descriptions
Your app is going to need a number of graphics and descriptions. It’s best if you put these together first so you have them during the build process. The AppPresser build process will require a 1024×1024 icon, 1550×2755 portrait splash graphic, and a 2755×1550 landscape splash graphic. For the iOS app store, there are some required and several optional graphic sizes. Read about those here. - apppresser.com/build
This is a simple form where you point to your website, add a couple graphics and you end up with a zip file that you’ll use in a later step. - developer.apple.com
Here is where you’ll go to create the certificates needed to prepare the app for submission. This process can be a bit tedious and it needs to be done exactly right or your build won’t work. We wrote a document to help you through this process. I STRONGLY suggest following this doc. I don’t know that I would have magically found the right path without it. - build.phonegap.com
Here is where you’ll take the zip file you created in step 2 and the certs you created in step 3 to build the file that will get submitted to the iOS or Android store. - Application Loader
(For info on Application Loader, check out this page) This is where you’ll submit your app to the iOS store. You’ll use the file you created in step 4 along with the graphics and text created in step 1. Assuming you have all the assets ready to go, this process doesn’t take very long at all. Once this step is completed and you get the “Pending Review” status, the only thing you need to do now is to wait for an email from Apple. I’ve heard that it can take up to a week to hear back. My app was reviewed and approved in about 26 hours. Your mileage may vary.
In Conclusion
My two main takeaways:
- The app building process was pretty straight forward. I’d go so far as to even say it was fun.
- The app submission process felt like a bunch of hoop-jumping. If I was a small business and looking to build a single app, I’d probably invest in the App Submission service to save time. If I planned to do multiple apps, I’d take copious notes and just get comfortable with the process.
If you have any questions or would like me to clarify any steps in this process even further, let me know in the comments!
No android option?
Soon! I was having some unrelated gmail account issues, so I put the process on hold. But, I’ll get back to it shortly.
Donna, here’s the link to the Android version: https://play.google.com/store/apps/details?id=com.hotbookdeals.app
Thanks for sharing. Great article!
Thanks, Louis!
Hi John,
Thank you for this article, it’s very helpful. I’ve had a hard to figuring out what piece does what with AppPresser. I am a Genesis user and it looks like you are too on your original site? So I understand, when you created your iOS app you used their iON theme. I was concerned I’d have to recreate too many things using a different, non-Genesis theme but from your process it doesn’t seem like it. I’m interested in exploring this since I already know how to work with iTunes Connect and the app submission process.
Hi Ginger, I’m glad you found the article useful!
Couple things:
1. You should check out my follow-up post where I talk about the theme process specifically: https://apppresser.com/using-child-theme-customize-app/
2. You are correct, the main site is built with Genesis. But, the app is using a child theme of the Ion theme.
3. I talk about this in the child theme post, but, to recap, I built the bulk of my functionality for hotbookdeals.com into a plugin, so all the functionality is still available inside my app. If you built a bunch of functionality directly into your Genesis theme, you will likely need to move that out and put it into a plugin as well.
I hope that helps. Let me know if you have any follow-up questions!
Hello John.. You have awesome website and App. Just felt to ask this, In the website there is Menu – SignUp, About, Deal, Contact ..You dont have such Menu Option in the App. App looks to me like a Blog than as a App functionality.
Is it something feasible to do or AppPresser will only allow certain features.
I purposely left several of the menu options that are available on the website out of the app. With AppPresser, it is super simple to use WordPress as my data storage system and then I can use the website to display data and add features and functionality for the desktop, but then have totally different functionality that is specific to the app all pulling from one data source.
I haven’t run into any limitations with AppPresser at this point. My only limitations have really been finding the time to work on the project as it’s just something I do in my spare time.
Thanks for the question!
Thank you John !! I learned about Master and Child theme from your articles. Article is very helpful.
Thank you again for sharing .!!
Great article for beginners.
Thanks John!
It helped a lot