
Customizing your checkout can be done with custom code or with WooCommerce extensions, we will cover both of those here.
Customizing WooCommerce checkout is something we are intimately familiar with. We recently built a new product called WooCommerce Smart Checkout, which required a lot of customization. We’ll share what we learned, along with lots of other tips in this article.
WooCommerce allows you to move or change existing checkout fields, add new ones, completely change the design, and do anything you want. This can be done with custom code in a plugin or child theme, or with an existing WooCommerce extension.
Let’s take a look at how to customize your checkout form.
Table of Contents
- Manipulating Checkout Fields
- Moving or re-ordering Fields
- Custom Checkout Page Template
- WooCommerce AJAX
- Other Customizations
- Customization advice from the Pros

Get this guide in PDF form
Enter your info below and we’ll send you the PDF right away.
Manipulating Checkout Fields
WooCommerce has hooks and filters that allow you to do anything you want with the fields, from changing the text to completely removing them. You can also add your own fields to any section of the form you want.
The easiest way to do this is with the Checkout Field Editor extension.
Checkout Field Editor
This extension starts at $49, and allows you to do anything you want to the checkout fields. It is much easier than using custom code, and it works seamlessly out of the box.
For example, let’s say we want to move the email field to be first, before any other fields.
To do that with this extension activated, we just have to drag and drop our email field where we want it.


With this extension, you can edit fields in the billing and shipping sections, and even add new fields. You can change the field attributes, such as input type and placeholder text, change the position, and even add new fields.


This extension does not change the order review or purchase options, that is handled separately. It also does not allow you to use custom input types, such as type=”tel”. I really like the “tel” input type for credit card and phone number inputs, because it displays a number pad on mobile phones.
Custom Code
If you would rather use custom code to edit your checkout fields, there is some great documentation on that.
Your custom code can be placed in a custom plugin or child theme functions.php file. Let’s look at some examples.
Better Input Attributes
When creating WooCommerce Smart Checkout, we wanted to change some of the input types so they were better for mobile. These change the keyboard that is displayed, which makes a big difference.
// Hook in
add_filter( 'woocommerce_checkout_fields' , 'set_input_attrs' );

// Our hooked in function - $fields is passed via the filter!
function set_input_attrs( $fields ) {
       $fields['billing']['billing_email']['type'] = 'email';
       $fields['billing']['billing_phone']['type'] = 'tel';
       $fields['billing']['billing_postcode']['type'] = 'tel';
       $fields['shipping']['shipping_postcode']['type'] = 'tel';

       return $fields;
  }
You can change the type on any other field by adding it to that list. You can also change other input attributes using the same type of code, such as placeholder or class.
In this example, we are changing the placeholder of the email field, and adding a new field for Shipping Phone.
add_filter( 'woocommerce_checkout_fields', 'custom_edit_checkout_fields' );

function custom_edit_checkout_fields( $fields ) {
	// Author: apppresser.com

	// Change placeholder
	$fields['billing']['billing_email']['placeholder'] = 'yourname@youremail.com';

	// Change all attributes on a field
	$fields['shipping']['shipping_phone'] = array(
		'label'     => __('Shipping Phone', 'woocommerce'),
		'placeholder'   => _x('(555) 555 5555', 'placeholder', 'woocommerce'),
		'required'  => false,
		'class'     => array('my-special-class'),
		'clear'     => true
	);

   return $fields;
}
Make Phone Number Optional
add_filter( 'woocommerce_billing_fields', 'my_optional_fields' );

function my_optional_fields( $address_fields ) {
	$address_fields['billing_phone']['required'] = false;
	return $address_fields;
}
The same code works to make other fields optional, just make sure you use the right filter. For example, here is how to make the address 1 field optional.
// Hook in
add_filter( 'woocommerce_default_address_fields' , 'custom_override_default_address_fields' );

// Our hooked in function - $address_fields is passed via the filter!
function custom_override_default_address_fields( $address_fields ) {
     $address_fields['address_1']['required'] = false;

     return $address_fields;
}
Moving or re-ordering Fields
Moving fields is one of the trickier customizations. Woo does not provide us with example code, so there are a lot of random code samples out there. I found that most of them left out required fields, or did not work 100%.
I would recommend that you use the Checkout Field Editor extension mentioned above to move fields and maintain compatibility with WooCommerce updates. If you really want to do it yourself, the code below uses all required fields in the WooCommerce documentation. It has been tested with WooCommerce 2.5.5.
add_filter( 'woocommerce_checkout_fields', 'yourplugin_move_checkout_fields' );

function yourplugin_move_checkout_fields( $fields ) {
	// Author: apppresser.com

	// Move these around as necessary. You'll see we added email first.
	$billing_order = array(
		"billing_email",
		"billing_first_name",
		"billing_last_name",
		"billing_company",
		"billing_address_1",
		"billing_address_2",
		"billing_postcode",
		"billing_country",
		"billing_state",
		"billing_phone"
	);

	// This sets the billing fields in the order above
	foreach($billing_order as $billing_field) {
	    $billing_fields[$billing_field] = $fields["billing"][$billing_field];
	}

	$fields["billing"] = $billing_fields;

	// Move these around as necessary
	$shipping_order = array(
		"shipping_first_name",
		"shipping_last_name",
		"shipping_company",
		"shipping_address_1",
		"shipping_address_2",
		"shipping_postcode",
		"shipping_country",
		"shipping_city",
		"shipping_state"
	);

	// This sets the shipping fields in the order above
	foreach($shipping_order as $shipping_field) {
	    $shipping_fields[$shipping_field] = $fields["shipping"][$shipping_field];
	}

	$fields["shipping"] = $shipping_fields;

	return $fields;
}
While this does work to move fields around, it does not account for any changes to the default fields, or adding custom fields. If this code runs later than other field customizations, it may override them.
Checkout Page Template Customizations
Besides moving fields around, you can also manipulate the page display.
For example, you could make the shipping fields display before the billing fields, or display a special message on the checkout page. This is done by using action hooks, or a custom checkout page template.
Checkout Hooks
There are 9 hooks on the checkout page:
- woocommerce_before_checkout_form
- woocommerce_checkout_before_customer_details
- woocommerce_checkout_billing
- woocommerce_checkout_shipping
- woocommerce_checkout_after_customer_details
- woocommerce_checkout_before_order_review
- woocommerce_checkout_order_review
- woocommerce_checkout_after_order_review
- woocommerce_after_checkout_form
These hooks are used by WooCommerce core to display checkout page elements, such as the billing and shipping fields. You can use them to add your own custom content. See a visual guide to these checkout action hooks here.
If you wanted to add a message before the checkout form, you could do something like this.
add_action( 'woocommerce_before_checkout_form', 'my_checkout_msg' );

function my_checkout_msg() {
	echo '<p>This page is 100% secure. Thank you for your business!</p>';
}
You could add that same message in other places on the checkout page, by using a different hook, such as woocommerce_checkout_after_order_review.
You should be able to do most of your customizations using the hooks and filters above, and some custom CSS. If you really need to make some big moves, you can use a custom checkout page template.
We did this for WooCommerce Smart Checkout, so we could create a multi-page checkout experience for mobile.
Tip: all of the action hooks and filters for WooCommerce are listed on this page.
Custom Checkout Page Template
WooCommerce allows you to override any of their page templates in your theme.
To add a custom checkout page template to your (child) theme, create a folder structure called woocommerce/checkout inside your theme folder. Next, copy the checkout page template from the WooCommerce plugin located at woocommerce/templates/checkout/form-checkout.php.
![]()

Copy woocommerce/templates/checkout/form-checkout.php to mytheme/woocommerce/checkout/form-checkout.php
You can now make any edits you want to mytheme/woocommerce/checkout/form-checkout.php, and it will not be overwritten when you update WooCommerce. Remember that any changes you make may affect WooCommerce core or extension functionality. I would recommend leaving all of the default actions and markup unless you know what you are doing.
Custom Template in a Plugin
When we created our plugin, we needed to use a custom checkout page template to create a multi-page checkout.
You cannot add a custom checkout page template in a plugin by default, so we had to use a custom filter. If you are creating a plugin, and not adding the checkout page to your theme, do the following.
First, add the custom form-checkout.php template in your plugin inside of a folder named “checkout.” For example, plugin/templates/checkout/form-checkout.php is a good place for it.
Next we need to tell WooCommerce to look in our plugin for our checkout page first using the woocommerce_locate_template filter.
/*
 * Use our custom woo checkout form template
 * Source: apppresser.com
 */
add_filter( 'woocommerce_locate_template', 'custom_woocommerce_locate_template', 10, 3 );

function custom_woocommerce_locate_template( $template, $template_name, $template_path ) {

  global $woocommerce;

  $_template = $template;

  if ( !$template_path ) $template_path = $woocommerce->template_url;

  $plugin_path  = untrailingslashit( plugin_dir_path( __FILE__ ) ) . '/templates/';

  // Look within passed path within the theme
  $template = locate_template(
    array(
      $template_path . $template_name,
      $template_name
    )
  );

  // Modification: Get the template from this plugin, if it exists
  if ( file_exists( $plugin_path . $template_name ) ) {
    $template = $plugin_path . $template_name;
  }

  // Use default template if no other exists
  if ( !$template ) {
    $template = $_template;
  }

  // Return what we found
  return $template;

}
You may need to edit the $plugin_path variable, depending on your plugin structure. Now you can edit your custom checkout template and it will not be overwritten by WooCommerce updates.
WooCommerce AJAX
We did a lot of javascript customization, and one issue we ran into was running our code at the right times.
WooCommerce updates the cart totals and other information on the fly with AJAX. For example, if you change the shipping options on the checkout page, the cart total and payment options may update. If you are using custom Javascript, you’ll want to make sure your code runs after the checkout page is updated (if necessary).
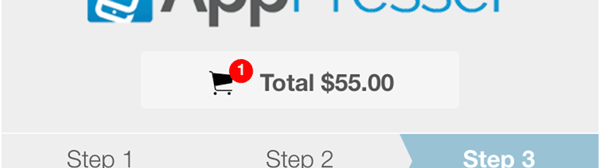
In our case, we display the cart total at the top of the custom checkout page, and this needs to update when the AJAX runs.

It is very difficult to tap into the WooCommerce AJAX events directly, but there is something better we can do. There is an “ajaxComplete” listener we can use to know when any event takes place. Then we can look at the data, and if it’s a WooCommerce checkout update, we can run our code. Here’s what that looks like:
// Put this in a document ready event
$( document ).ajaxComplete(function( event, xhr, settings ) {

  console.log( settings.url );

  // settings.url tells us what event this is, so we can choose what code we need to run
  if( settings.url.indexOf('update_order_review') > -1 ) {

  	// update order form
  	doTotalUpdates();

  } else if( settings.url.indexOf('wc-ajax=checkout') > -1 ) {
  	// Add messages after checkout here
        doAfterCheckout();
  }

});
In our case, this allowed us to know what event was happening, and we could update our code accordingly. Very handy!
Other Customizations
There are a variety of WooCommerce extensions that allow further customization to the checkout page.
This extension allows you to put your sales copy, product selection, and checkout form together on a single page. This works great for some types of businesses.
This extension allows you to add extra inputs to your checkout page. For example, custom engraving instructions, gift wrapping yes/no, upsell options, and lots more. It’s the no-coding equivalent to adding your own custom checkout fields.
Quick Checkout is a popular extension that allows you to display your checkout form in a pop-up modal on any page.
Instead of clicking add to cart => view cart => checkout, you can instantly show the checkout form, saving a few steps.
Smart Checkout instantly improves your mobile checkout experience, getting you more sales. It features a sleek mobile checkout page, multi-step checkout, address autofill, and more.
Customization Advice from the Pros
There are lots of ways to customize your checkout form, but don’t make changes just because you can.
Make sure you understand your visitors, and you test your changes to make sure they are actually improving conversions.
We asked some WooCommerce professionals what they recommend when making changes to your checkout page, here’s what they said.

Brent Shepherd, founder of Prospress, and creator of WooCommerce Subscriptions says:
The thing I’d recommend is to run user tests of checkout customisations.
You can always A/B test things, but sitting in the same room as someone talking through their thinking process while progressing through your checkout, of watching a video of a customer talking through the process of checking out will be very revealing.
Those custom buttons, banners or fields might not be perceived or understood the way you think they will. Running user tests always reveals the unexpected to allow you to customise checkout to address that, ultimately helping improve conversions.
If you are interested in how user testing works, we recently did user testing on our own product, and wrote about it here.
Let us know in the comments if you have any advice on customizing WooCommerce checkout.
Get this guide in PDF form
Enter your info below and we’ll send you the PDF right away.