
View our updated article for using the final version of the WP-API in a mobile app using Ionic 2 here.
The REST API is currently a plugin that allows applications to access the data produced by WordPress in JSON format. Version 1.0 was recently released, and it is slated to be in WordPress core by version 4.1 later this year.
This is incredible news for anyone interested in making mobile apps with WordPress!
The implications of this API have already been written about by WP Tavern, this article will focus on how to use it to build a mobile application.
Let’s talk about creating a simple mobile app using Phonegap that will pull data from your site using the REST API.
First, either view or download the tutorial files by clicking the link below.
Setting things up
The first thing you need to do is install the REST API plugin on your WordPress site.
In my case, I’m running WordPress locally on my Mac, using Desktop Server.
After the REST API plugin is installed and activated, you can visit http://yoursite.com/wp-json to see the basic JSON object. It looks something like this:
{"name":"AppPresser","description":"Just another WordPress site","URL":"http:\/\/www.wp4.dev"}
You can see elements of your site by appending the url, such as http://yoursite.com/wp-json/posts, or http://yoursite.com/wp-json/pages.
That’s the data that we’ll use to pull into the mobile app.
The mobile app

We are going to make a hybrid mobile app, which is basically a static website that can be wrapped in a native app wrapper with Phonegap.
I won’t go into the details about making this a native app, we’ll just be using a static website for demonstration purposes. Our static website will consist of an index.html file, and some CSS and Javascript files.
You can see the files on github here.
If you look at the index.html file, you’ll see that we have loaded our CSS and Javascript the same way you would on a website, and we also have some basic HTML structure for the header, and post list.
I’m using some pre-made libraries, including jQuery, and Topcoat for the UI.
In the mobile app, all of these assets would be local on the phone, we do not pull them in from the website. The only thing we are getting from the website is the data through the REST API.
Custom post types
The app we are going to make is simply going to display custom post types from WordPress. Later on, we can add page transitions, menus, and even push content from the app to WordPress, but let’s not get ahead of ourselves!
To get custom post types, we can access
http://yoursite.com/wp-json/posts/types
I created a post type called “News” for this app, so I can access the data I need at
/wp-json/posts?type=news
My JSON data for the news CPT looks something like this:
[{"ID":2602,"title":"Travel behemoth Priceline","status":"publish","type":"news","author":{"ID":1,"username":"scottopolis","name":"Scott B","first_name":"Scott","last_name":"Bolinger"...
If you don’t have a custom post type, that’s ok, you can access your posts at http://yoursite.com/wp-json/posts. Go ahead and visit that url to view your JSON data.
That object gives us access to everything we need: title, excerpt, content, featured image, author, etc. We can now pull that data into our app, and display it any way we want.
The AJAX
Now that we have the JSON data ready, and the mobile app ready, all we need to do is pull the data into our app. We will use an AJAX request to do that.
I am going to use some jQuery, so we have loaded the jQuery library in the app already.
The AJAX request looks like this:
$.ajax({
	type: 'GET',
	url: rootURL + '/posts?type=news',
	dataType: 'json',
	success: function(data){
	// do something with the data here
	}
});
That goes and gets the data, and inside the success function is where we’ll loop through and display it.
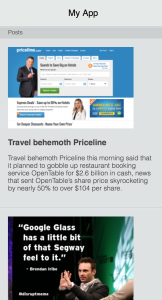
In this case we will use $.each to get the items we want from each news article, and add those into a list item. The HTML will look like this:
<li class="topcoat-list__item">
<img src="http://url.com/featured/image.png" /><br>
<h3>Title</h3>
<p>Post excerpt</p>
</li>
We’ll need to get the featured image url, the title, and excerpt through the API. The code for that will go in the AJAX success function, and it looks like this:
$.each(data, function(index, value) {

  $('ul.topcoat-list').append('<li class="topcoat-list__item">' +
  	'<img src="'+value.featured_image.attachment_meta.sizes.medium.url+'" /><br>' +
  	'<h3>'+value.title+'</h3>' +
  	'<p>'+value.excerpt+'</p></li>');

});
You’ll see that I’m drilling down into the featured_image object to retrieve the medium image url. If you don’t do that, you’ll get the original file, which might be too big.
You can see the full code for the AJAX on Github.
Wrapping things up
You can load the index.html file into Safari to see how the app is looking so far. (Chrome blocks the AJAX request)
You could wrap this app with Phonegap and load it into a simulator if you wanted, but there’s a lot more we can do with it first.
We can add menus, page transitions, local storage, posting data TO WordPress, and much more. If you are interested in learning how to do more with this type of app, let me know in the comments.
Cheers!