
We’ve all heard it before, “WordPress is the easiest content management system around.” And if you’ve been using WordPress for a while, you’ve probably said that exact same thing to somebody else. But, do you remember the first time you installed WordPress and logged in to the dashboard? So many links and pages and settings. It could certainly feel overwhelming.
Like WordPress itself, AppPresser is a very powerful tool that you can use to create a mobile app. Even though we’ve made the process pretty darn simple to add WordPress content to your app, the first time you go through the process can seem daunting. But I’m here to tell you, and show you, it really is simple to do.
In this quick tutorial, I’m going to show you to add your WordPress content to your App.
Before we can begin, you will first need to install the AppPresser plugin and theme on your WordPress website and configure a few settings. That process is covered in detail here in our documentation.
All set? Great, let’s get going!
Adding WordPress Pages To Your App
On your website, you likely have a number of static pages that you’d like to include in your mobile app. Contact Us, About Us and Store Locations are just a few examples. To add these pages to your app takes only a couple of steps.
1) Log in to your account at MyAppPresser.com.
2) Click on the name of the app that you’d like to edit.
3) Click the “Customize and Build App” button. This will bring you to the App Builder screen where you will see a preview of your app on the right-hand side, next to a menu of options for customizing your app.
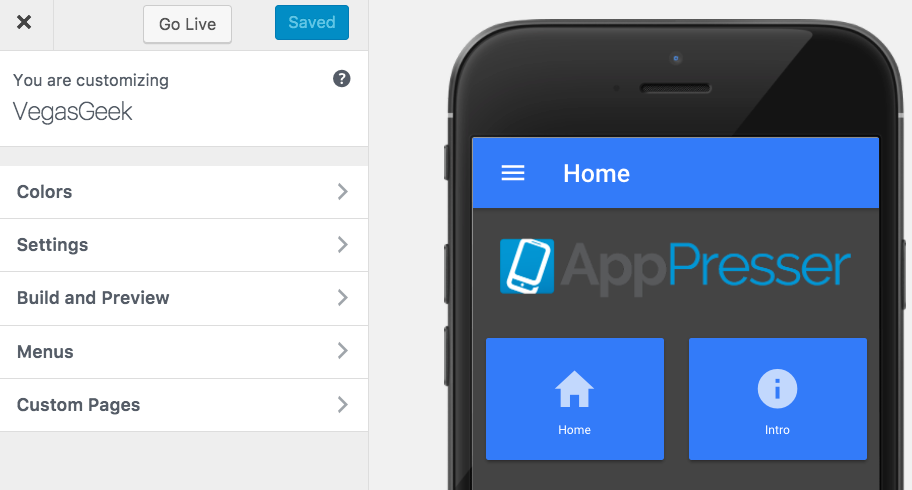
4) Click the “Menus” option from the list on the left side to see a list of available menus. When you create a new App, a menu with the same name as the App is created automatically for you.
5) Click on the menu that you want to edit. If this is your first time editing the menu, it’s going to look like the screenshot below, with two menu items created for you by default.
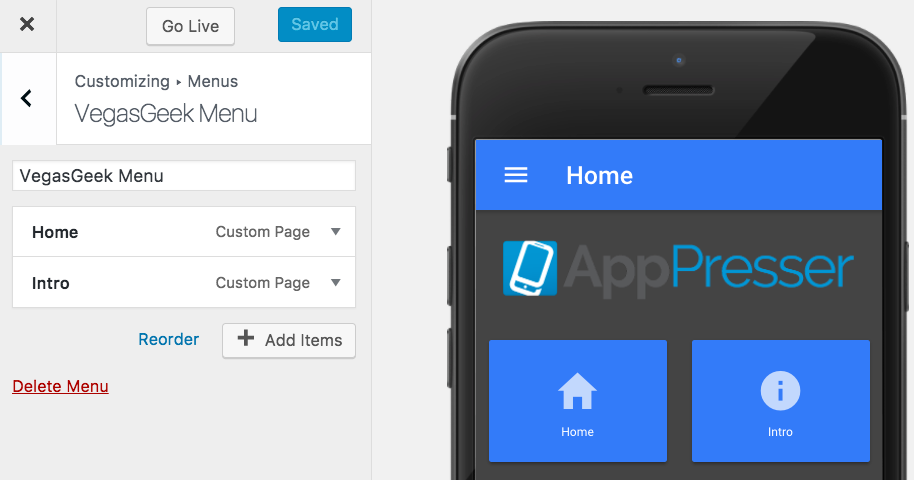
6) Click the “Add Items” button. This will slide out a sub-menu where you will have two options.

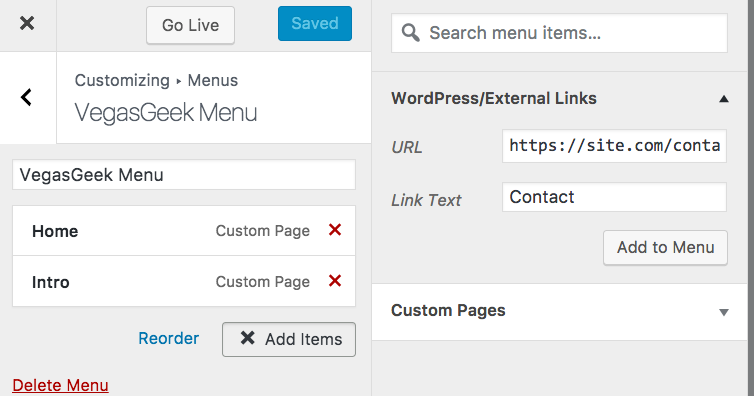
7) Click the “WordPress/External Links” option. This will display the form you’ll need to add your WordPress pages to your menu.
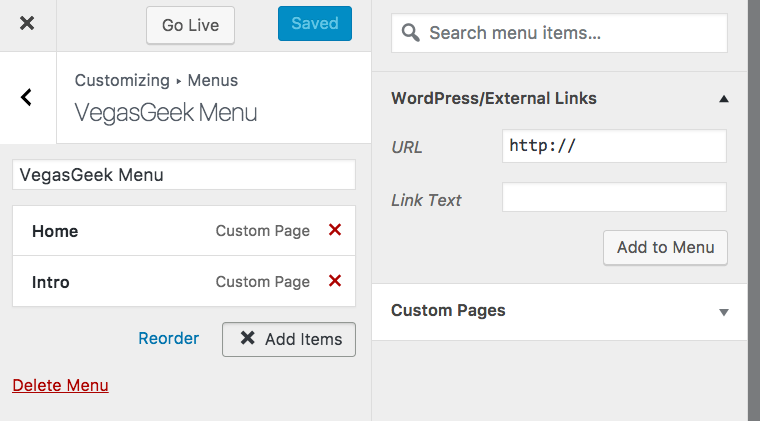
8) Add the full URL to the page on your WordPress site plus the text that will be used in your menu, then click Add to Menu.
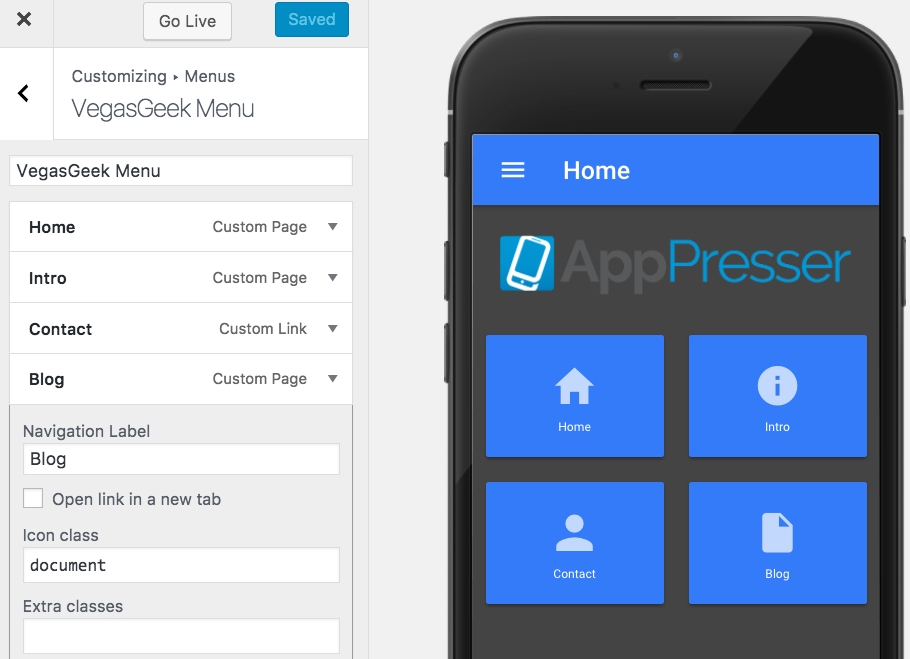
9) Click the blue “Save” button at the top of the screen to save your changes and refresh the preview of your app. You can now click the menu on the preview app to see your new menu item.
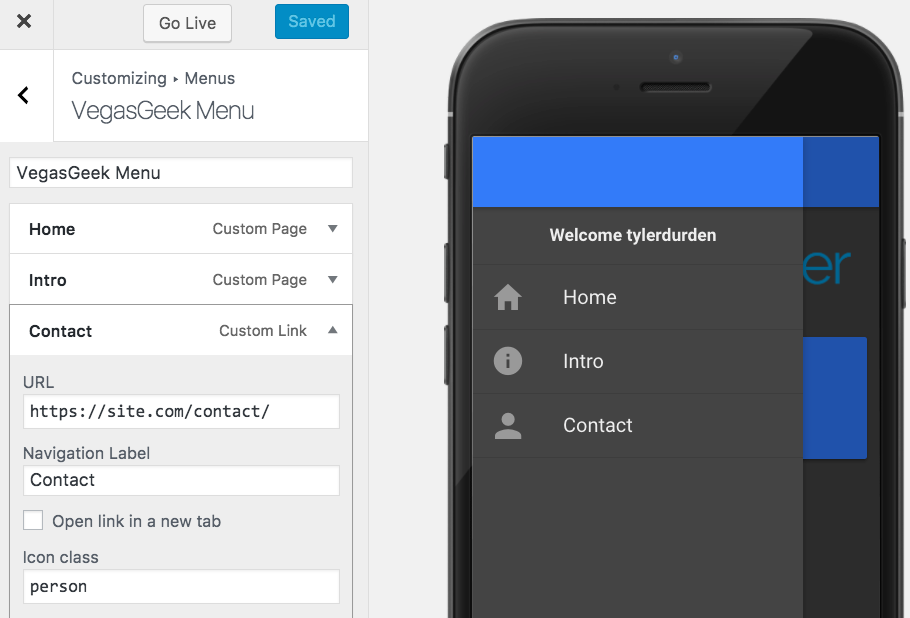
10) If you would like to add an icon to the left of your menu item (as I’ve done in the screenshot above), you do this clicking the dropdown arrow on the menu item and adding the name of the icon to use inside the icon class. You can find a list of available icons right here.
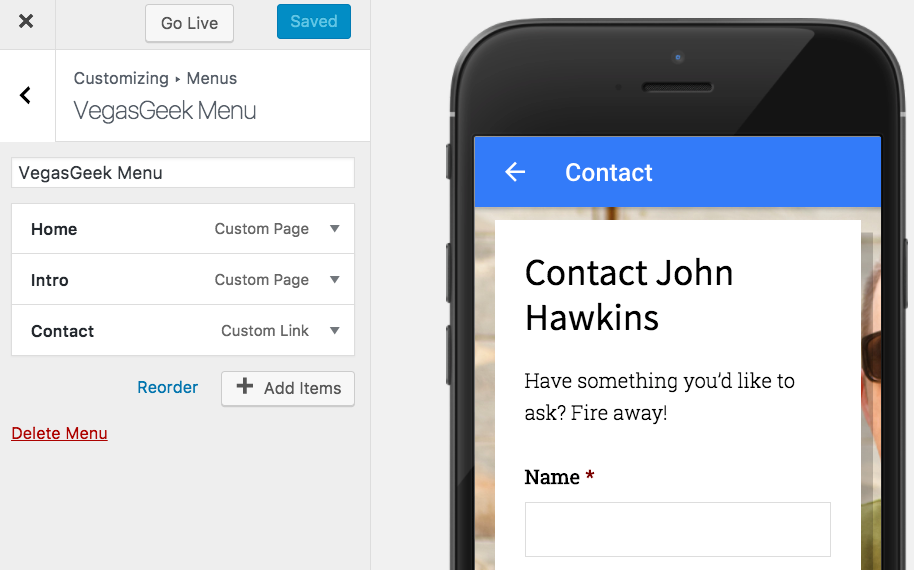
Clicking on the new link in the preview app will display your WordPress page as it will be seen in your app.
It may seem like a lot of steps, but that’s only because I broke it down into the most basic of elements. Once you’ve added a menu item or two, you’ll have this memorized and will be adding WordPress content in a matter of seconds.
Adding your blog posts to your app
To add blog posts to your app, we’re going to use the WP-API. Now, don’t be scared off by the technical sounding acronym, I’m going to step you through the process.
1) Log in to your account at MyAppPresser.com.
2) Click on the name of the app that you’d like to edit.
3) Click the “Customize and Build App” button. This will bring you to the App Builder screen where you will see a preview of your app on the right-hand side, next to a menu of options for customizing your app.
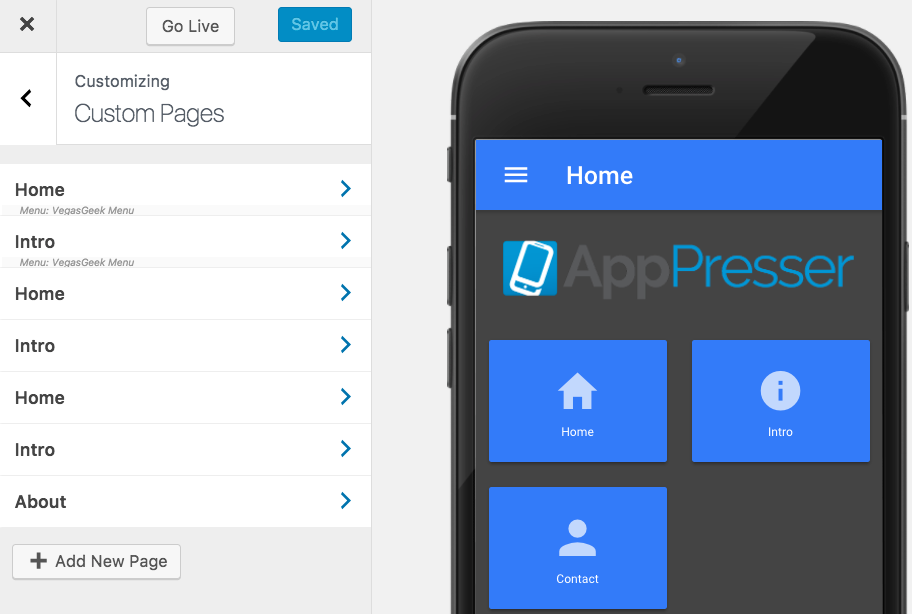
4) Click the “Custom Pages” option from the list on the left side.
5) Click the “Add New Page” button at the bottom of the list on the left side.
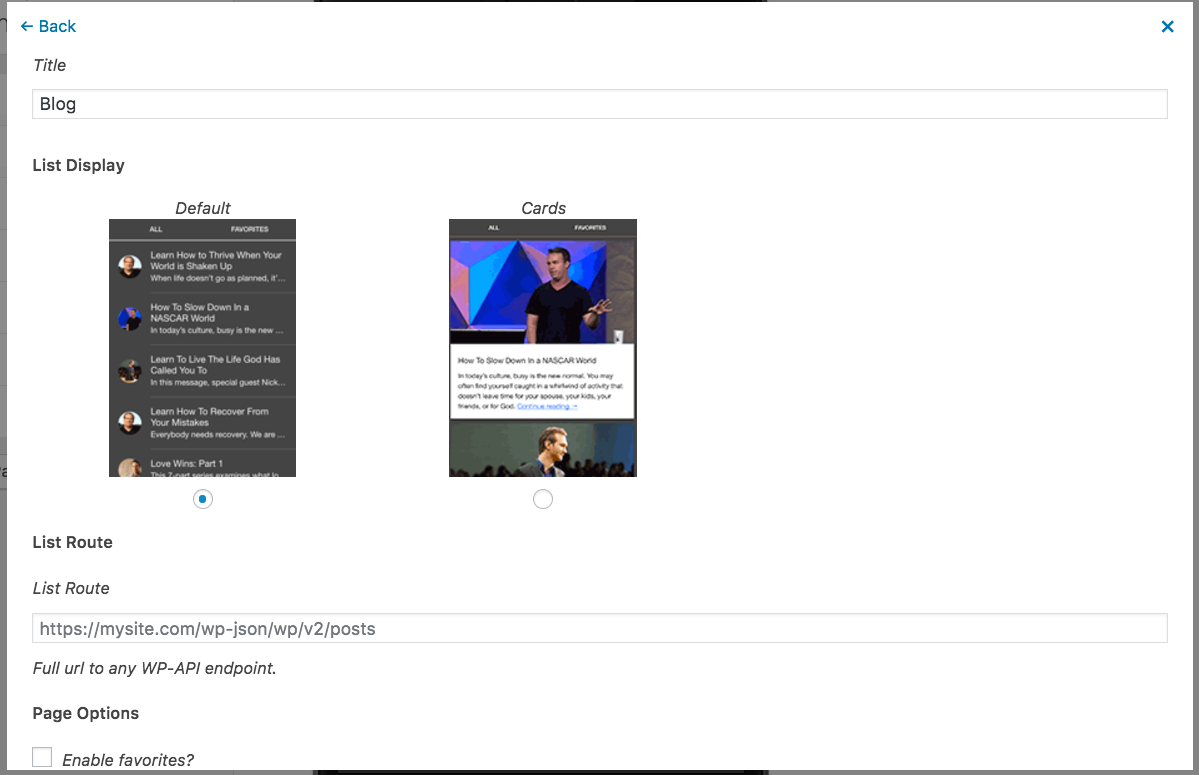
6) You’ll see a pop-up modal with 2 options; Click on the “List” option.

7) On the “List” modal, you will have the option to give your page a title, select the display style, and provide the URL to your WP-API endpoint. You will see an example of the API endpoint in the field (as seen in the screenshot below), but basic format is going to look something like:
https://yoursite.com/wp-json/wp/v2/[cpt]
[cpt] would get replaced with the post type you want to include. For blog posts, we’ll use “posts”. So our final URL will look like:
https://yoursite.com/wp-json/wp/v2/posts
For more information on the API List page options, check out the documentation here.
Scroll down and click “Save” when you’re done.
8) On the left-hand menu, Navigate back to the main list and choose “Menus”
9) Click on the menu that you want to edit.
10) Click the “Add Items” button. This will slide out a sub-menu where you will have two options.
11) Click the “Custom Pages” option to see a list of all the custom pages available for your app.
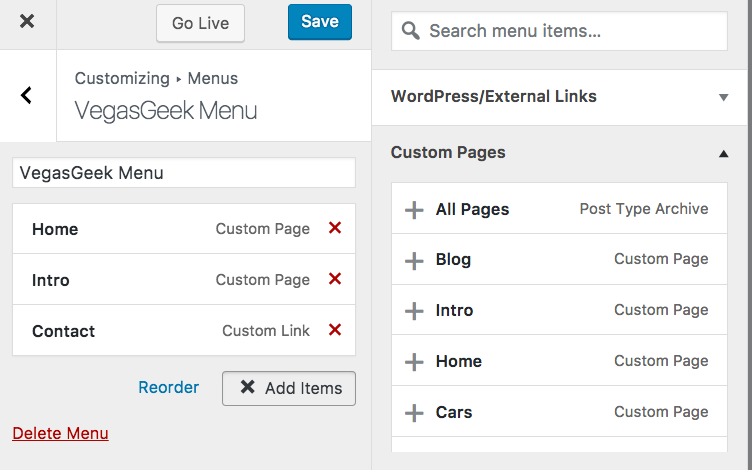
12) Click the name of the page you created for your blog posts. In my example, I’ll click on “Blog”. This will add the page to my menu on the left.

13) To add an icon to your menu, click the dropdown arrow on the new menu item and add the name of the icon to use inside the icon class. You can find a list of available icons right here.
Clicking on the new link in the preview app will now display your blog posts.
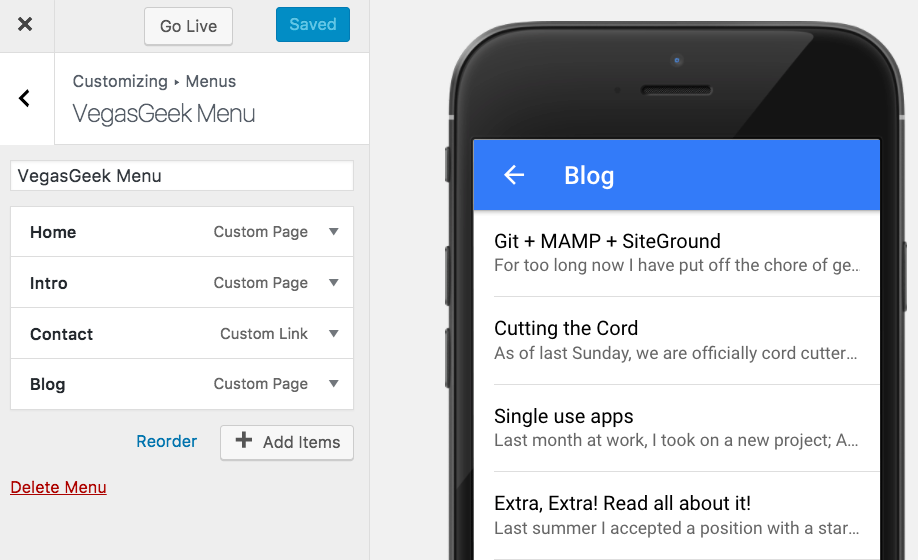
And just like that, you’re all done!
OK, you’re probably not done at this point. Yes, you now have your blog posts displaying in your app. But, this is just the tip of the iceberg for what you can do with custom pages and the WP-API. For example, you can pull in posts from a specific category or tag, or limit the posts to only a certain author, exclude certain posts, and more. And, with a little custom code, you can display featured images and metadata in your list if you choose. To learn more about all that, check out our documentation. And for some advanced tips and tricks, check out the webinar we held recently.
One last thing before I let you go, I want to point you to the Getting Started page in our documentation. It is a great place to start learning about AppPresser, with links to additional documentation for each section of the process. It’s a very handy page and I suggest bookmarking it so you can refer back to it as often as needed.
I hope this posts was able to show how easy it is to add your WordPress content right into your app. If you have any questions, please feel free to leave them in the comments below.
Everything You Need to Know About AppPresser
Learn how AppPresser works, and how it can help you get a great mobile app published quickly and affordably. Get 4 emails describing the process in detail.
Thanks for signing up! Check your email for the first part of the course.